

How to Create and Setup a Debian KVM VPS with Proxmox VE 6 -- Part I -- Creation

How to Create a Debian KVM VPS with Proxmox VE 6
Contributed by Not_Oles, December 27, 2020
Introduction
This afternoon we're going to spin up a new Virtual Private Server ("VPS") running the Debian GNU/Linux Operating System. Our VPS will be a Kernel-based Virtual Machine {"KVM") utilizing the Proxmox Virtual Environment.
Today's post will cover creation of the Virtual Machine ("VM") with the Proxmox web GUI ("Graphical User Environment") from the beginning up to the exciting moment when the Debian installer successfully starts. ![]() The next post will cover the Debian installation, and the following post will cover configuration inside the newly installed Debian operating system.
The next post will cover the Debian installation, and the following post will cover configuration inside the newly installed Debian operating system.
We're going to be using an AX51-NVME server at Hetzner on which Proxmox already has been installed.
Soyoustart, LXC, and Secure Shell Alternatives
If you do not already have a Proxmox server, previous posts covering Proxmox installation and postinstall configuration at Soyoustart might be helpful.
Today's project involves a KVM VPS. Another post in this series discusses creating LXC container VPSes.
Today's post also assumes a bit of familiarity with Secure Shell ("ssh"), which is used here to obtain the Debian netinstall ISO file. However, alternate instructions also are given for uploading the ISO via the Proxmox web GUI.
Download the ISO
For today's KVM VPS we're going to use the standard Debian netinstall iso.
- Log in to the server and put the Debian iso in the right place for the Proxmox web GUI to find it.
$ ssh [email protected]
Linux hels.example.com 5.4.78-2-pve #1 SMP PVE 5.4.78-2 (Thu, 03 Dec 2020 14:26:17 +0100) x86_64

The programs included with the Debian GNU/Linux system are free software;
the exact distribution terms for each program are described in the
individual files in /usr/share/doc/*/copyright.

Debian GNU/Linux comes with ABSOLUTELY NO WARRANTY, to the extent
permitted by applicable law.
Last login: Sun Dec 13 06:26:17 2020 from 187.XXX.XXX.XXX
root@hels ~ # cd /var/lib/vz/template/iso
root@hels /var/lib/vz/template/iso # wget https://cdimage.debian.org/debian-cd/current/amd64/iso-cd/debian-10.7.0-amd64-netinst.iso
[ . . . ]
HTTP request sent, awaiting response... 200 OK
Length: 352321536 (336M) [application/x-iso9660-image]
Saving to: ‘debian-10.7.0-amd64-netinst.iso’

debian-10.7.0-amd64-netinst 100%[===========================================>] 336.00M   108MB/s    in 3.2s

2020-12-15 23:34:41 (104 MB/s) - ‘debian-10.7.0-amd64-netinst.iso’ saved [352321536/352321536]

root@hels /var/lib/vz/template/iso #
Verify the ISO
- Next we download the checksums file and the signature file so we can verify the ISO:
root@hels /var/lib/vz/template/iso # wget https://cdimage.debian.org/debian-cd/current/amd64/iso-cd/SHA512SUMS
--2020-12-16 04:50:34--  https://cdimage.debian.org/debian-cd/current/amd64/iso-cd/SHA512SUMS
Resolving cdimage.debian.org (cdimage.debian.org)... 2001:6b0:19::165, 2001:6b0:19::173, 194.71.11.173, ...
Connecting to cdimage.debian.org (cdimage.debian.org)|2001:6b0:19::165|:443... connected.
HTTP request sent, awaiting response... 200 OK
Length: 658
Saving to: ‘SHA512SUMS’

SHA512SUMS                  100%[===========================================>]     658  --.-KB/s    in 0s

2020-12-16 04:50:35 (20.5 MB/s) - ‘SHA512SUMS’ saved [658/658]

root@hels /var/lib/vz/template/iso # wget https://cdimage.debian.org/debian-cd/current/amd64/iso-cd/SHA512SUMS.sign
--2020-12-16 05:03:56--  https://cdimage.debian.org/debian-cd/current/amd64/iso-cd/SHA512SUMS.sign
Resolving cdimage.debian.org (cdimage.debian.org)... 2001:6b0:19::165, 2001:6b0:19::173, 194.71.11.165, ...
Connecting to cdimage.debian.org (cdimage.debian.org)|2001:6b0:19::165|:443... connected.
HTTP request sent, awaiting response... 200 OK
Length: 833
Saving to: ‘SHA512SUMS.sign’

SHA512SUMS.sign             100%[===========================================>]     833  --.-KB/s    in 0s

2020-12-16 05:03:56 (35.1 MB/s) - ‘SHA512SUMS.sign’ saved [833/833]

root@hels /var/lib/vz/template/iso #
- Next we check the signature on the SHA512SUMS file:
root@hels /var/lib/vz/template/iso # gpg --verify SHA512SUMS.sign SHA512SUMS
gpg: Signature made Sun 06 Dec 2020 02:46:09 AM CET
gpg:                using RSA key DF9B9C49EAA9298432589D76DA87E80D6294BE9B
gpg: Can't check signature: No public key
root@hels /var/lib/vz/template/iso # gpg --keyserver keyring.debian.org --recv DF9B9C49EAA9298432589D76DA87E80D6294BE9B
gpg: /root/.gnupg/trustdb.gpg: trustdb created
gpg: key DA87E80D6294BE9B: public key "Debian CD signing key <[email protected]>" imported
gpg: Total number processed: 1
gpg:               imported: 1
root@hels /var/lib/vz/template/iso # gpg --verify SHA512SUMS.sign SHA512SUMS
gpg: Signature made Sun 06 Dec 2020 02:46:09 AM CET
gpg:                using RSA key DF9B9C49EAA9298432589D76DA87E80D6294BE9B
gpg: Good signature from "Debian CD signing key <[email protected]>" [unknown]
gpg: WARNING: This key is not certified with a trusted signature!
gpg:          There is no indication that the signature belongs to the owner.
Primary key fingerprint: DF9B 9C49 EAA9 2984 3258  9D76 DA87 E80D 6294 BE9B
root@hels /var/lib/vz/template/iso #
- We verify that the downloaded install file matches the SHA512sum:
root@hels /var/lib/vz/template/iso # sha512sum -c SHA512SUMS 2>/dev/null | grep debian-10.7.0-amd64-netinst.iso
debian-10.7.0-amd64-netinst.iso: OK
root@hels /var/lib/vz/template/iso #
- Alternatively, we might already have the ISO downloaded and available locally, or it might be a custom ISO that we ourselves made. in these and similar cases, we can upload the ISO via the Proxmox web GUI.
Log in to the web GUI at https://[Node_Name].example.com:8006. Note that we must use https. The server will send an empty response if we use http.
In the upper left hand Server View column of the web GUI, we expand the Node_Name by clicking the almost invisible ">" to the left of the Node_Name. Then we click on "Local" and on "ISO Images." When we click on the "Upload" button above the list of images, a dialog box opens to start the upload.

Create the Virtual Machine
- In the upper right of the Proxmox web GUI, we click the "Create VM" button.

- The "General" Tab is the first tab in the "Create: Virtual Machine" dialog.
Proxmox assigns a VM ID number, by default beginning with 100, but we might prefer to use a custom numbering scheme.
By default, let's use the reverse DNS provided by Hetzner as the name of the server.

Click the "Next" button to continue to the OS tab.
- In the OS Tab, we select from the drop down the OS image we previously downloaded and verified. We also check to see that the OS type and kernel version are correct.

- The System Tab is next. In the System Tab, we get to choose a graphics card, running Qemu Agent, and the SCSI hard disk controller. Let's go with the defaults.

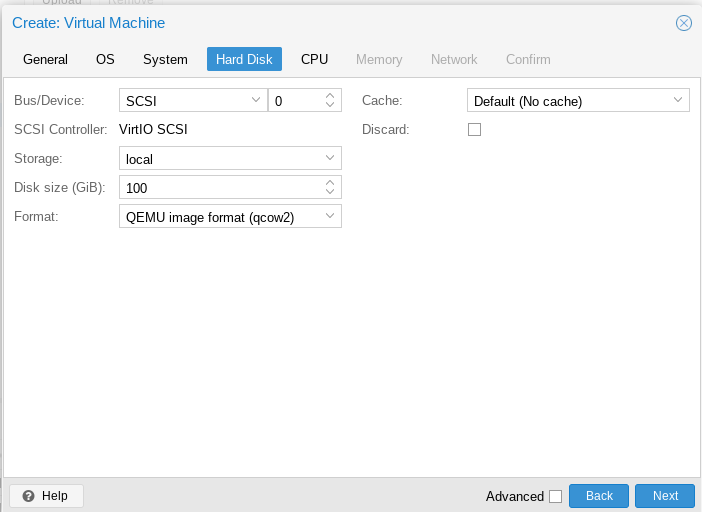
- In the Hard Disk Tab, let's increase the disk size allocation to 100 GB and otherwise go with the defaults.
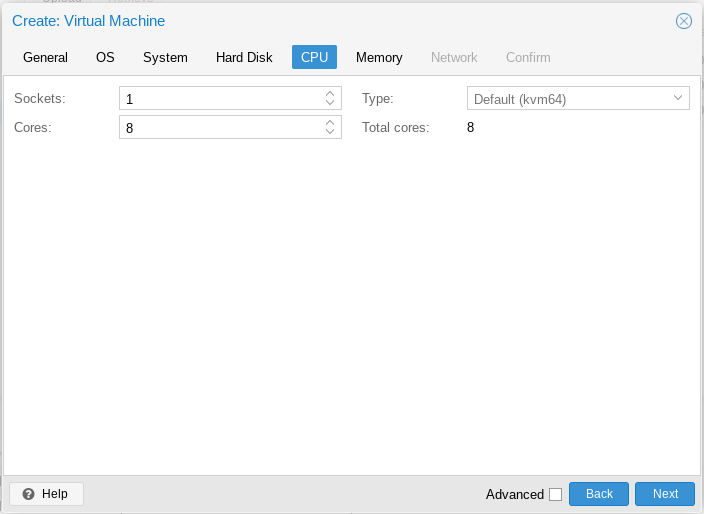
- In the CPU Tab, let's give this user 8 cores.
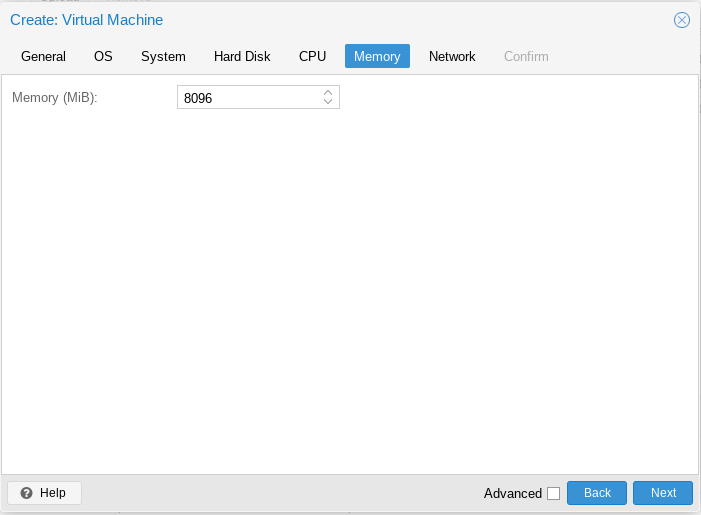
- In the Memory Tab, let's give this user 8096 MiB.
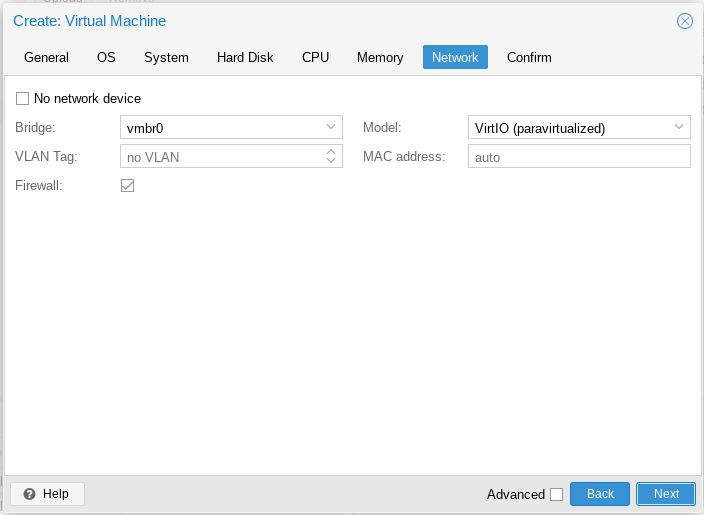
- In the Network Tab we can go with the defaults.
- In the Confirm Tab, let's click "Start after created."
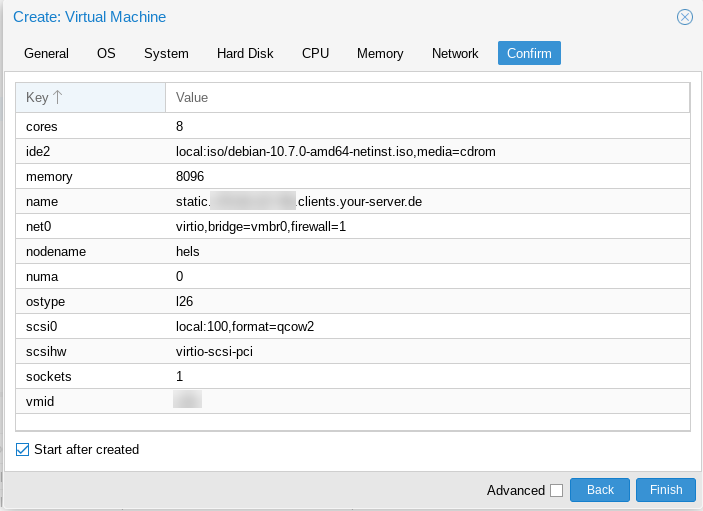
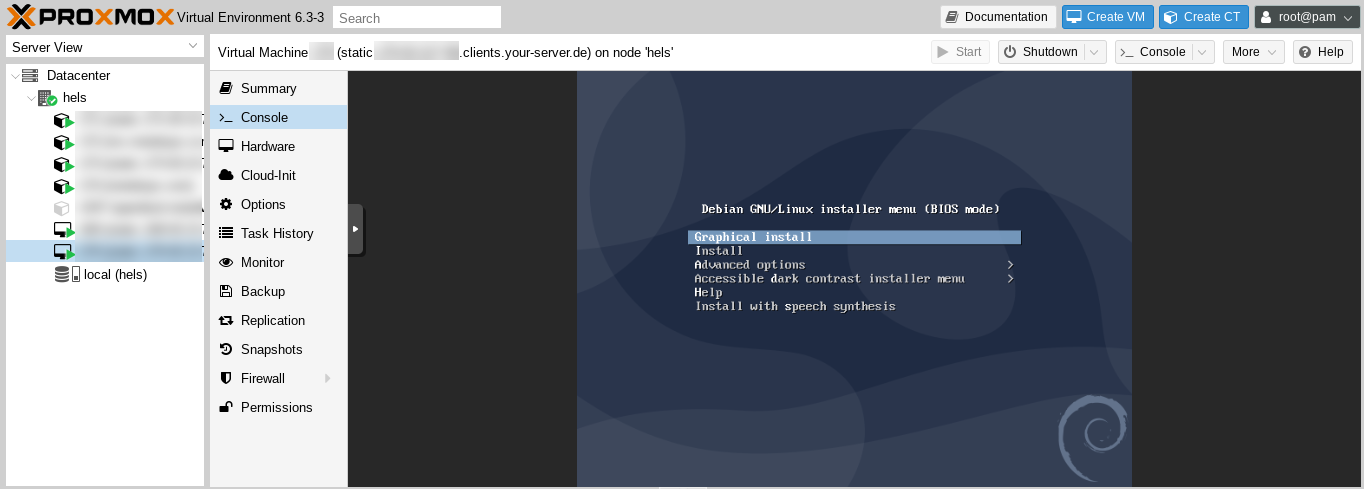
- Selecting the newly created VM and "Console" lets us see the successful Debian boot screen!
")
Conclusion
At this point, the VM has been created, and Debian server is ready to be installed inside the newly created VM.
I hope everyone gets the servers they want!
Comments
Nice start!
And I wonder why ai do not make it a default practice to check the iso signature.
Going fwd I will make it a point !
Cheers
Squats are the new Push-ups
Thanks for the post @Not_Oles sorry it took a while to make live!
https://inceptionhosting.com
Please do not use the PM system here for Inception Hosting support issues.
Thanks for sharing @Not_Oles , great write-up!