

Portainer – A Docker management tool
 sahjanivishal
Content Writer
sahjanivishal
Content Writer
Written by @sahjanivishal, 27 Apr 2021
Article was migrated from WordPress to Vanilla in March 2022
What is Docker?
If you're reading this, most probably you already know Docker or have at least heard about it a lot. But still, for the uninitiated, Docker is an open platform for developing, shipping, and running applications and it enables you to separate your applications from your infrastructure so you can deliver software quickly. Find Docker interesting and want to know more? Head over to their docs and you can find all the information you need!
What is Portainer?
So, talking about the elephant in the room, Portainer is a fully-featured web based GUI management tool for Docker. It runs locally, giving developers a rich UI to build and publish container images, deploy and manage applications and leverage data persistence and horizontal scaling for their applications.
Worried about the cost? Portainer Community Edition is open source, free forever and used by more than 500,000 developers worldwide.
What can I use Portainer for?
- Visualize your server's docker environment on your web browser. (I know that you don't fear the terminal, but hey, a little help won't harm anybody!)
- Aggregate view of Docker Swarm clusters (Yeah, it's that fancy!)
- Deploy containers with some pre-built templates, right from inside the Portainer.
- Start, Stop, Kill, Restart, Pause, Resume and Remove the containers easily with the web-GUI.
- Facing any issue while deploying containers? Don't worry, Portainer to rescue! You can inspect the logs for any containers directly from the GUI and see what is stopping you from conquering the world.
How do I install Portainer?
So, you're happy to give Portainer a go and want to know how can you install it? I have got you covered:
- Make sure you have Docker Engine installed on your server. You can follow the install instructions given here.
- Run the following command to create a docker volume which should give output as
portainer_dataindicating the command was successfully executed:
sudo docker volume create portainer_data
- Once the volume is created, run the following command to create and run the Portainer container:
sudo docker run -d -p 8000:8000 -p 9000:9000 --name=portainer --restart=always -v /var/run/docker.sock:/var/run/docker.sock -v portainer_data:/data portainer/portainer-ce
The above command should create and run the Portainer container on your server's port number 9000, which can be generally accessed in following ways:
a) By opening http://your_server_ip:9000 in your favorite browser.
b) If you have a domain name pointed towards your server's IP, by opening yourdomain.com:9000 in your browser.
Note: If you want to access Portainer over a subdomain instead of every time typing
yourdomain.com:9000, you can put it behind a reverse proxy with the help of any web server, like Caddy.
4. Alright, once the container is up and running, access it via any of the above methods and you will be greeted by the following initial setup screen of Portainer:
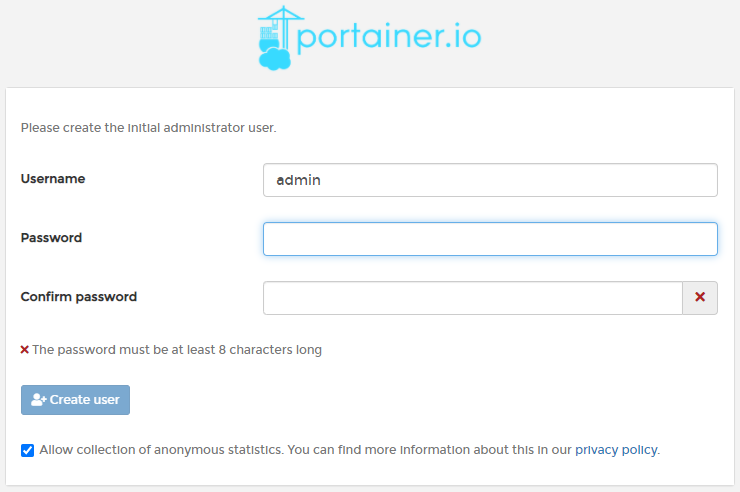
Set the username and password for admin user here and click on
Create User.
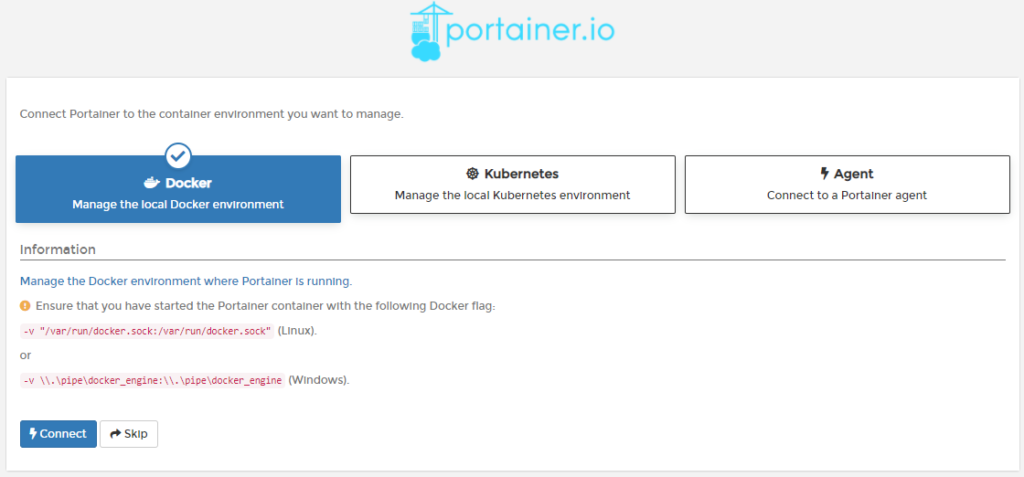
5. Next, select Docker as the container management environment you want Portainer to connect to (yes Portainer can connect to Kubernetes too, but that's a story for another day):
6. Voila! now you have successfully connected your local Docker environment to Portainer and you should be able to see below screen:
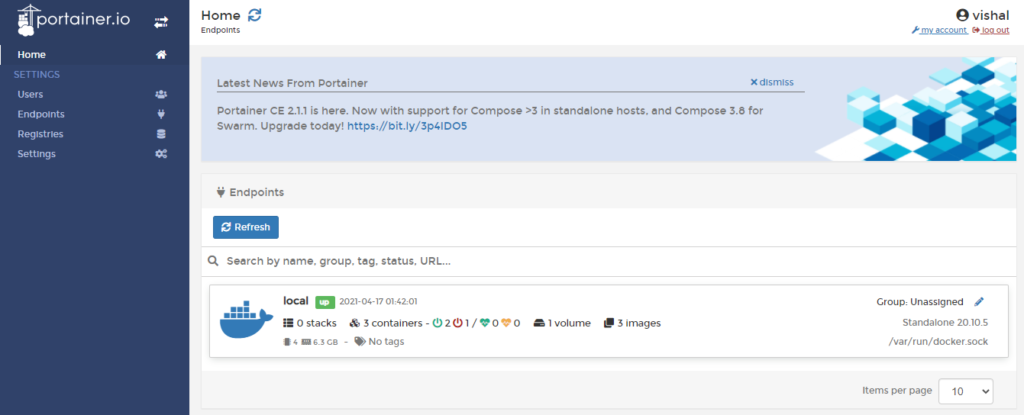
7. Click on the local endpoint to see all the containers, images, volumes, networks etc. in your Docker environment:
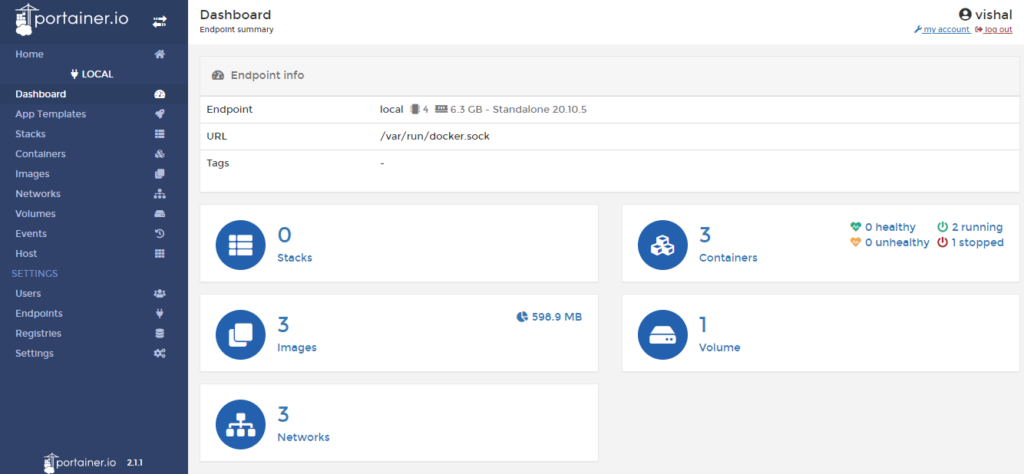
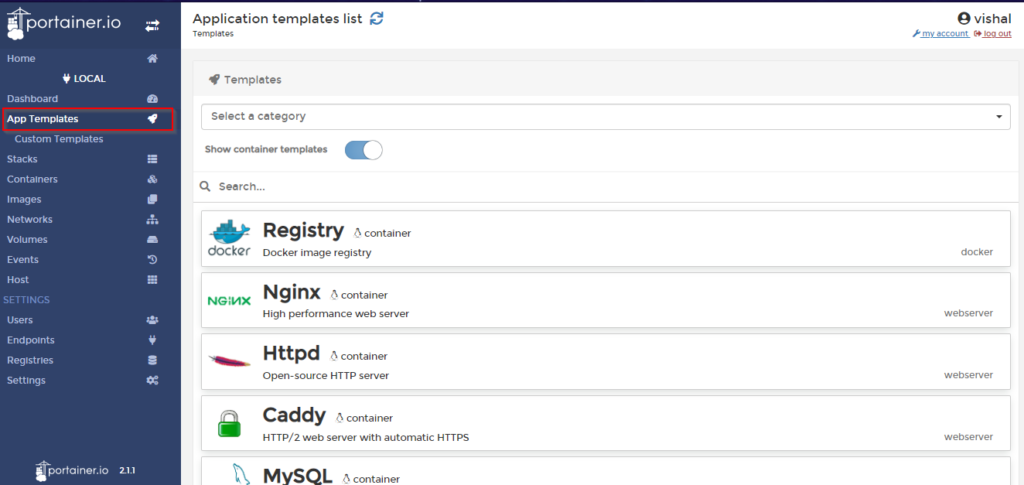
8. You can also deploy app templates containers right from inside the Portainer:
This is it! Go on, play around a bit and I'm sure you'll love how easy Portainer makes it to manage Docker containers. Given how many of the self-hosted apps can be deployed using Docker containers, Portainer is a must-have tool in your arsenal.
Comments
This is fun! Thank you!
Thank you for this.
Can I install it on GCP?
My client is having WordPress multisite with Bitnami in GCP. He wants to update php from 7.0 to 7.3 which is not possible in the same container.
Can portainer do some magic?
✓✓Only shared hosting-both DA and cPanel Still in 2006
Nice post.
I've been searching for this guide.
https://microlxc.net/
Hello,
Usually Portainer can be installed wherever Docker can be installed, so if you have docker installed on GCP VM instance then you should be able to install Portainer as well.
However since Portainer is only a management tool, it doesn't add any functionality as such to the Docker so I'm not certain if it can help you update to PHP 7.3 if the container doesn't allow it.
Nice write-up. Another great (web-based) Docker management tool is Yacht:
https://github.com/SelfhostedPro/Yacht
It supports docker-compose files, which I personally like
LinuxFreek.com
"A VPS doesn't have dedicated resources (and so, guaranteed performances) of course" - c1vhosting
Like this?
@NanoG6 , it has its own template not docker-compose
Yes I have also heard good things about Yacht, but didn't try it yet. Will definitely try as it looks promising!
Can I import my current stash of docker-compose files to it somehow?
I need to have a look at Yacht. If I'm not wrong though, Portainer's stack function takes docker-compose files.
Does it now? When I checked back, albeit 2 years ago, it only supported it's own format.
LinuxFreek.com
"A VPS doesn't have dedicated resources (and so, guaranteed performances) of course" - c1vhosting
I think it does. I have a couple of containers running based on stacks.