

"Invalid file offset" Error Installing NetBSD With IPMI On A Crunchbits Dedicated Server

Introduction
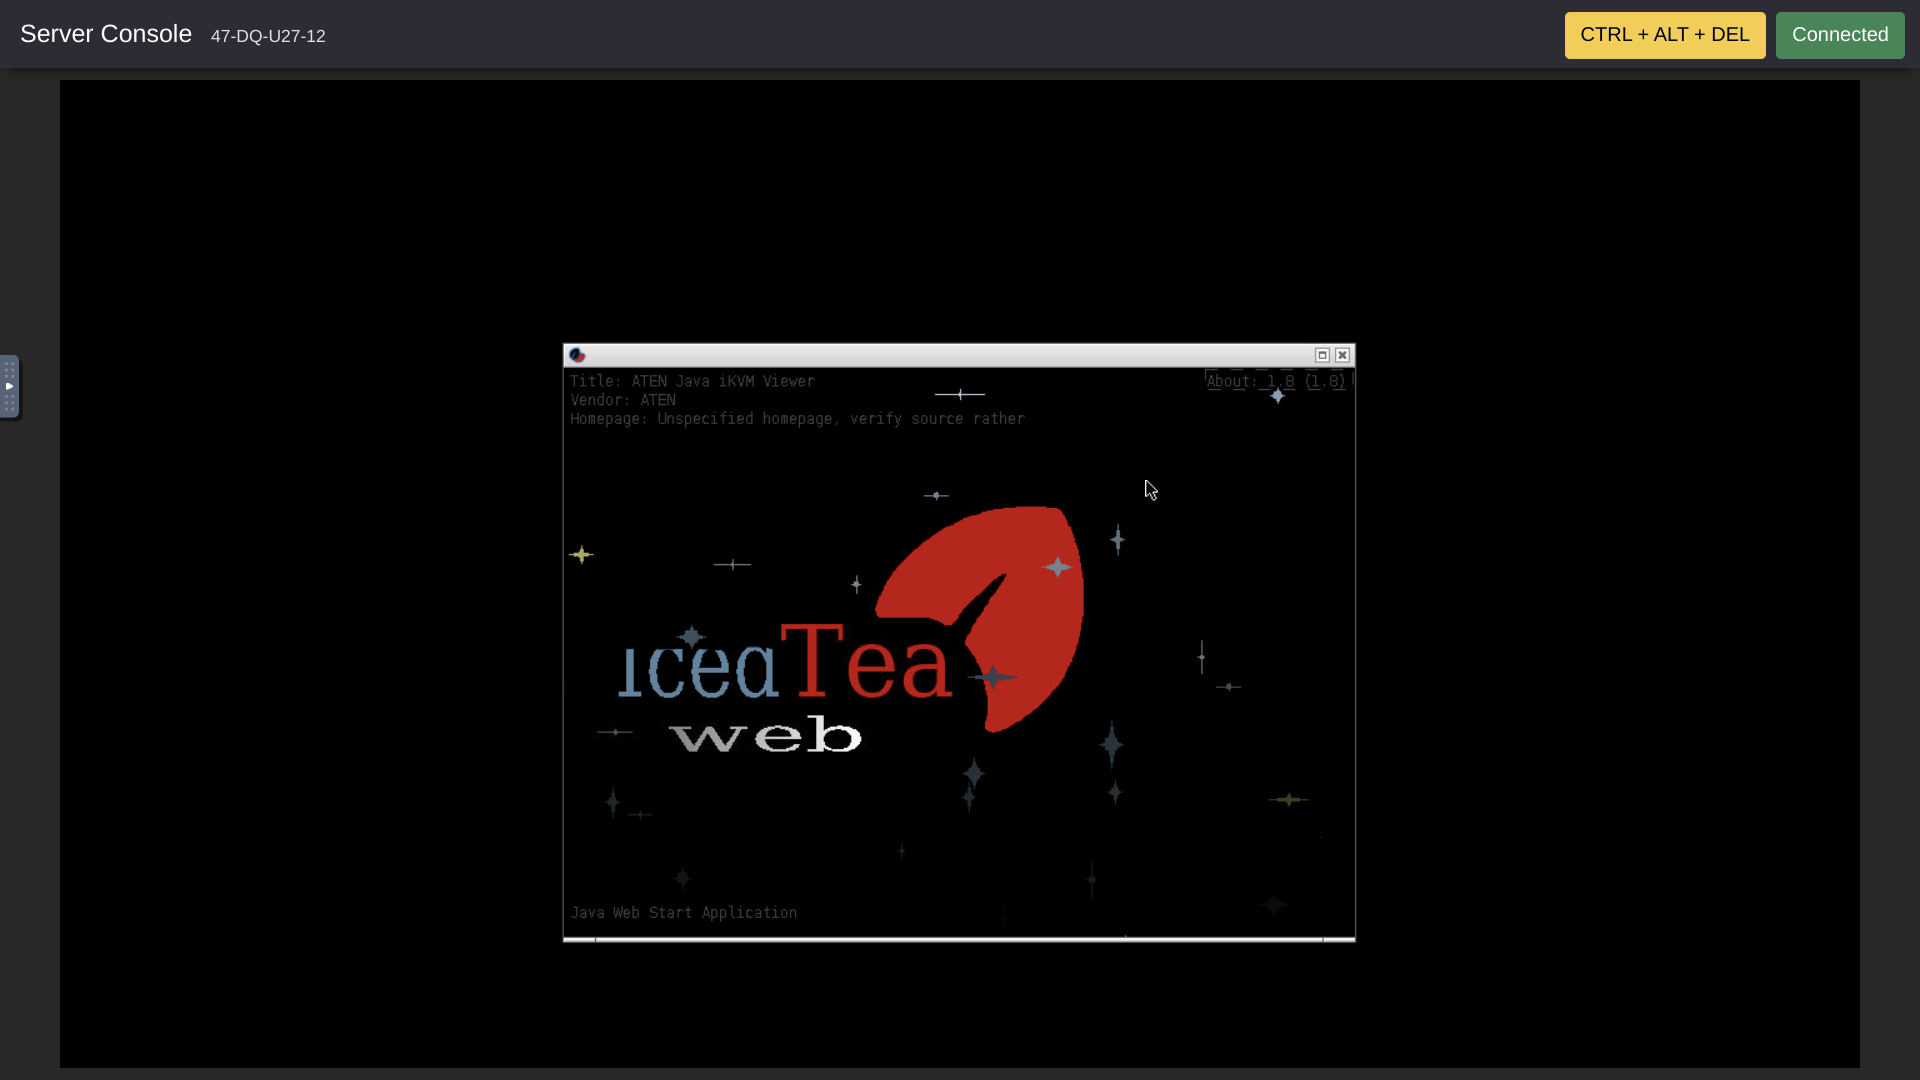
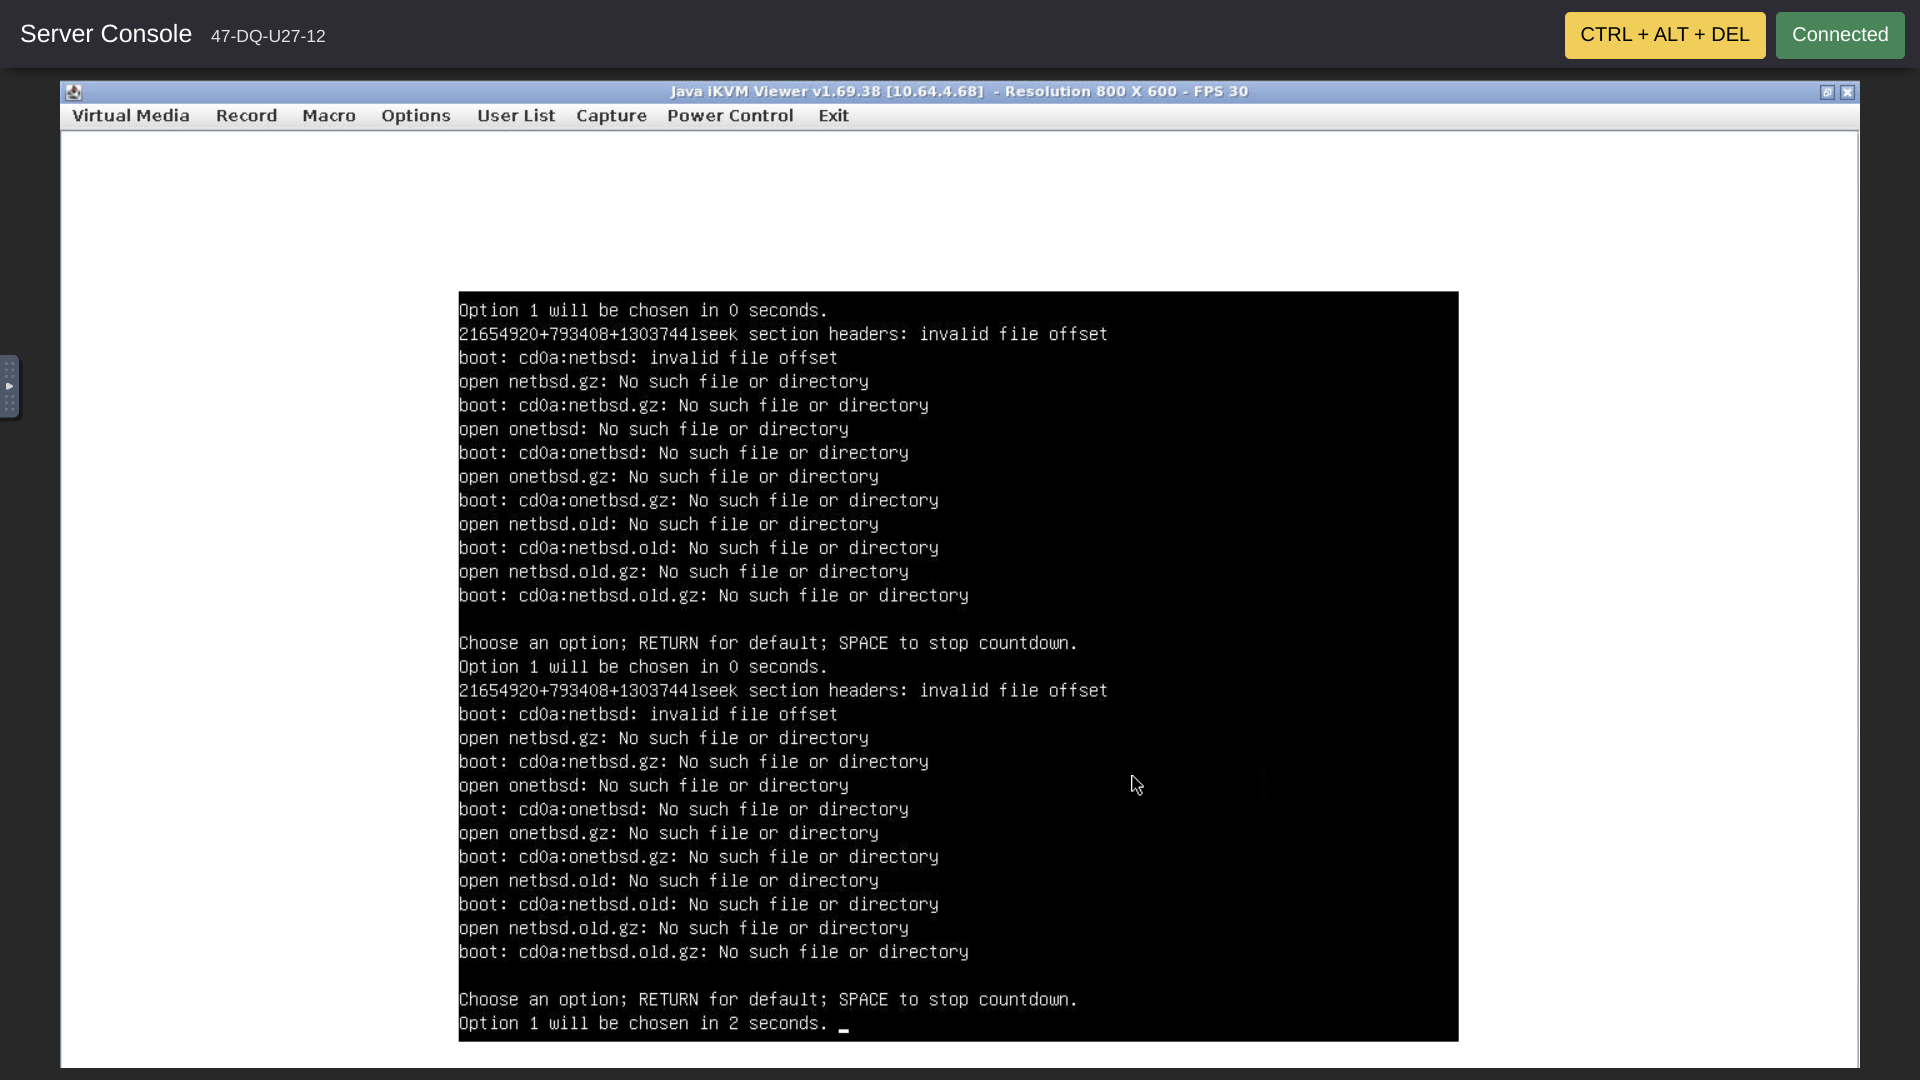
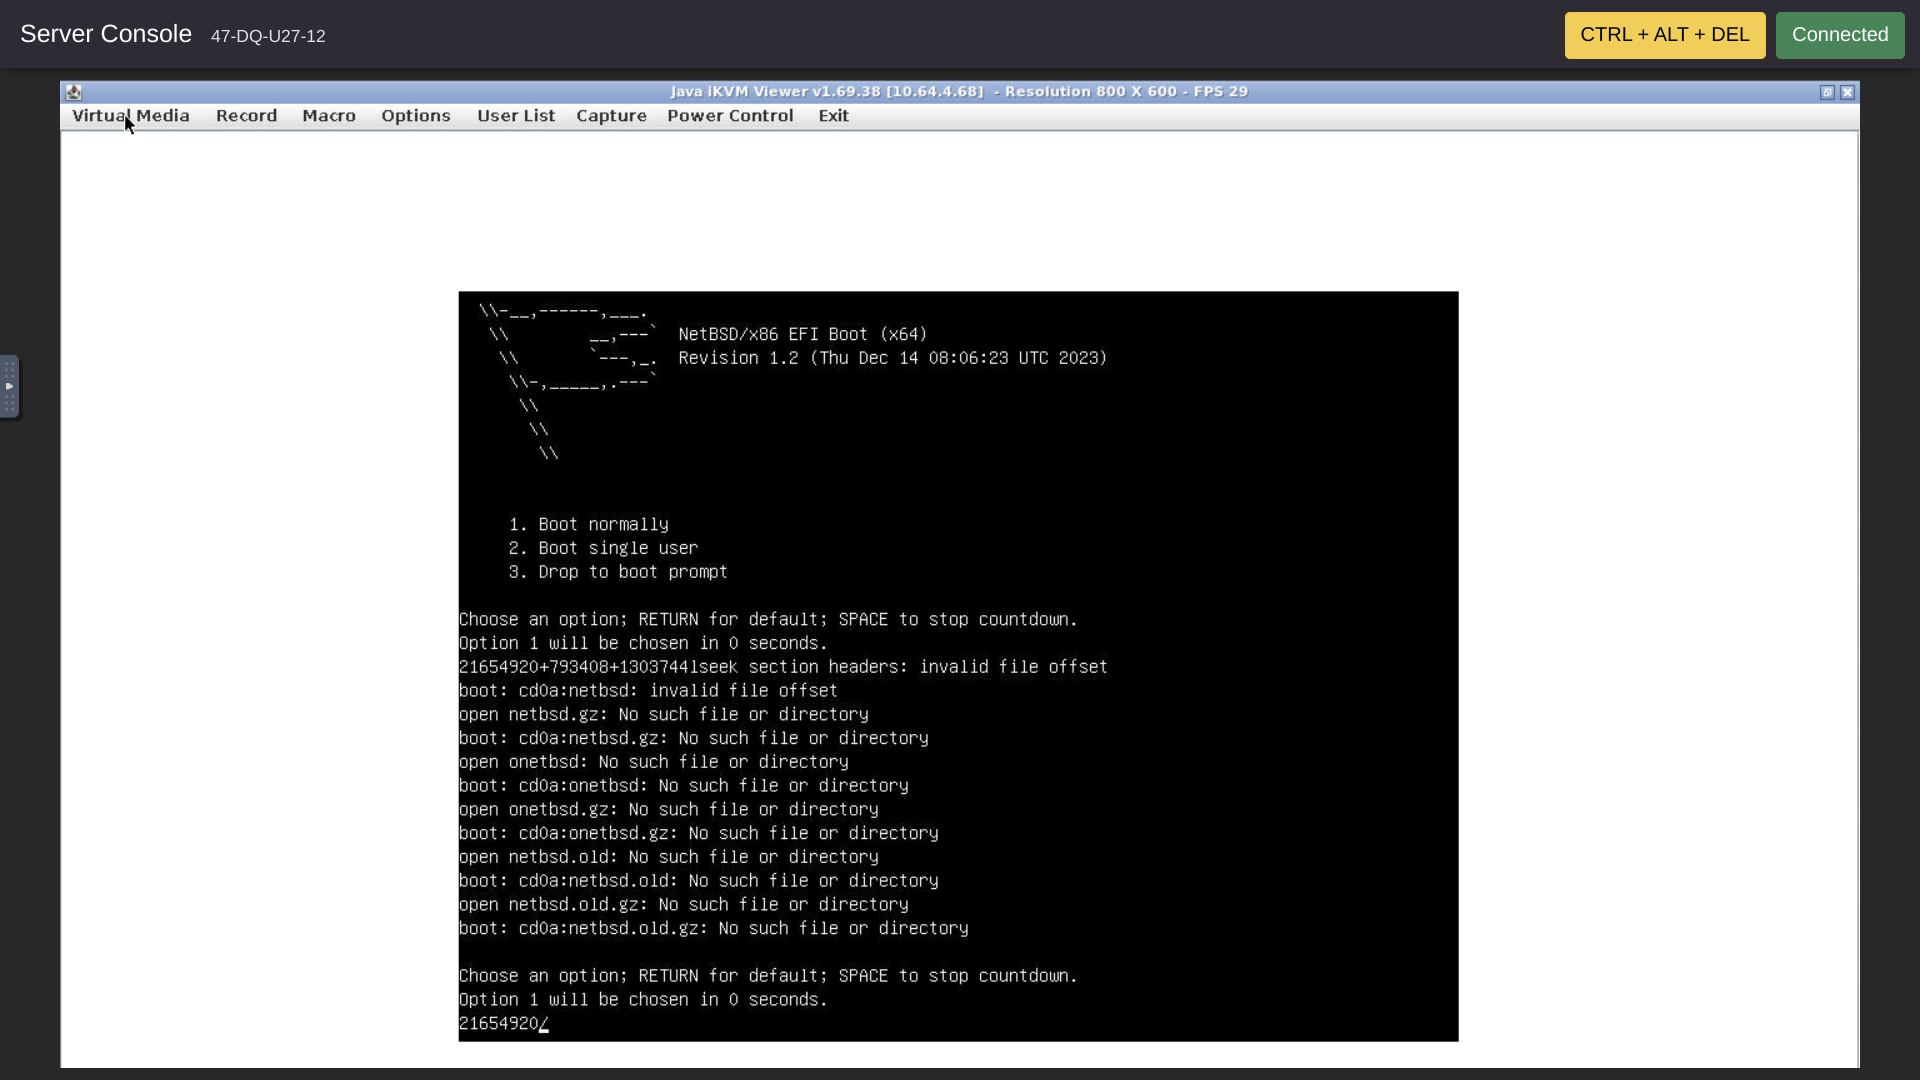
I failed to install NetBSD on crunchy, my dedicated crunchbits server. The IPMI install setup seems successfully to get started installing from a known-working Ubuntu 22.04 ISO, but the NetBSD ISO errors out. The NetBSD errors are "invalid file offset" and "No such file or directory." The NetBSD errors can be seen in the last of the screenshots below.
The "Invalid file offset" error and the CDROM format are discussed at https://mail-index.netbsd.org/netbsd-bugs/2018/08/16/msg058532.html. Maybe "invalid file offset" means that no files could be read. In other words, maybe the "invalid file offset" error explains all the "No such file or directory" errors.
The problem might be with the NetBSD ISO. I'm sure crunchbits checked the SHA512 sum. And, happily, as also shown in the screenshots below, the NetBSD boot seems to begin okay prior to erroring repeatedly. But, maybe I chose the wrong ISO? Is there something about my IPMI boot setup, detailed below, that interferes with NetBSD but works with Ubuntu? What else could be wrong?
Here are the steps I followed.
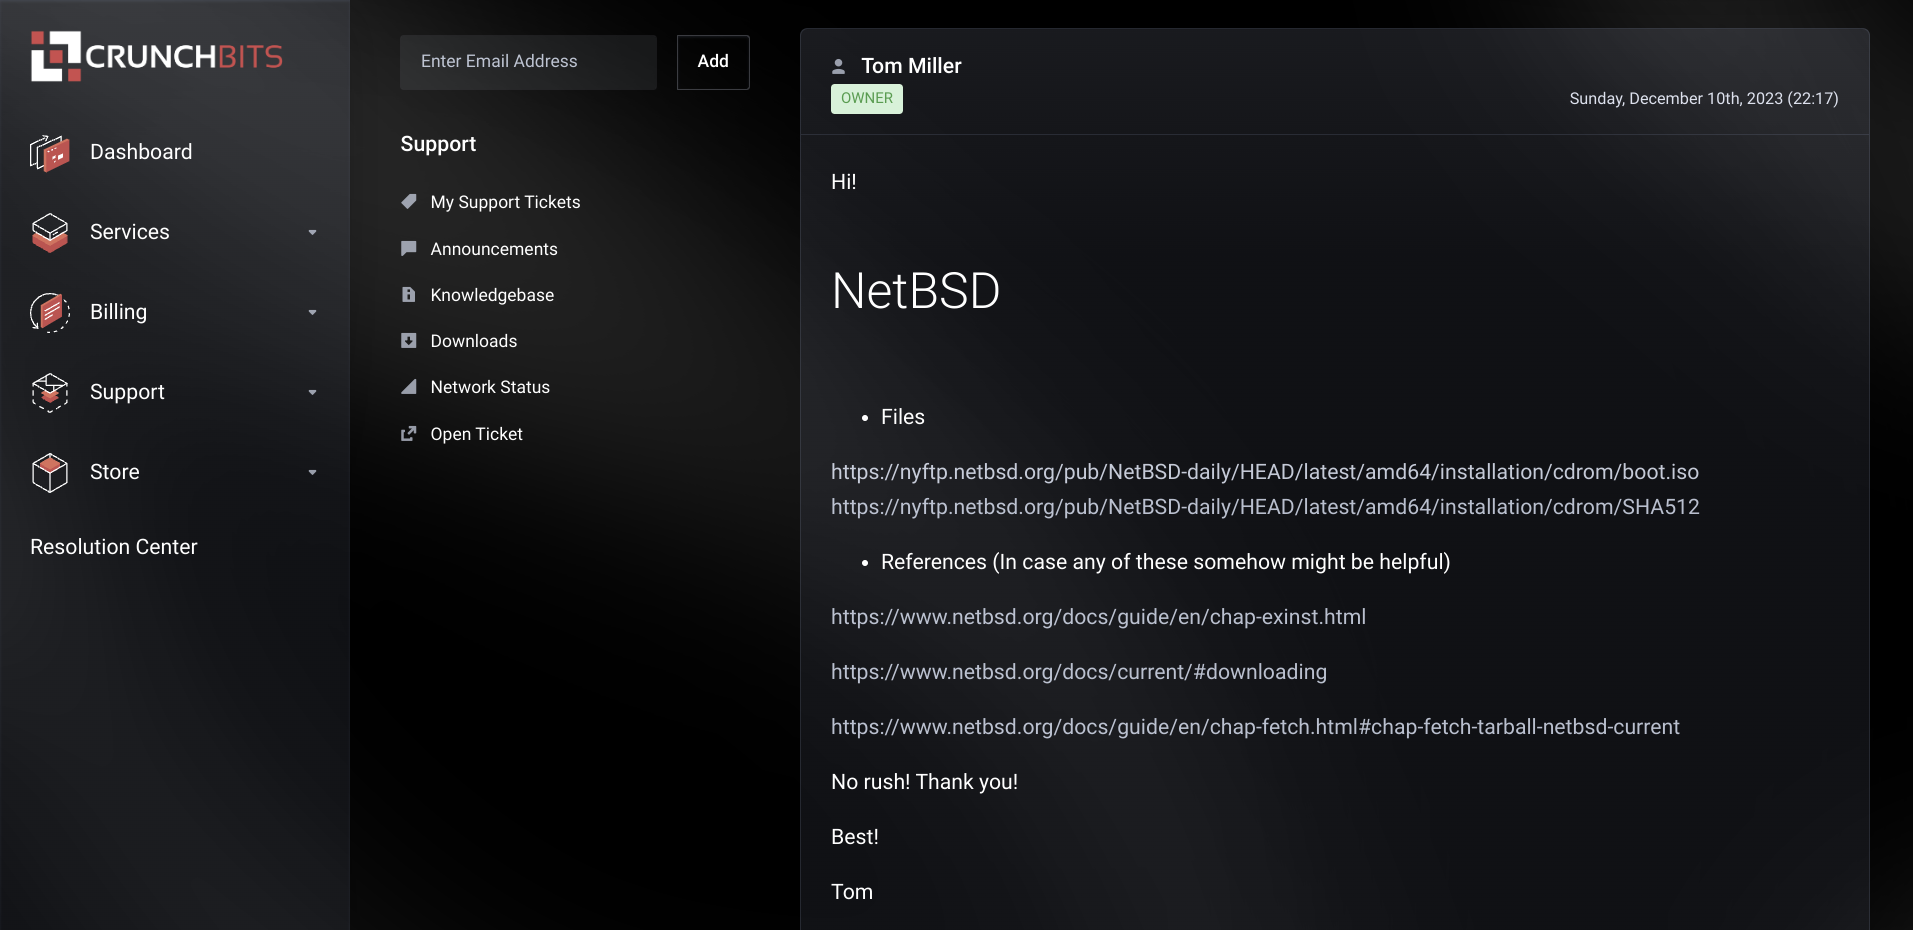
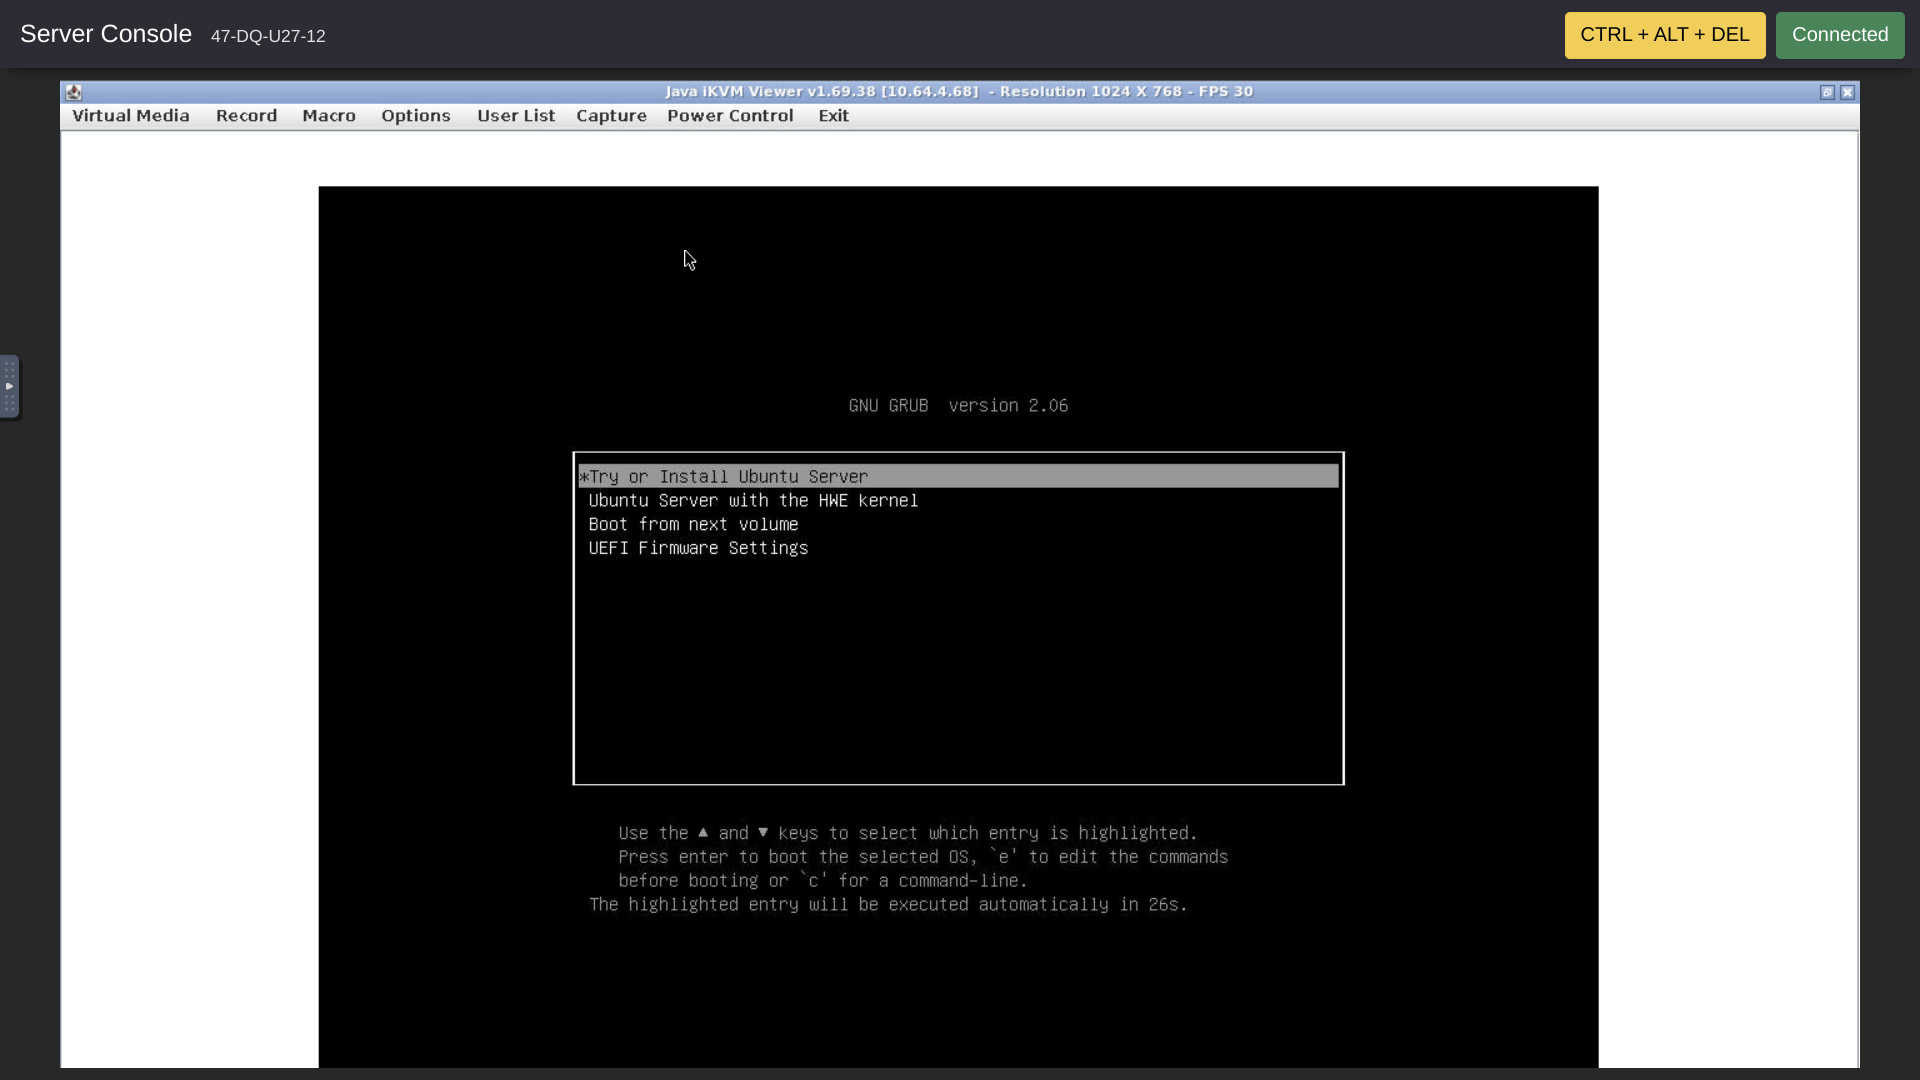
Step 1 -- Ticket #DVO-787826 - Please add NetBSD ISO to crunchbits lineup
Thanks to crunchbits ![]() for uploading the NetBSD ISO!
for uploading the NetBSD ISO!
Step 2 -- Launch The Console
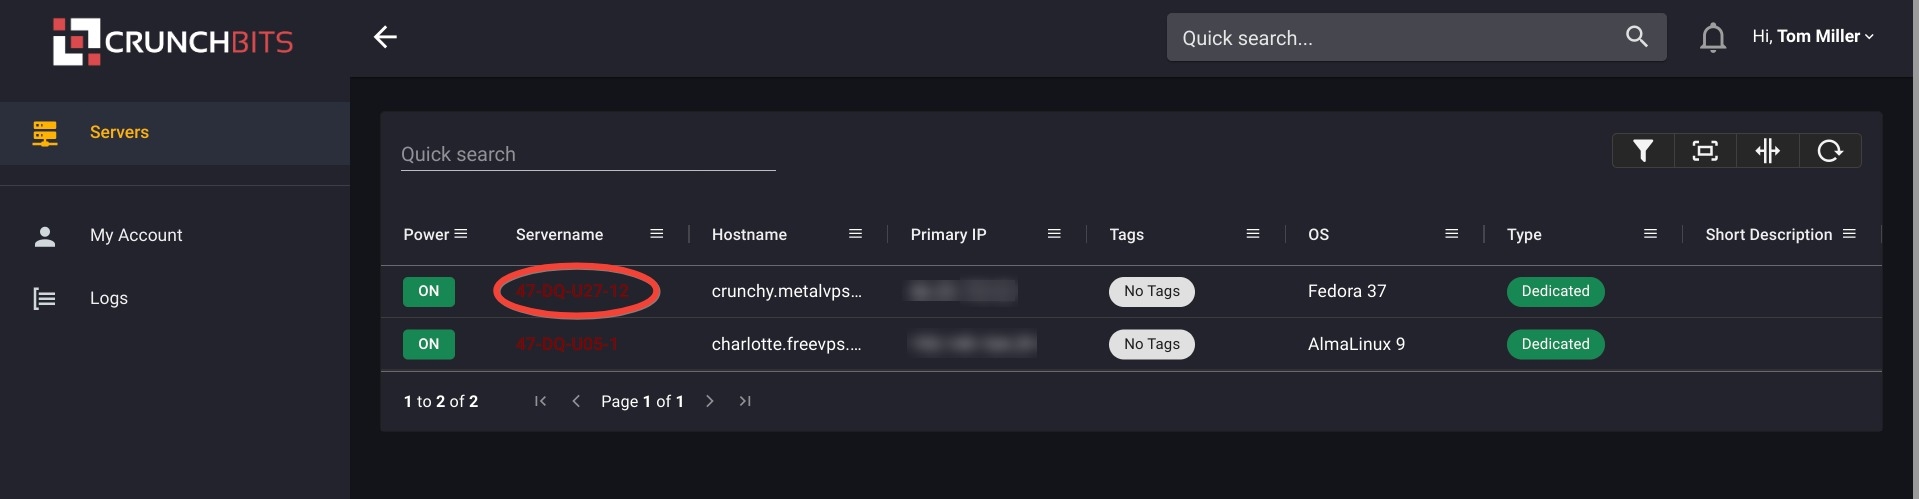
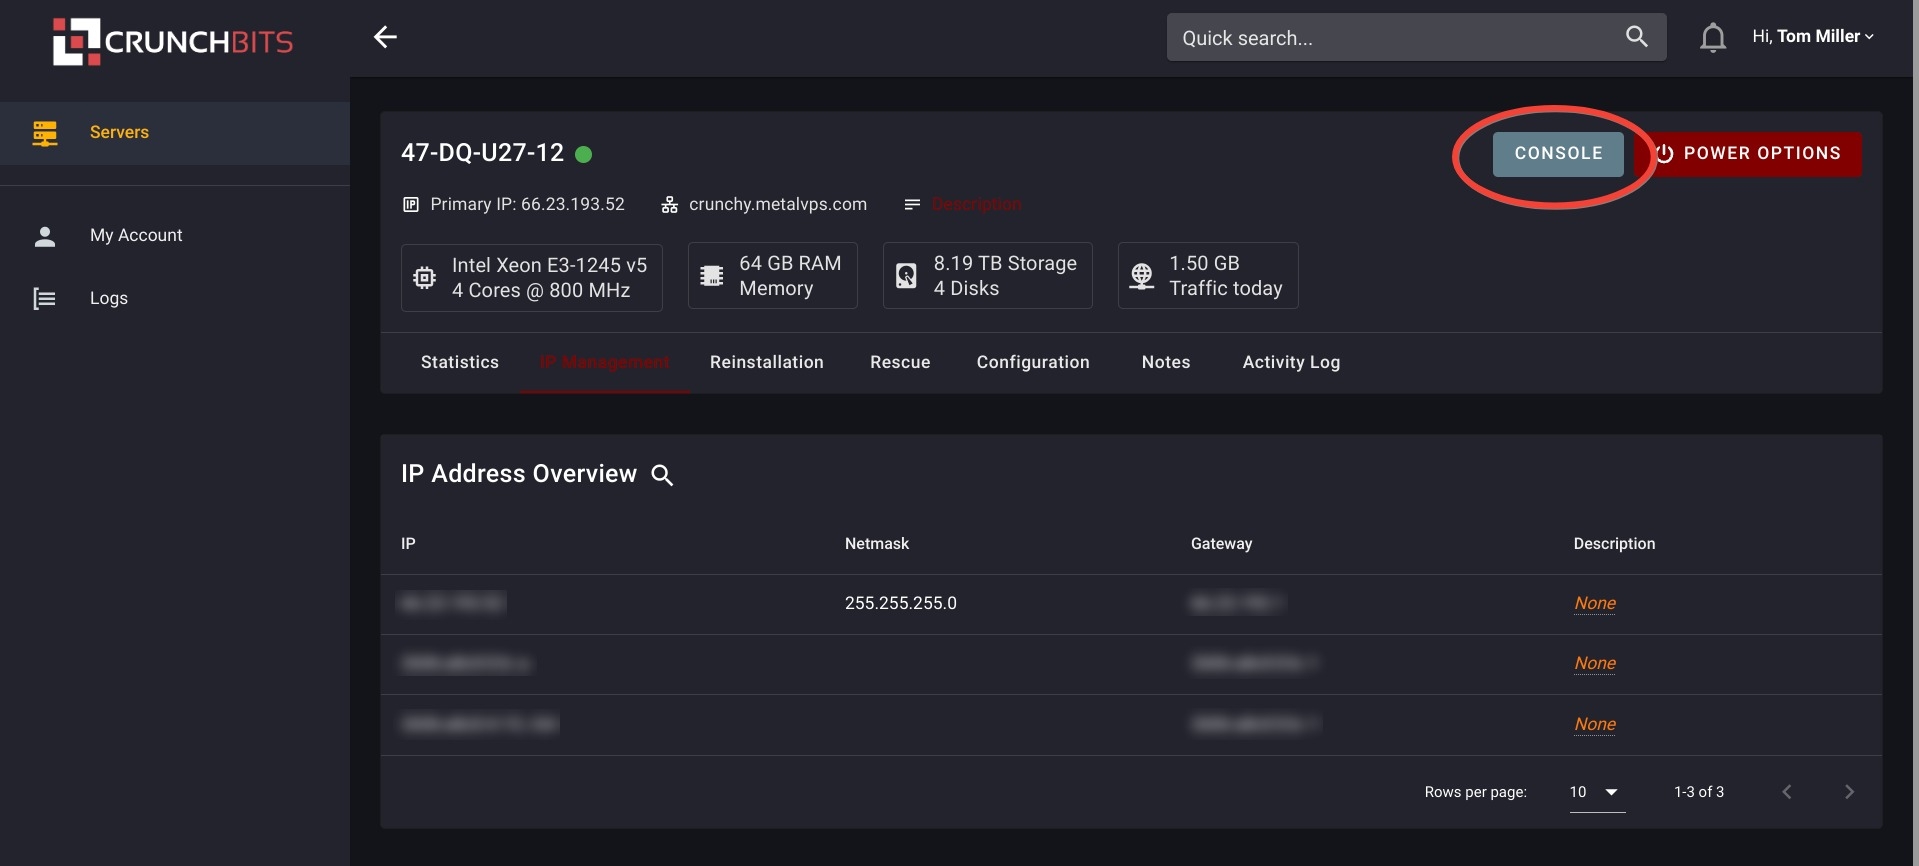
Log in to the Crunchbits Server Management Panel. Click on Servers > Servername > Our Servername.
In the server's Management Panel, click CONSOLE.
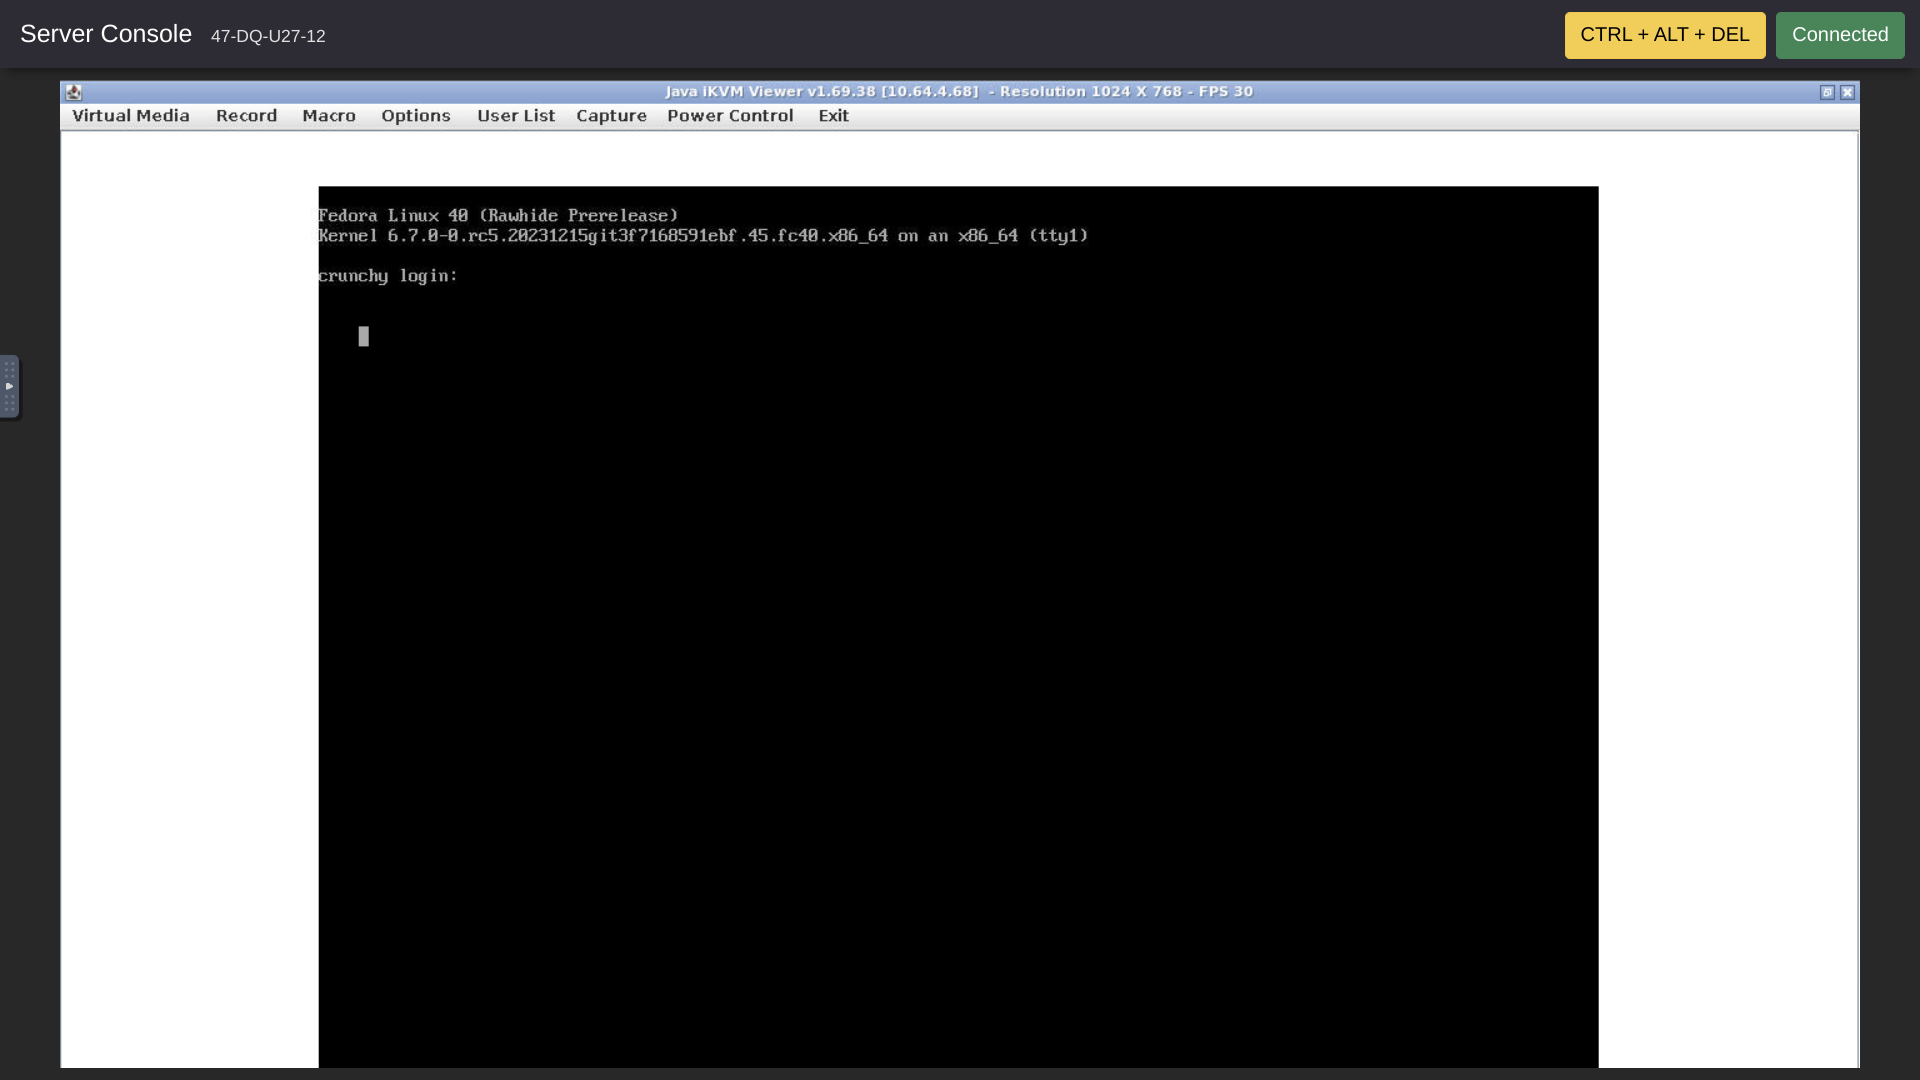
We see a pop-up telling us that the Console will be available in a moment. A new tab opens showing the Console loading. Next, the newly loaded Console shows our server's login prompt.
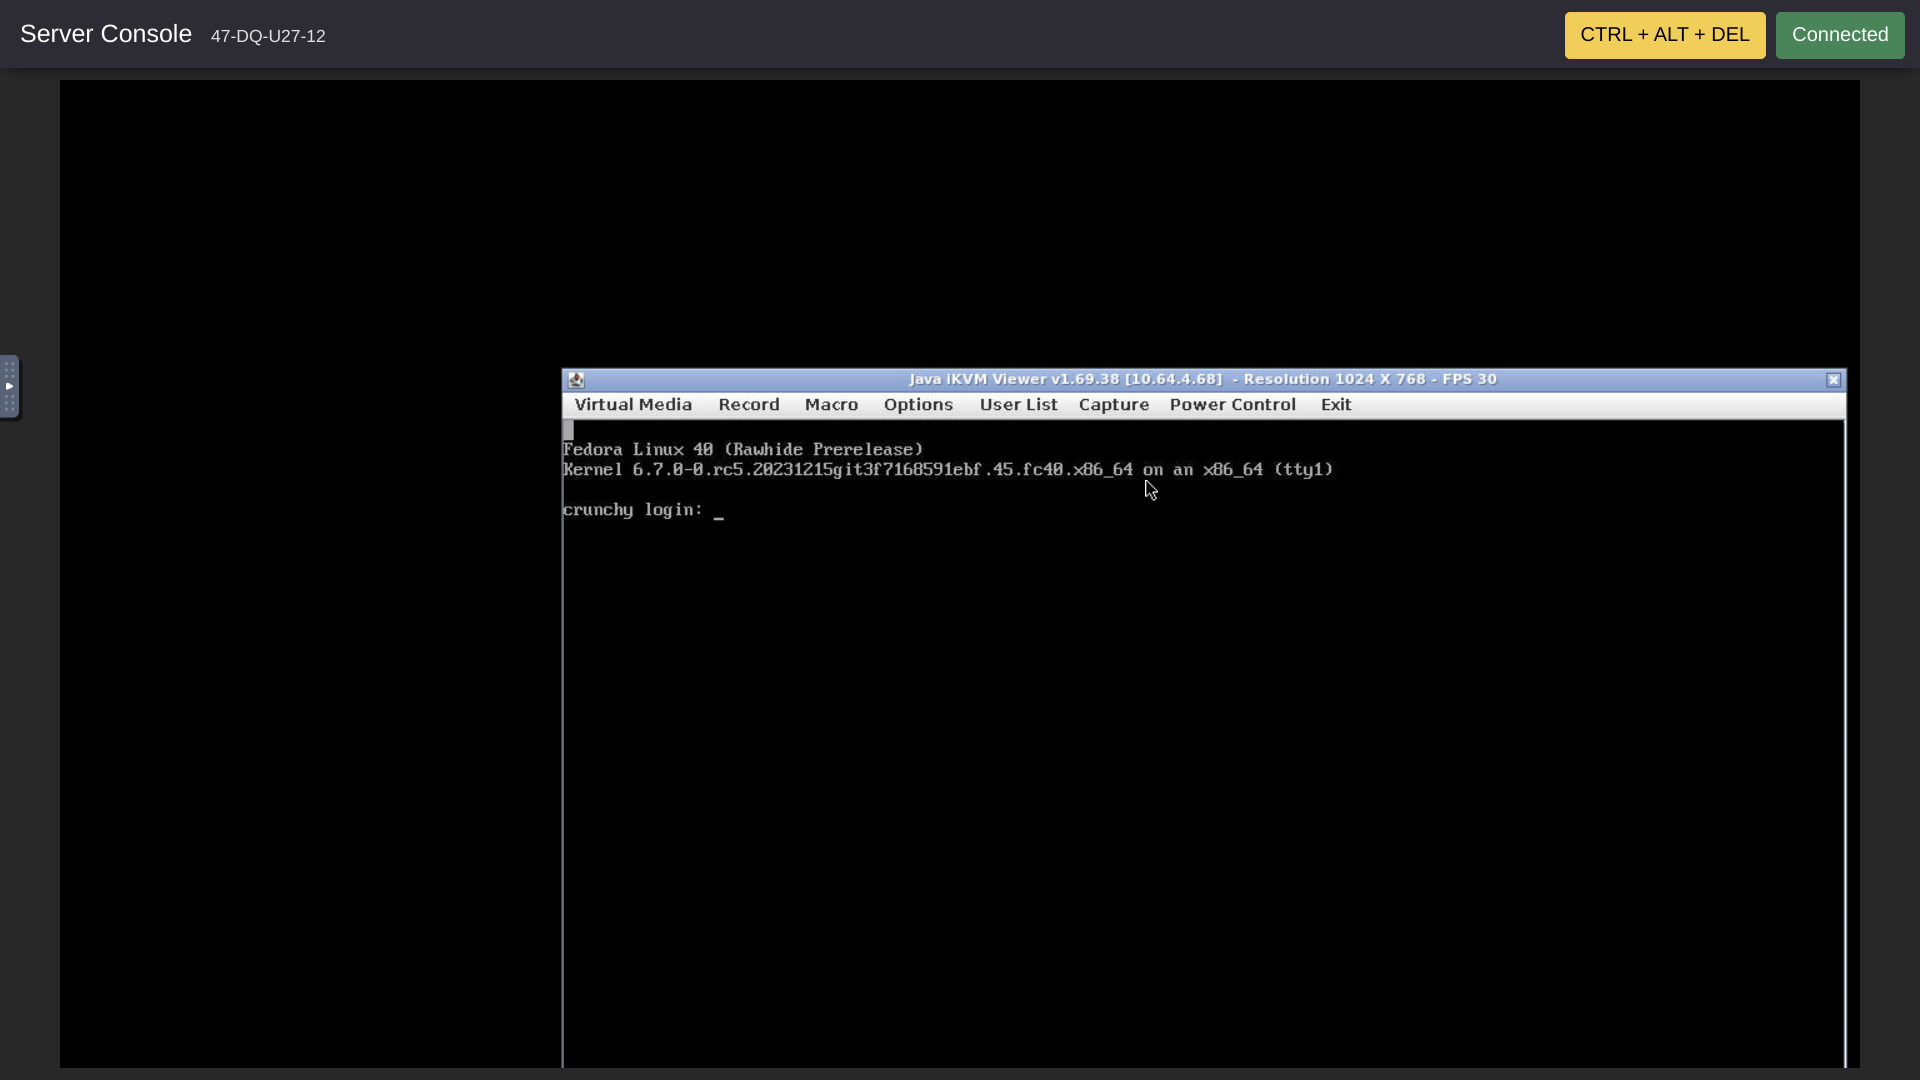
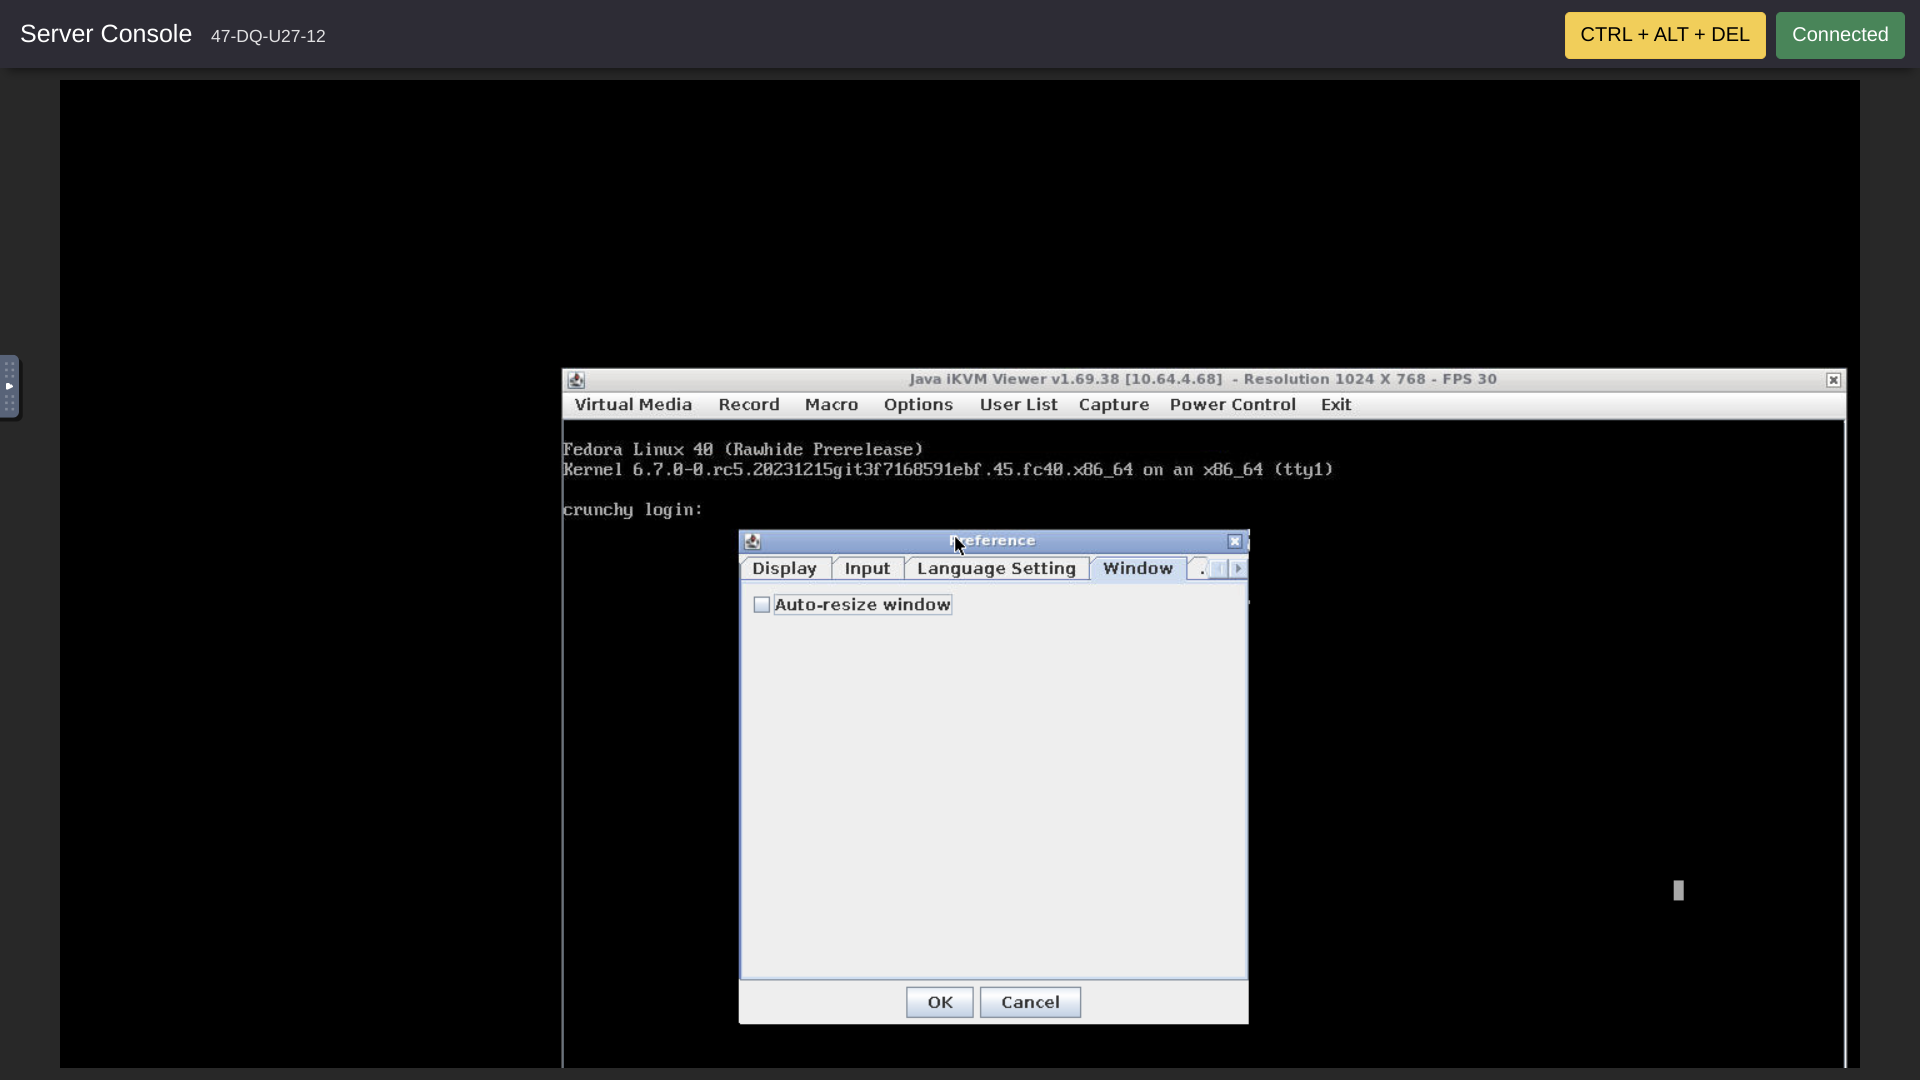
Step 3 -- Set Console Window Auto-resize Preference
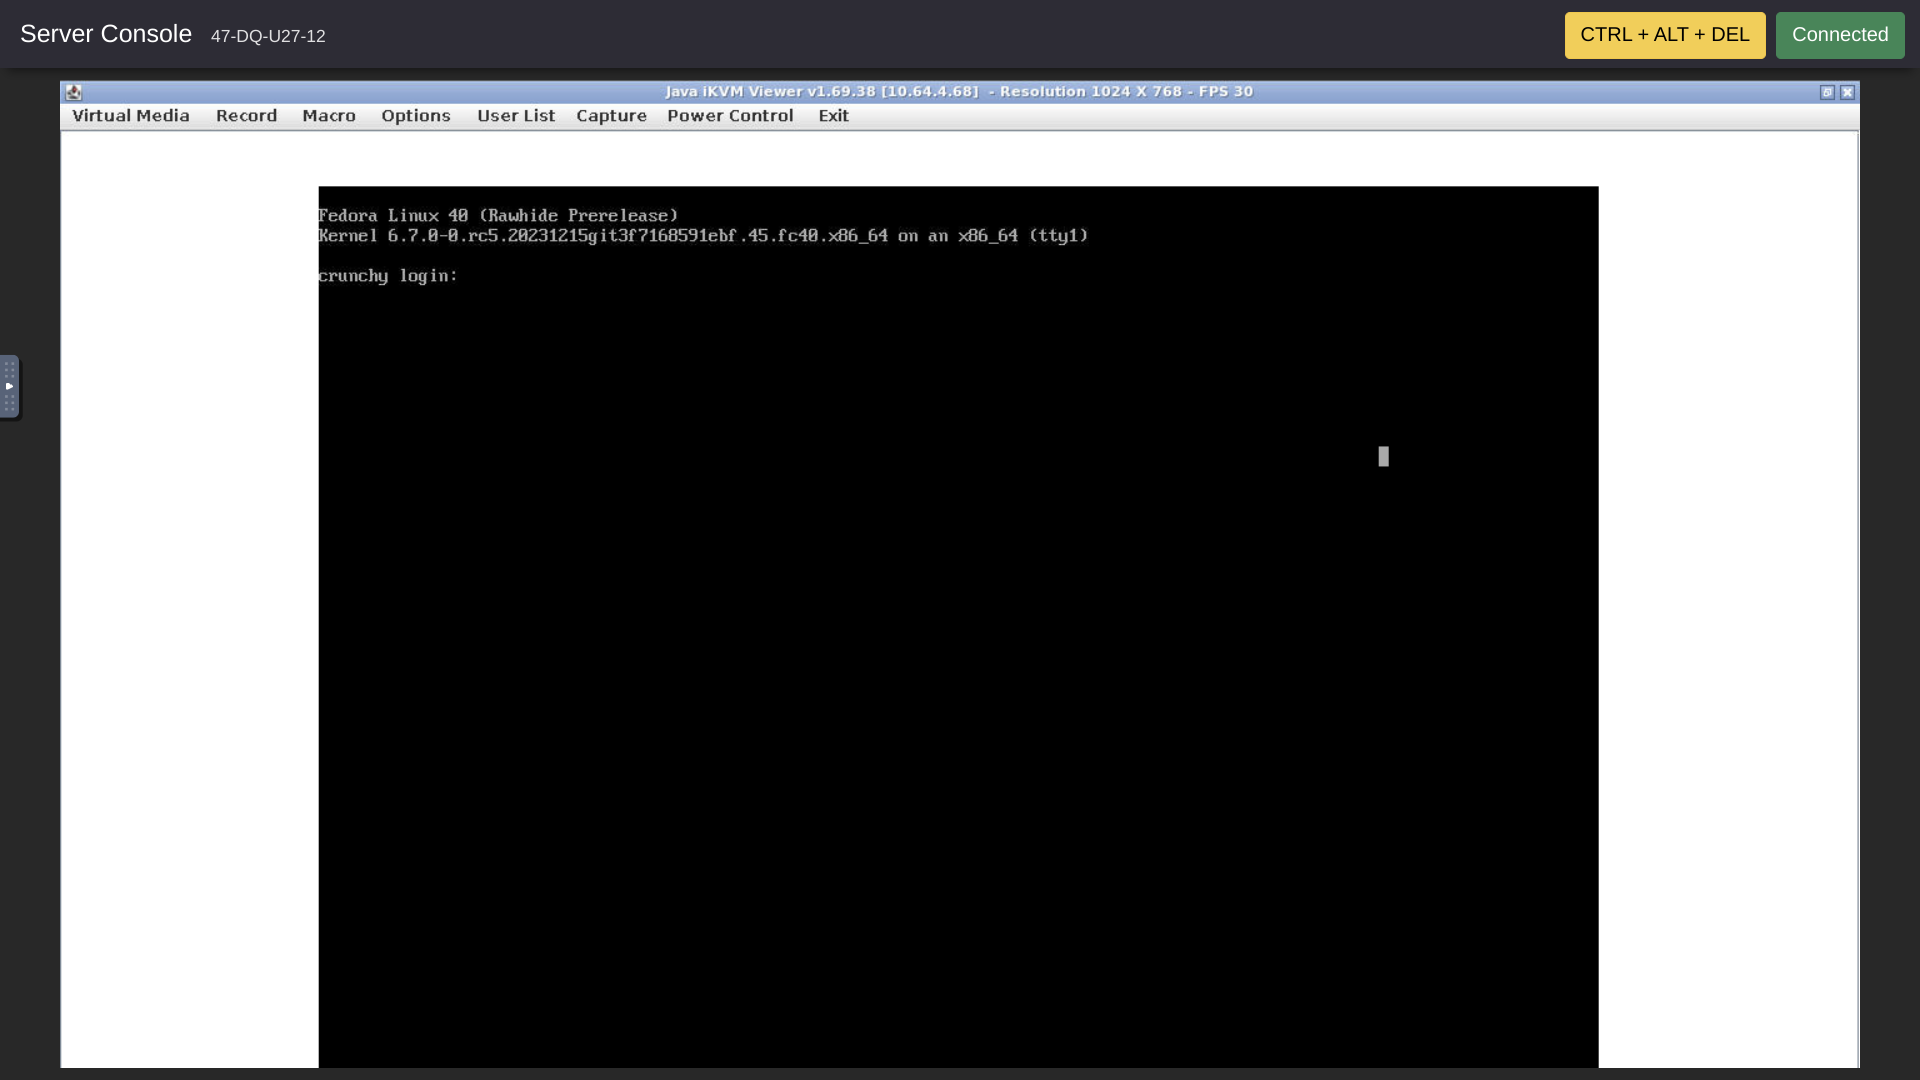
Here, our console window is displaced toward the right and toward the bottom of the screen. This happens because of the IPMI auto-resize feature. To disable auto-resize, in the console top menu bar, click Options > Preference. In the Preference window pop-up, select Window. Uncheck "Auto-resize window" and then click OK.
After disabling auto-resize, we see the Console window appearing approximately as expected.
Step 4 -- Load netbsd.iso Image
On the Console top bar menu, the first item on the left is Virtual Media. Click Virtual Media.

Then select Virtual Storage.
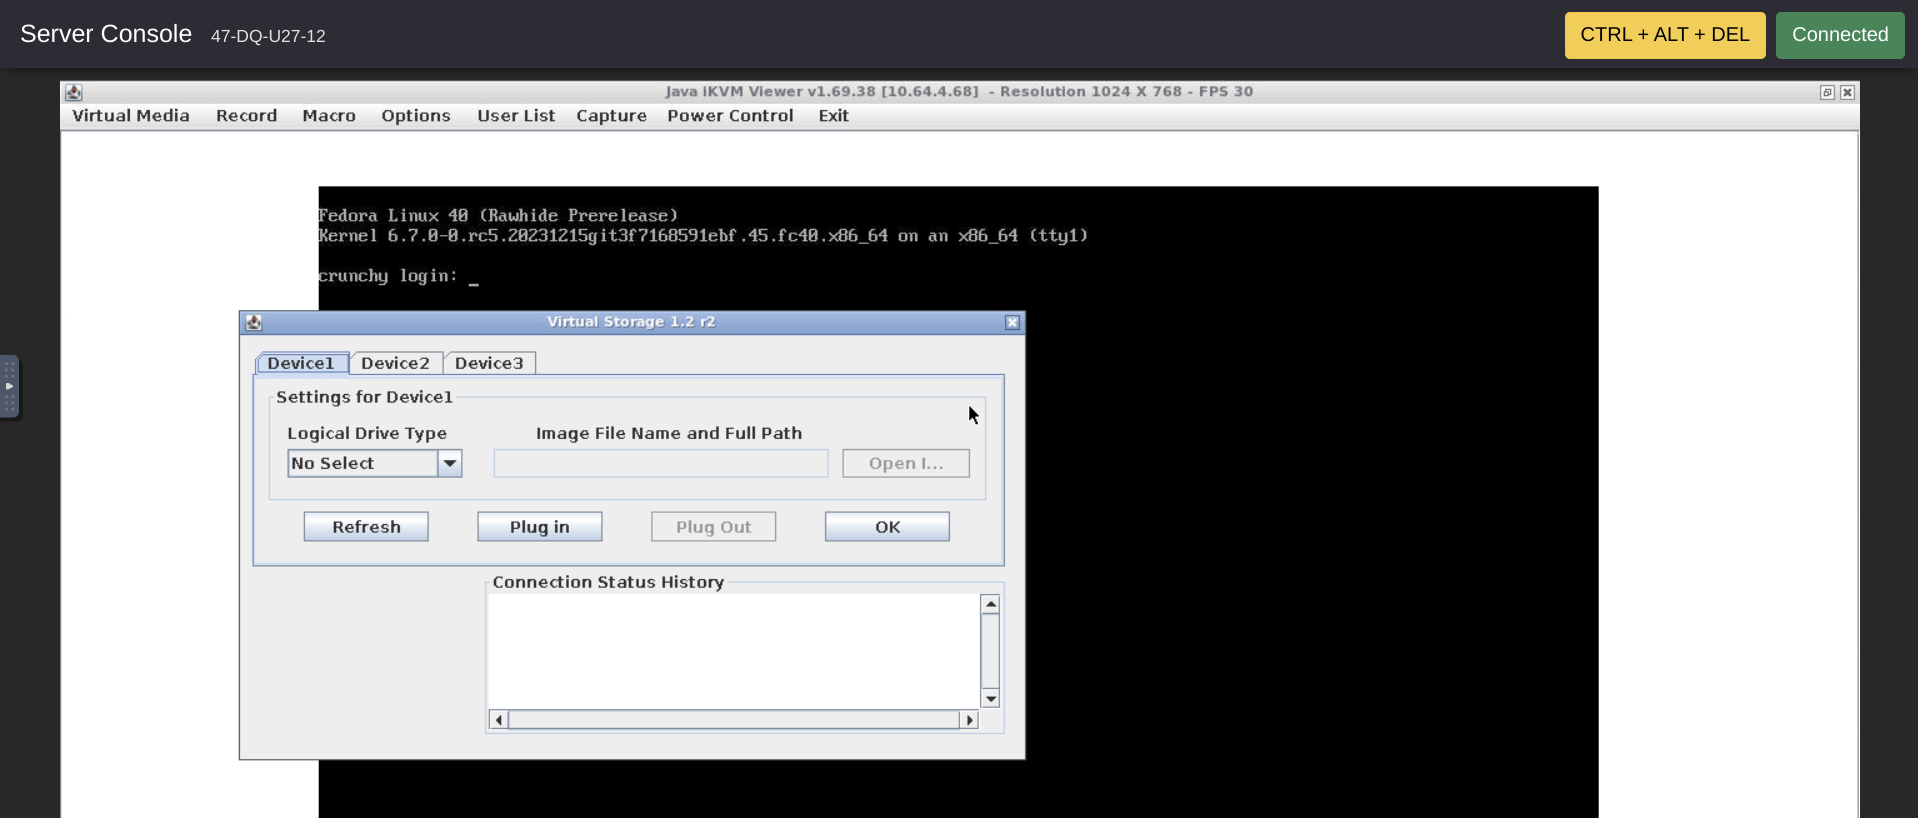
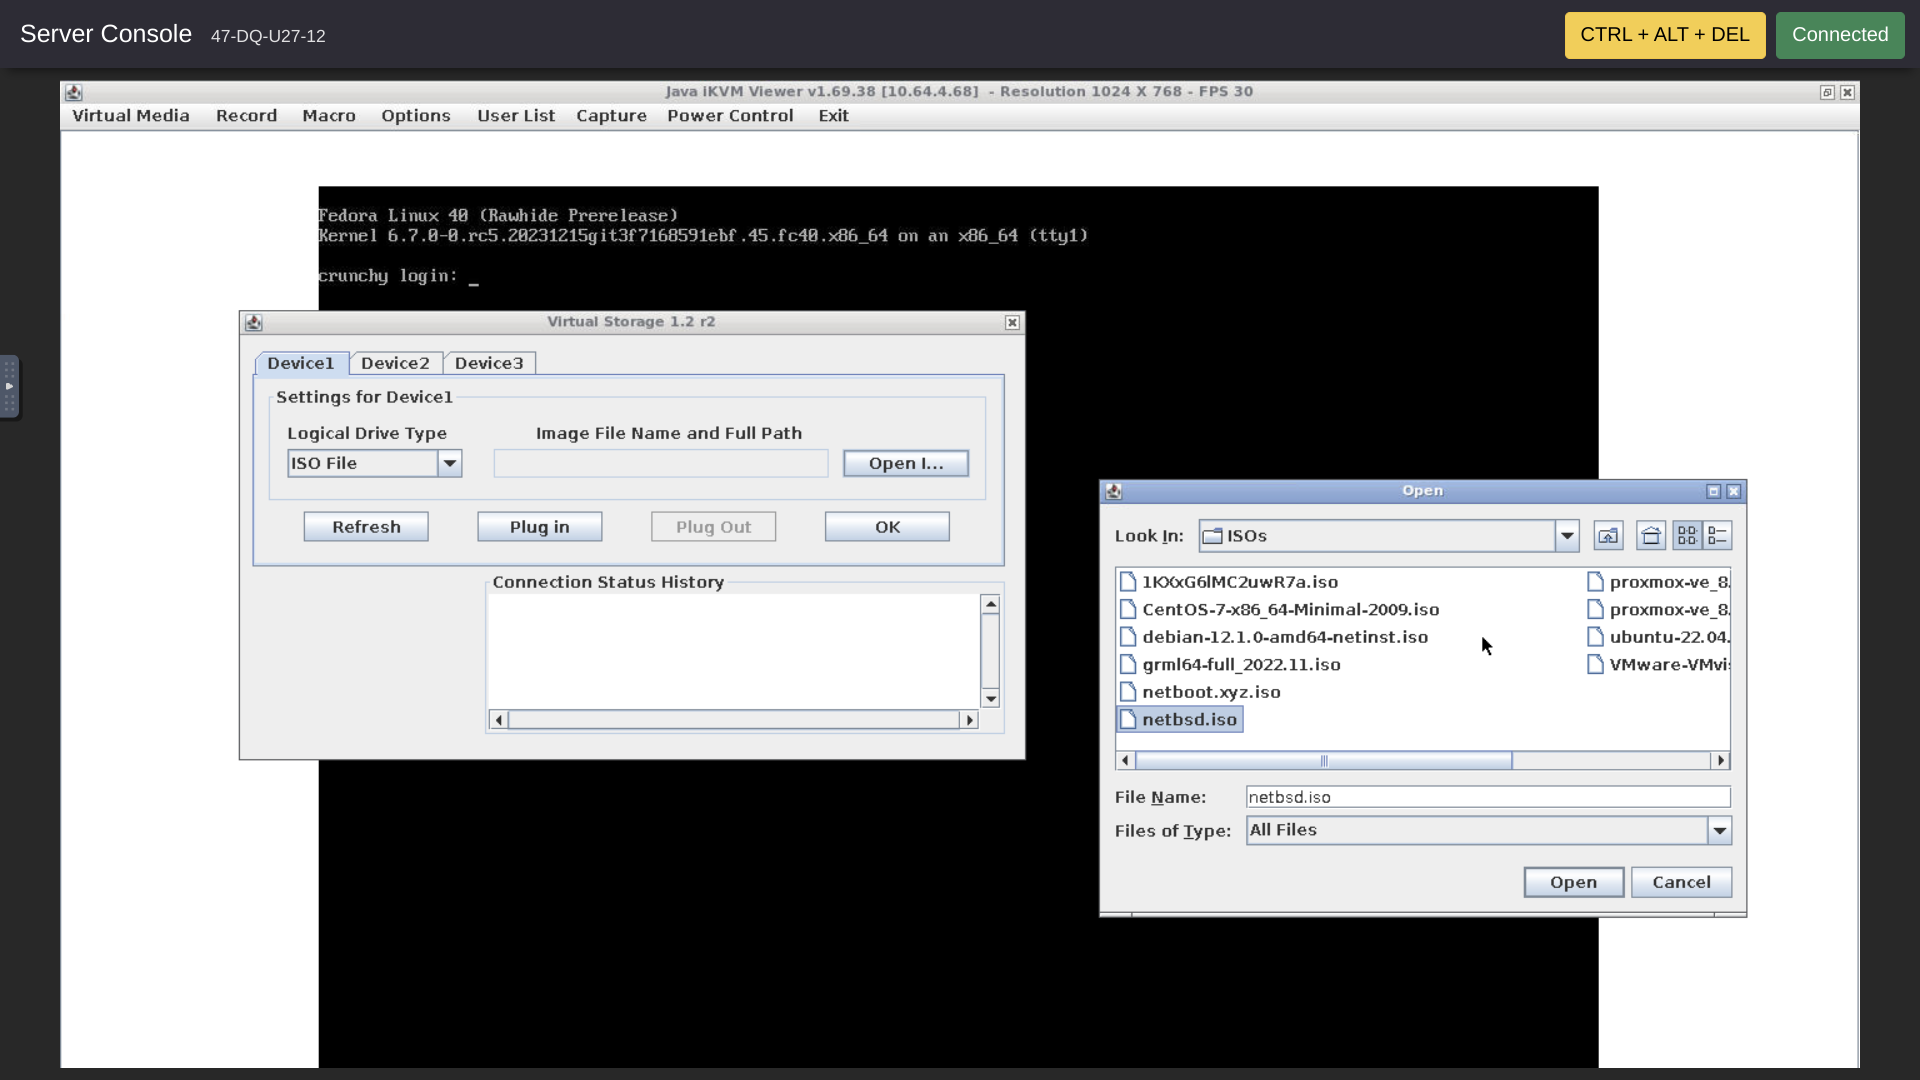
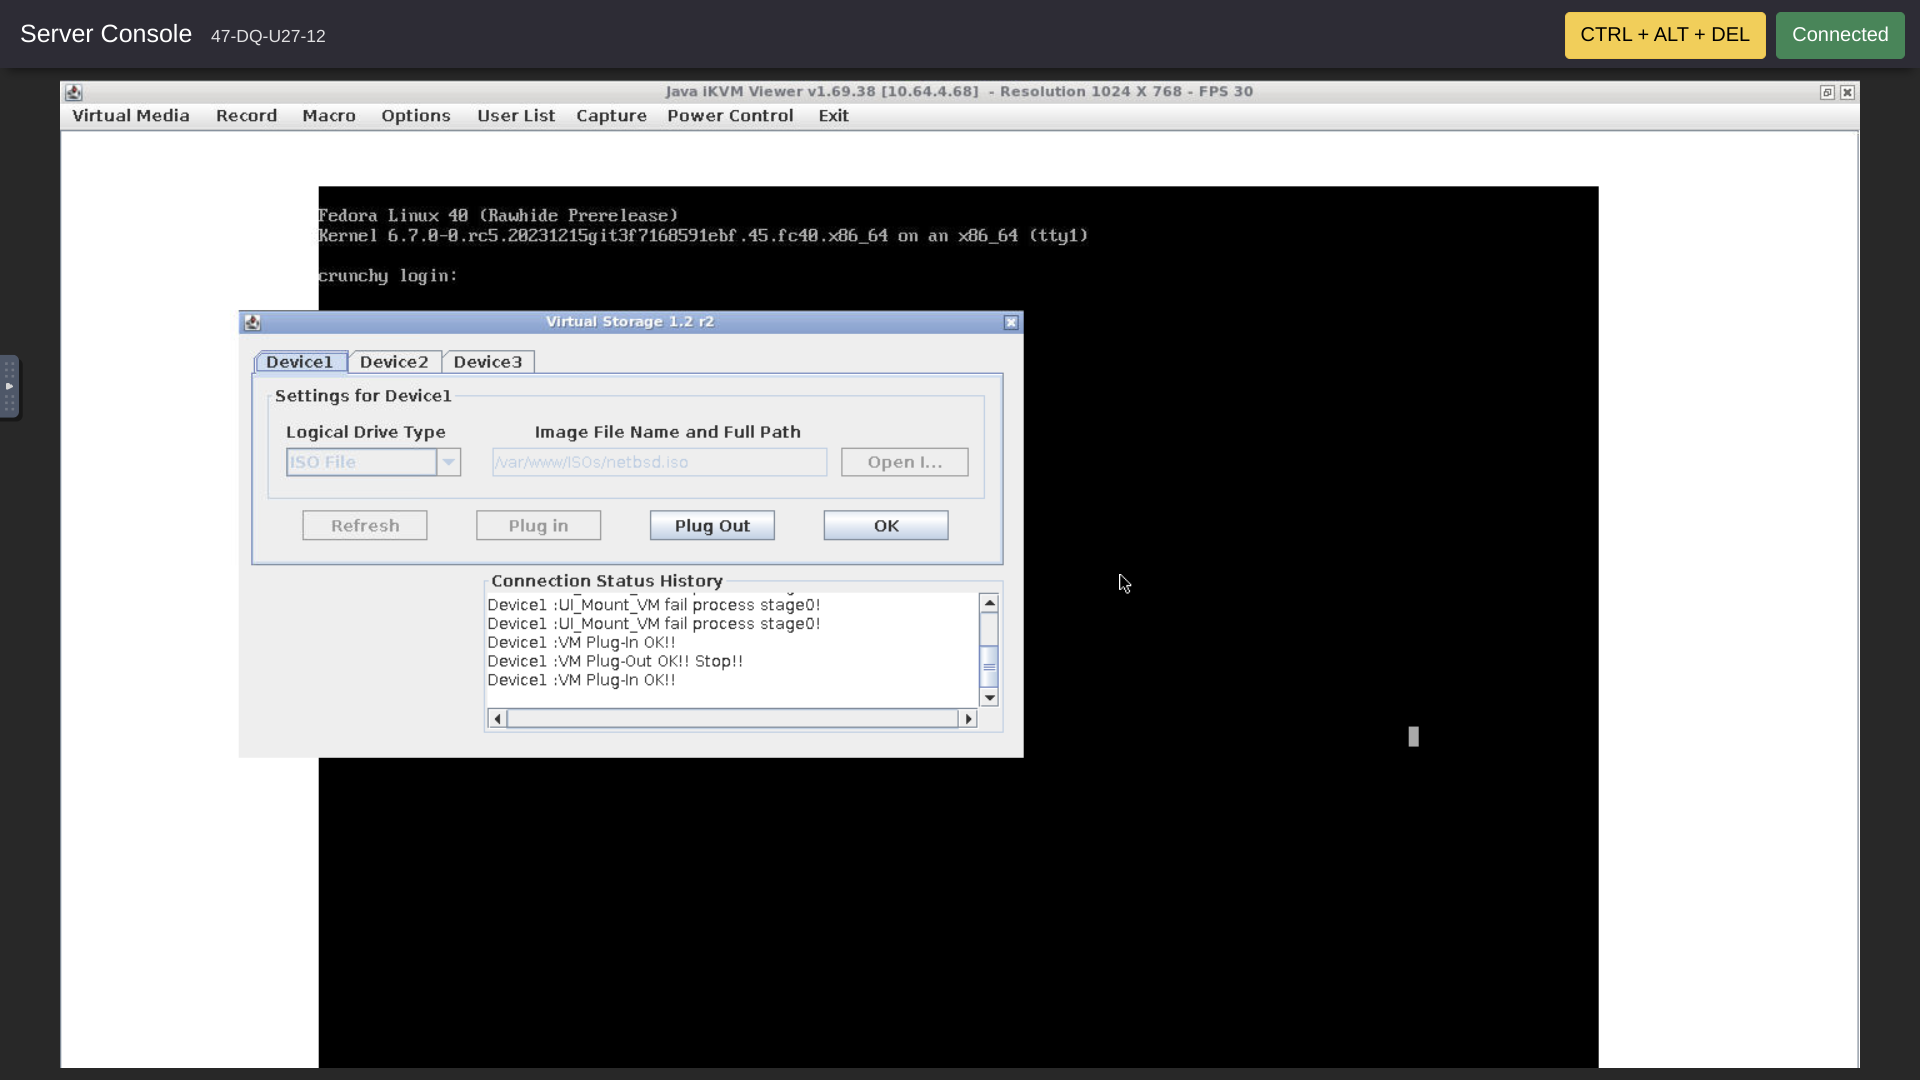
In the Virtual Storage dialog window, select ISO as the Logical Drive Type. Then, still in the Virtual Storage Dialogue window, we click on Open ISO (this choice shows as "Open I . . .").
A new "Open" dialog window appears. This window shows just one choice, ISOs. So, double click ISOs. Then we can see inside the ISOs folder. Find and select the netbsd.iso. Click the Open button.
Now we are back in the Virtual Storage dialog. The NetBSD ISO appears greyed out as /var/www/ISOs/netbsd.iso in the "Image Full Name and Full Path" box. It might be hard to see this in the screenshot.
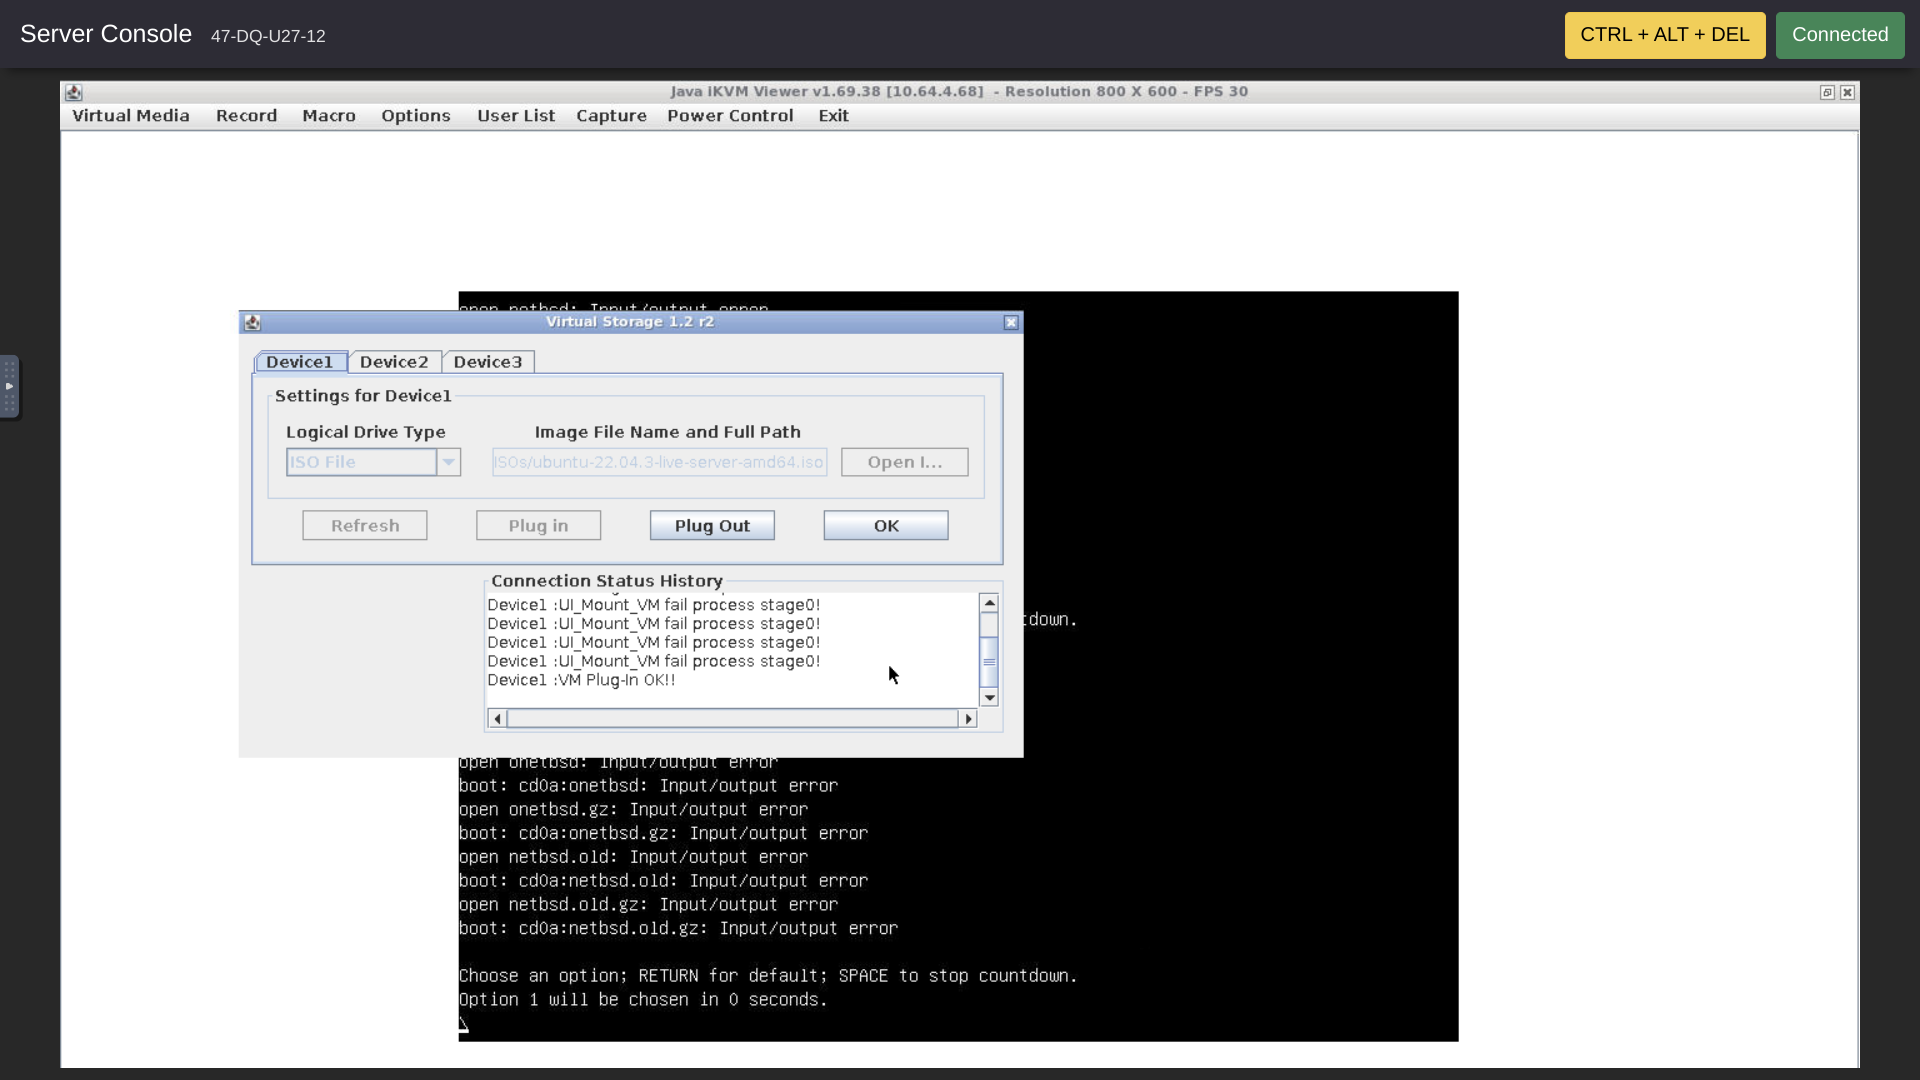
Finally we click the "Plug in" button to connect the ISO file to the virtual CDROM. After we click "Plug in," we see "Device1 :VM Plug-in OK!!"
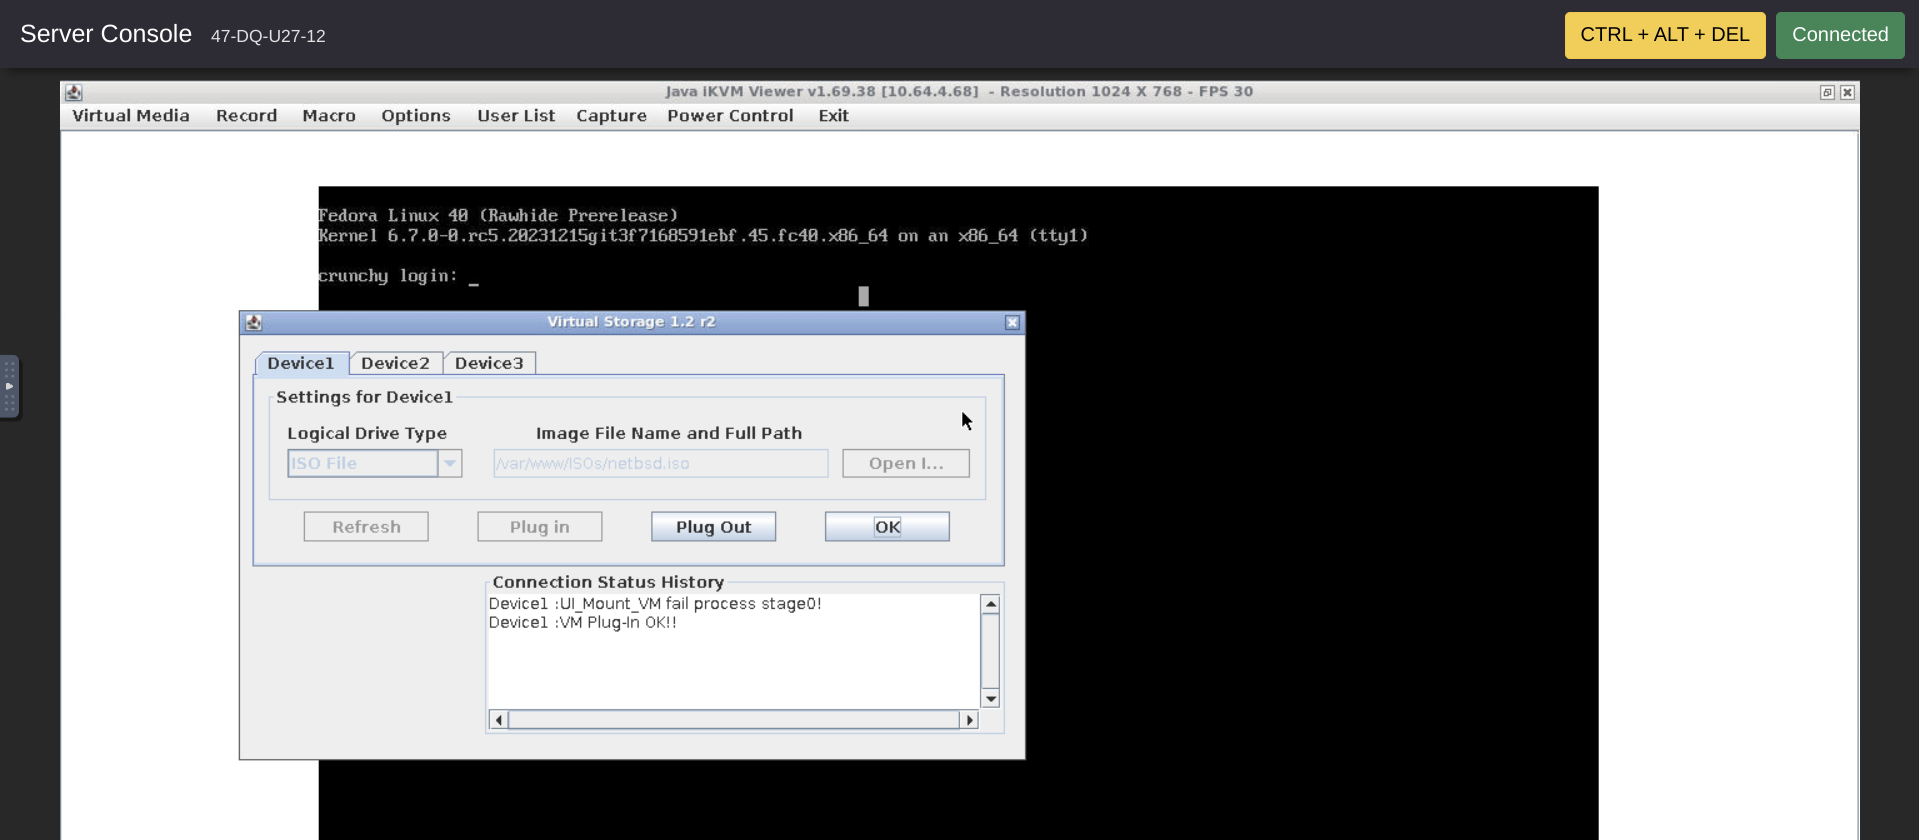
Click the OK button to close the Virtual Storage dialogue.
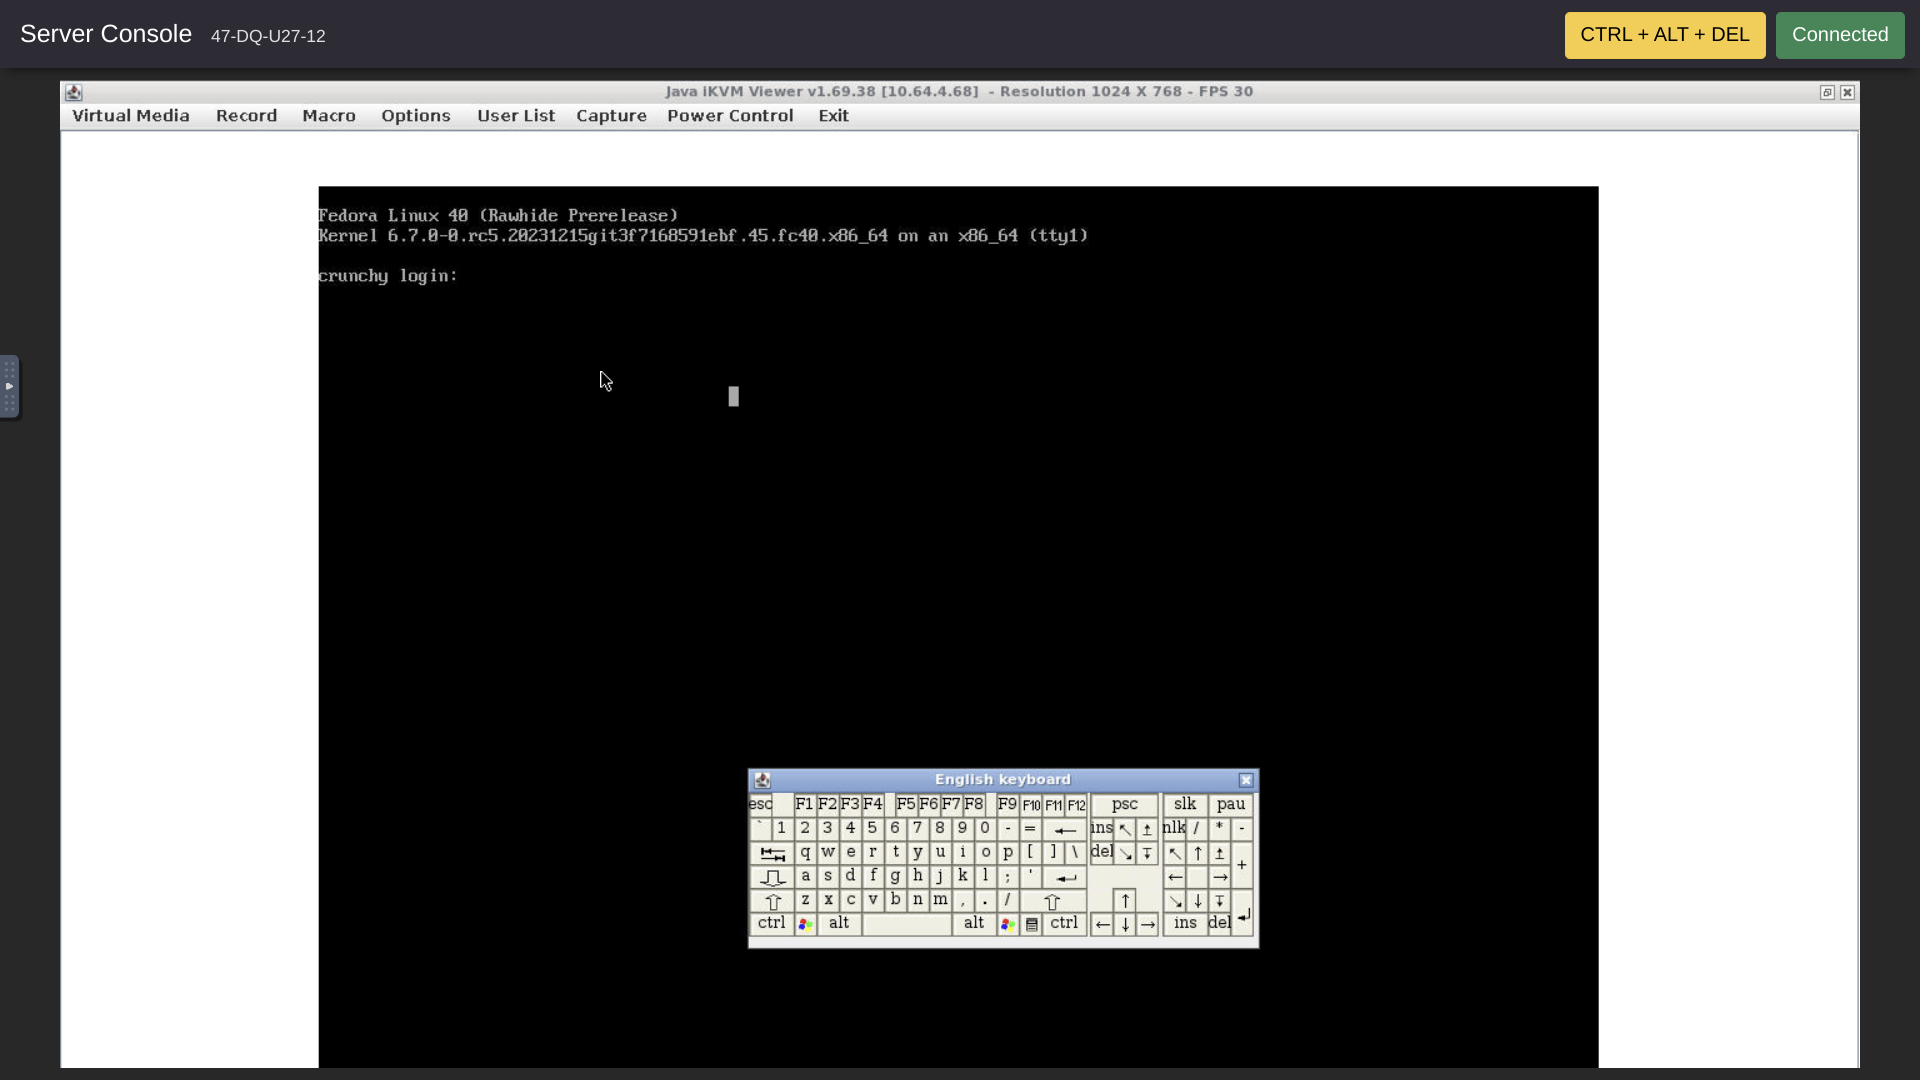
Step 5 -- Open the Virtual Keyboard
Here, from Chrome Browser on my daily driver Duet 5 Chromebook, it seemed that the next few upcoming steps did not work with my Chromebook's emulated function keys. Thus. I opened the IPMI's Virtual Keyboard.
In the Console top bar menu, click Virtual Media. Then click Virtual Keyboard. The keyboard shows in the Console Window.

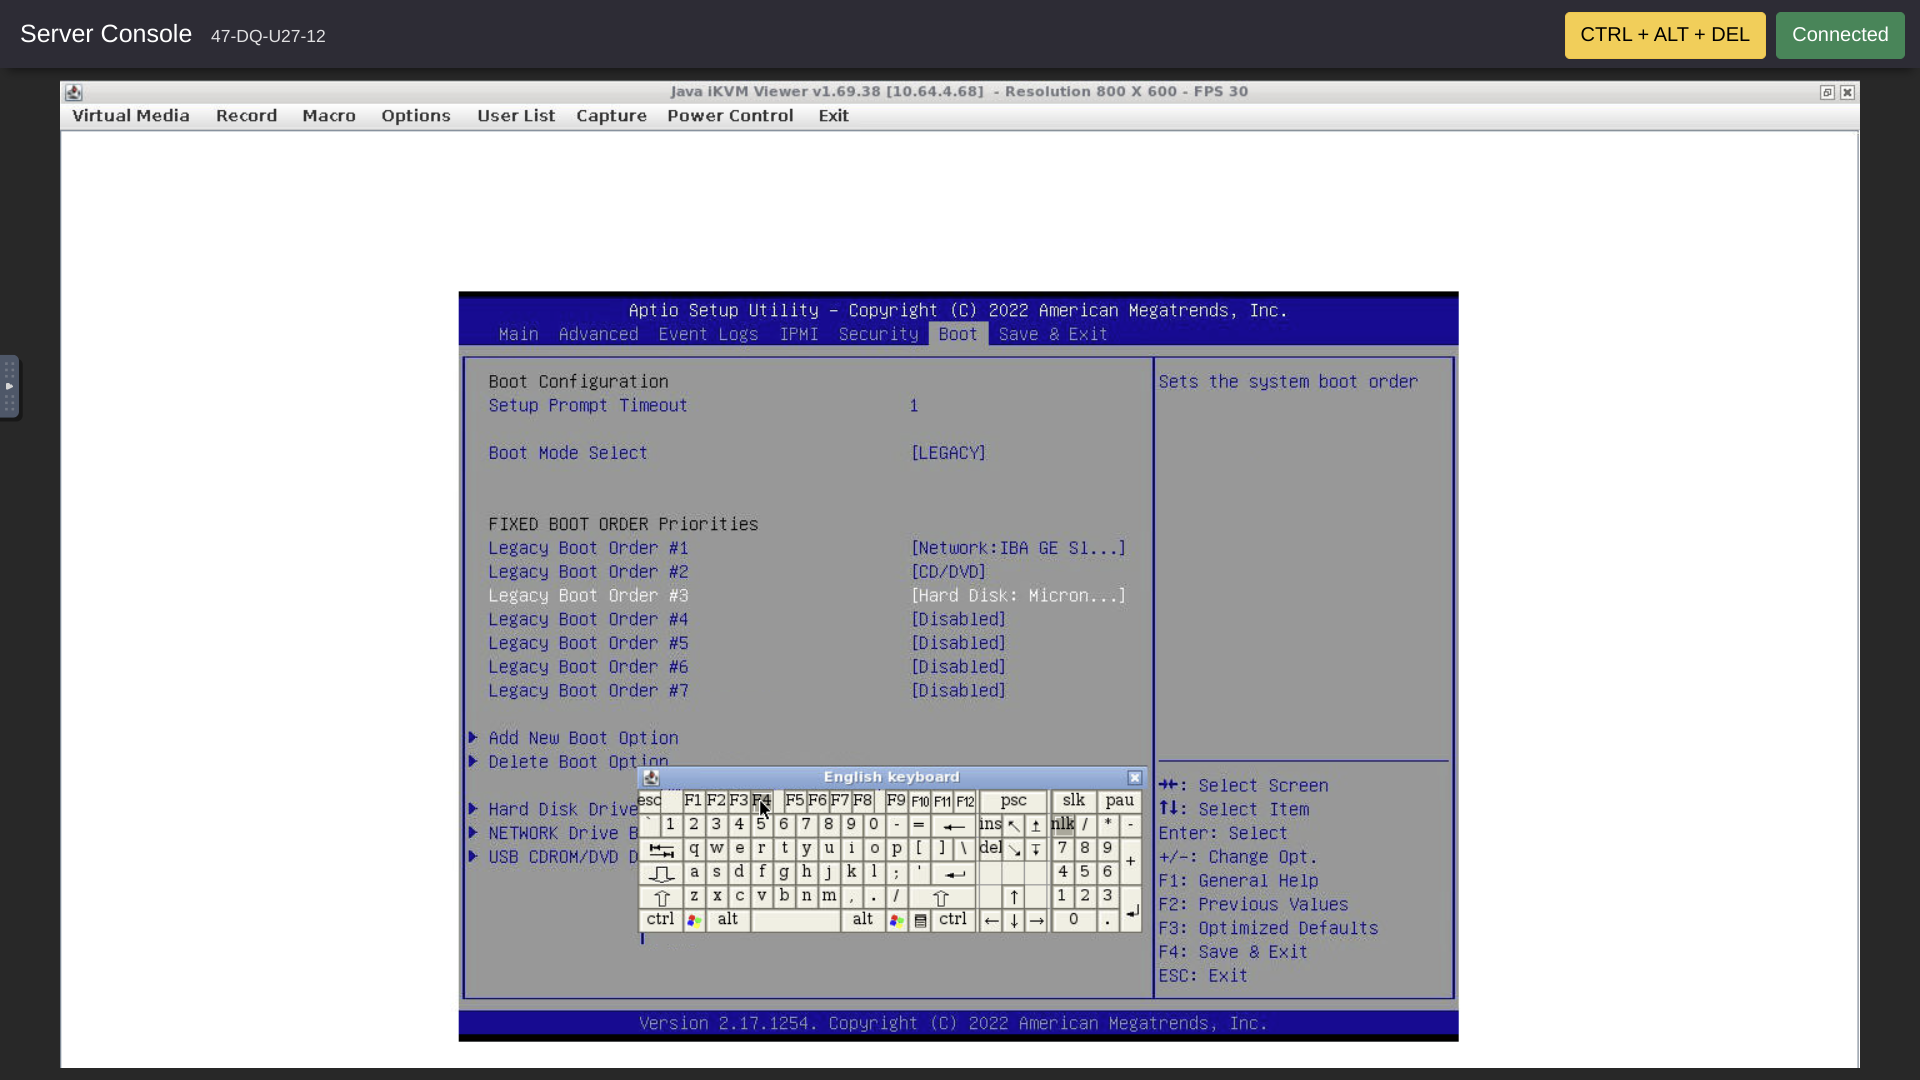
Step 6 -- Set BIOS Options To Permit Booting From CDROM
Our crunchbits server was delivered with her BIOS set to LEGACY. We need to reset the BIOS in order to work with an ISO image. If we later resume using the crunchbits auto-installed images, we need to revert our changes to the BIOS. So, let's launch the BIOS Setup and make a record of the initial settings where we started.
Of the various methods for getting into the BIOS, what worked here was to launch the virtual keyboard and spam the F11 virtual key during the reboot process.
To reboot the server, choose Macro in the top menu bar of the Console window. Then, choose Macro again and Ctrl+Alt+Del in the submenu. The big CTRL + ALT + DEL button in the upper right of the Console didn't seem to work for me, regardless of whether the Virtual Keyboard was open or closed.
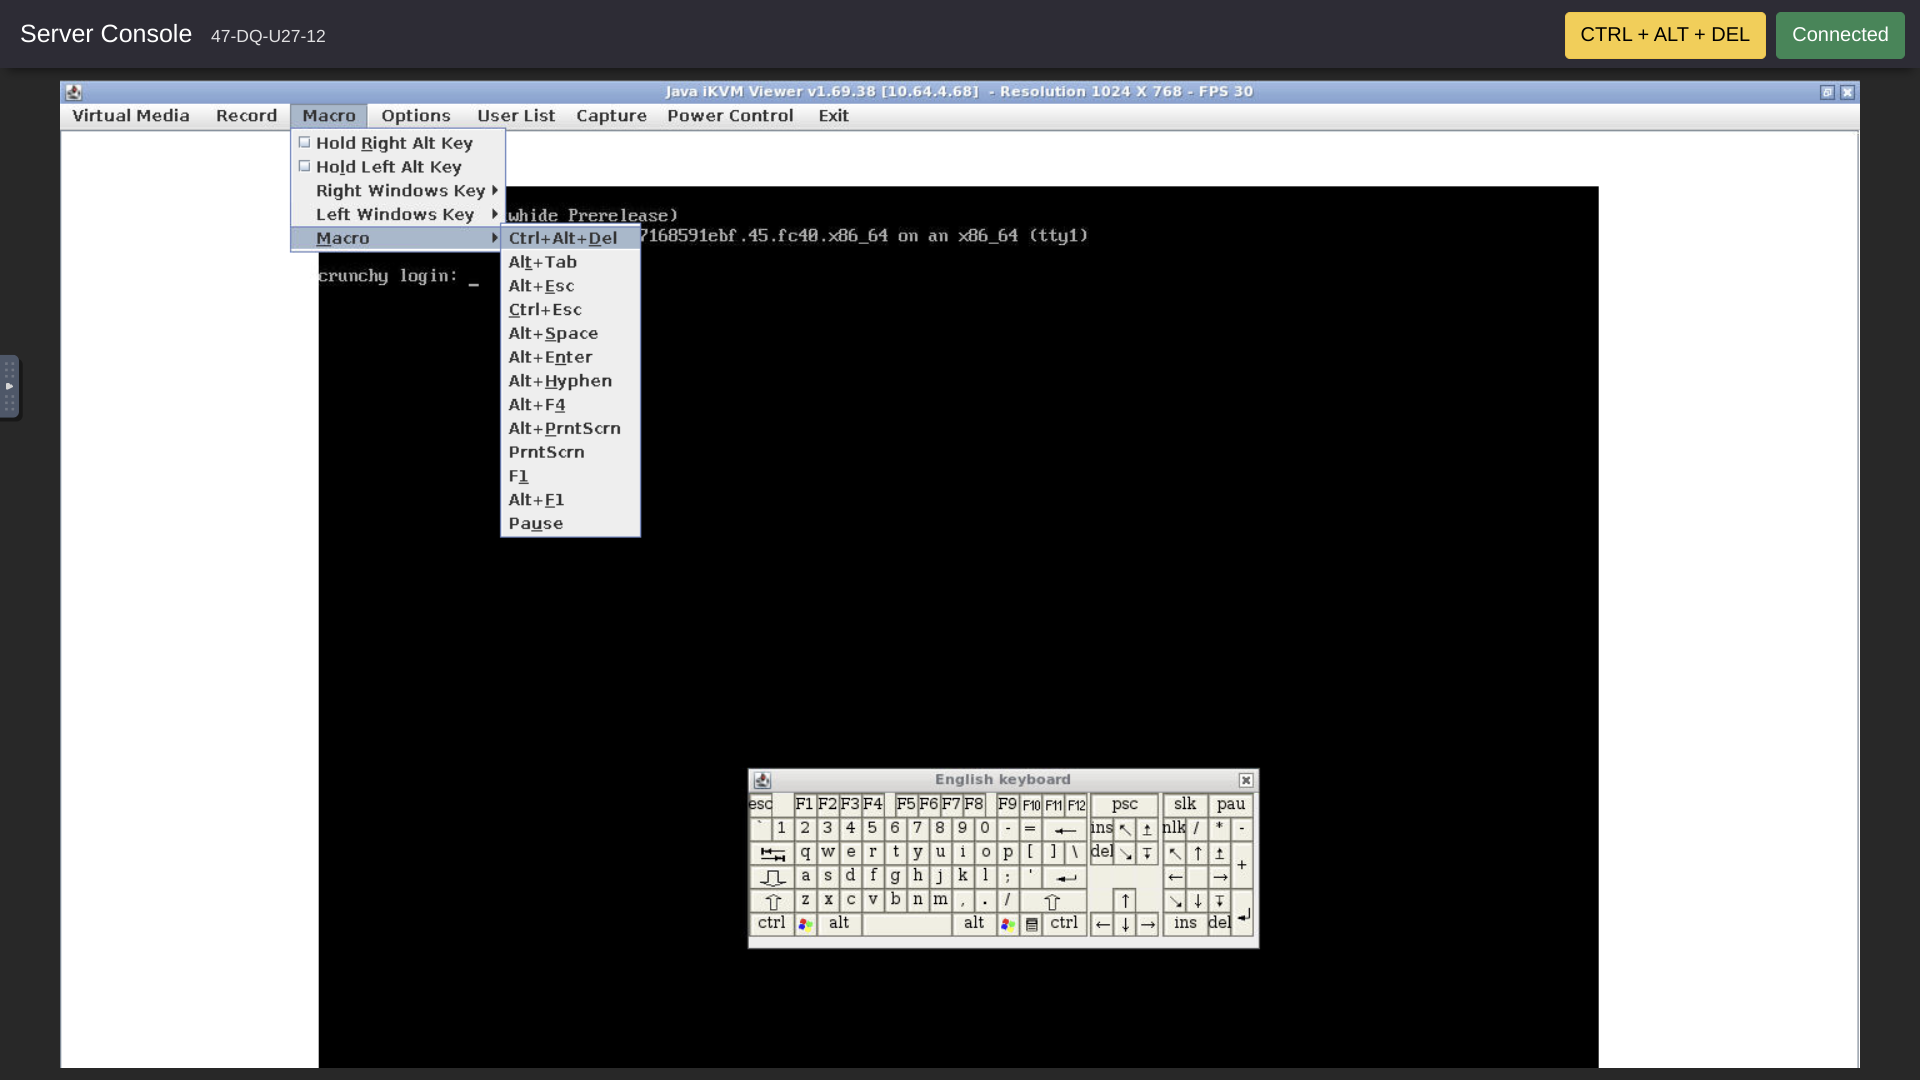
During the reboot, spamming the Virtual F11 key while the display keeps changing, brings us to the "Please select boot device:" menu. Here, we select Setup to enter the BIOS.
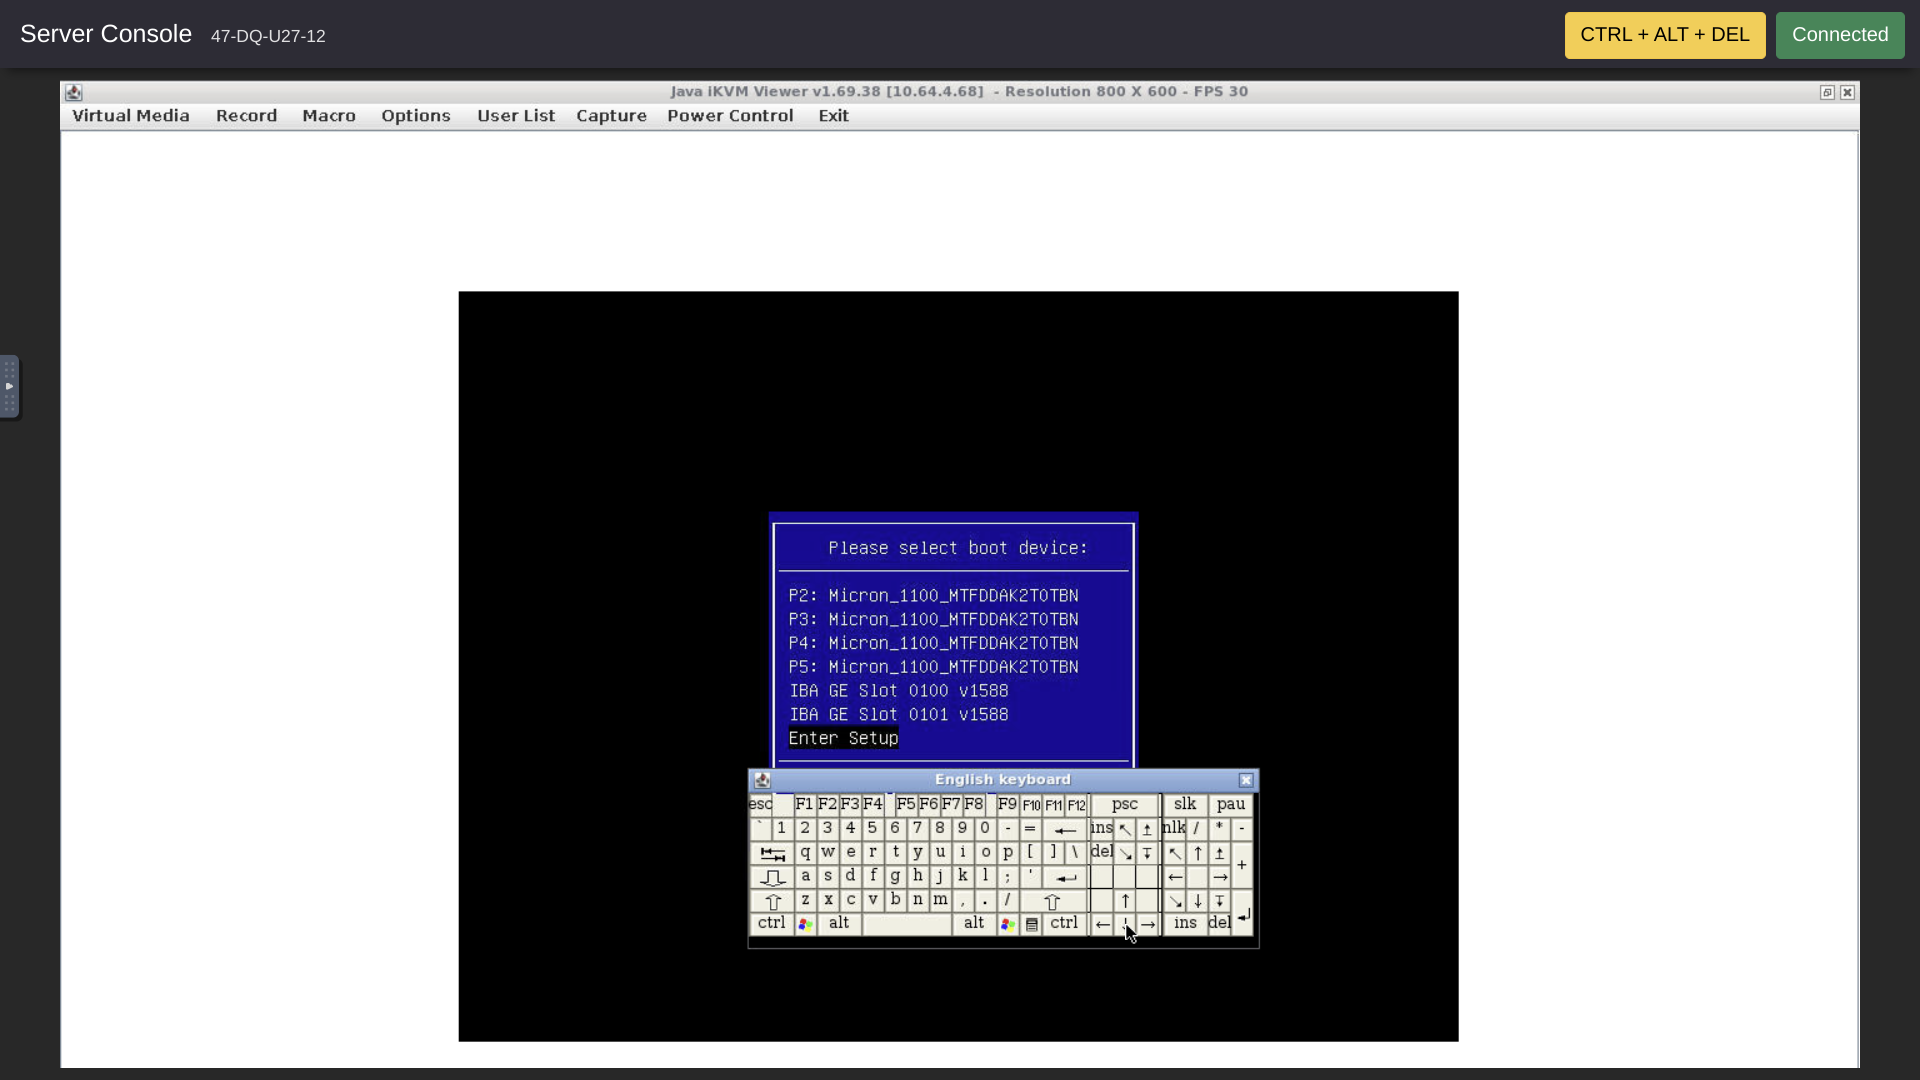
In the BIOS, use the Virtual right arrow key to move five steps from left to right across the top level Setup Utility menu from Main to Boot. Here we can see the boot sequence settings as our server was delivered by crunchbits. Again, we need to remember these settings if we decide to revert to using the crunchbits auto-installer. Again, note that the boot method originally selected is LEGACY.
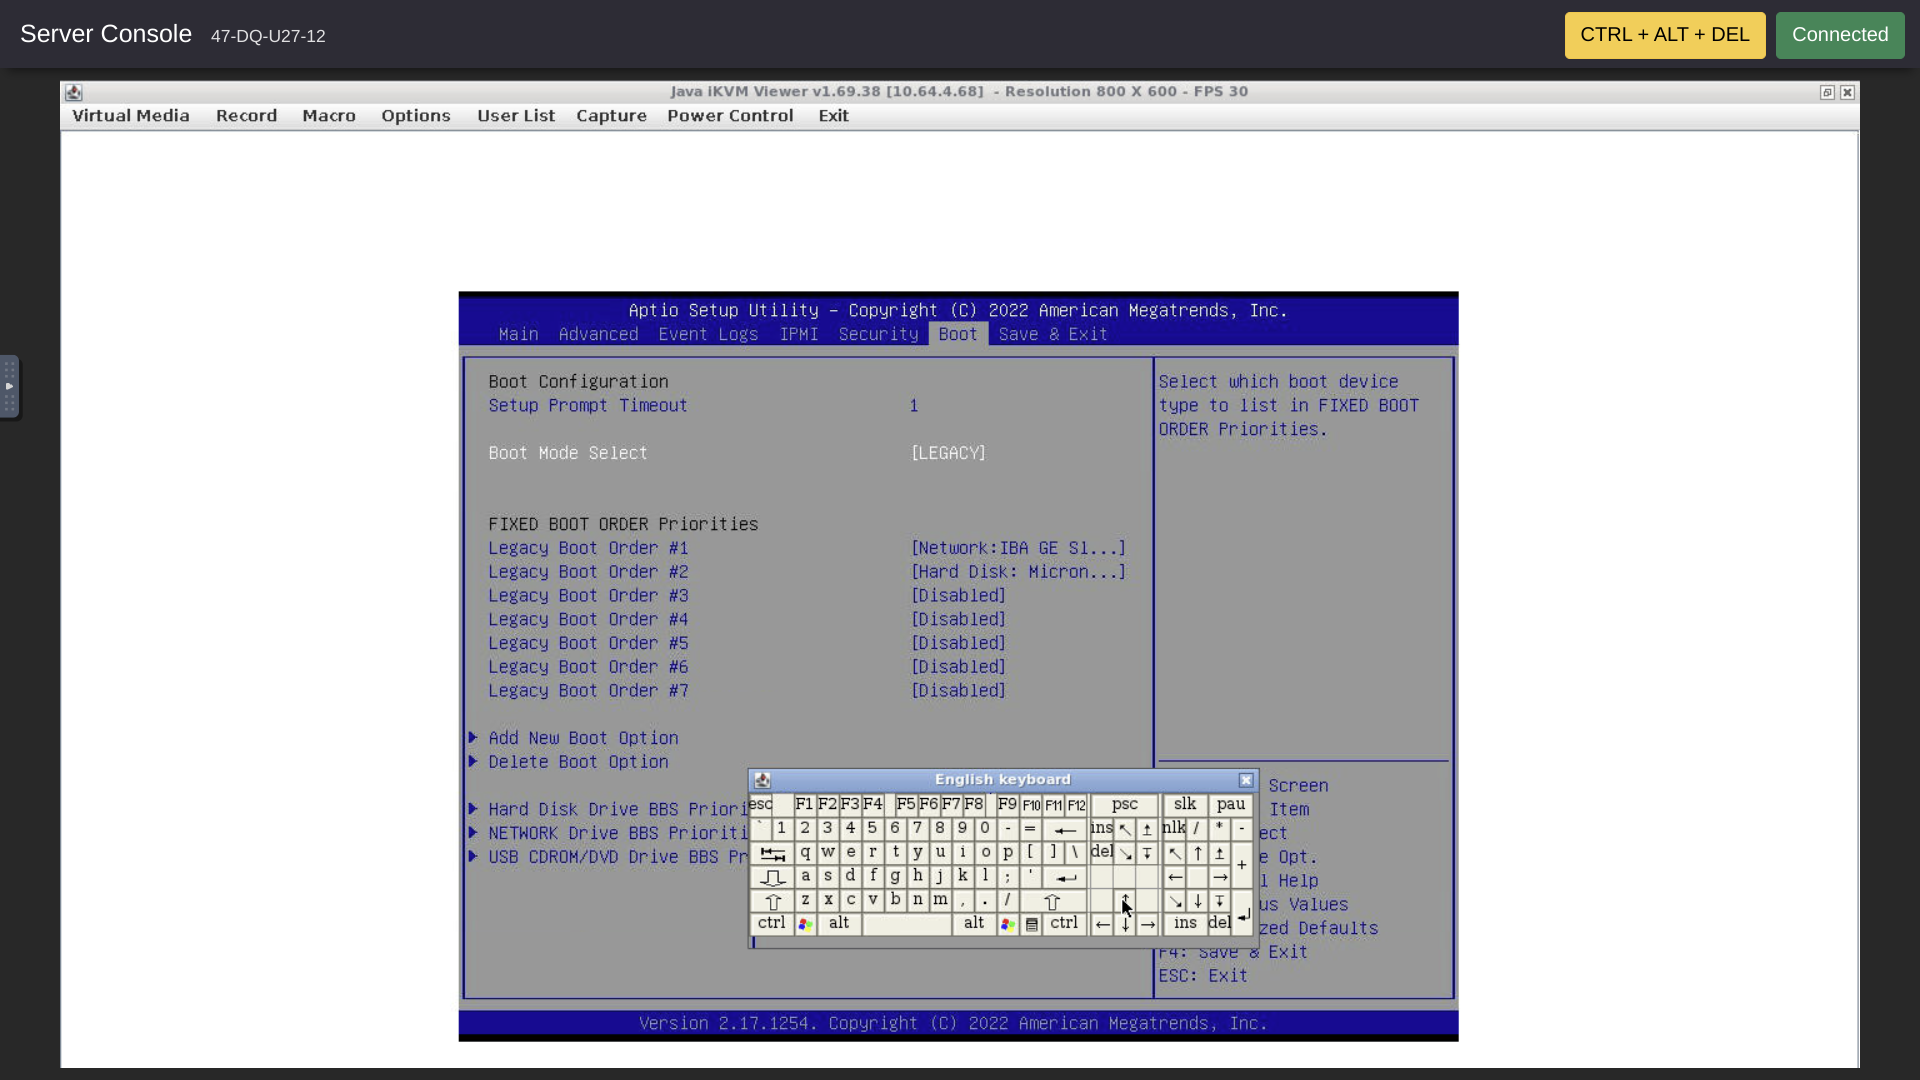
It would seem that Legacy BIOS boot mode should work for most ISOs. However, here, it seems necessary to change the boot mode to UEFI and also to position CDROM ahead of the Micron hard drives in our server. So, we use the virtual "+" key to change Boot Mode Select to UEFI.
Here, the single change in the boot mode automatically also changed the boot sequence to UEFI USB CD/DVD:U . . . + UEFI CD/DVD + UEFI Hard Disk.
Save and exit with the Virtual F4 key followed by the Virtual Enter key to select Yes.
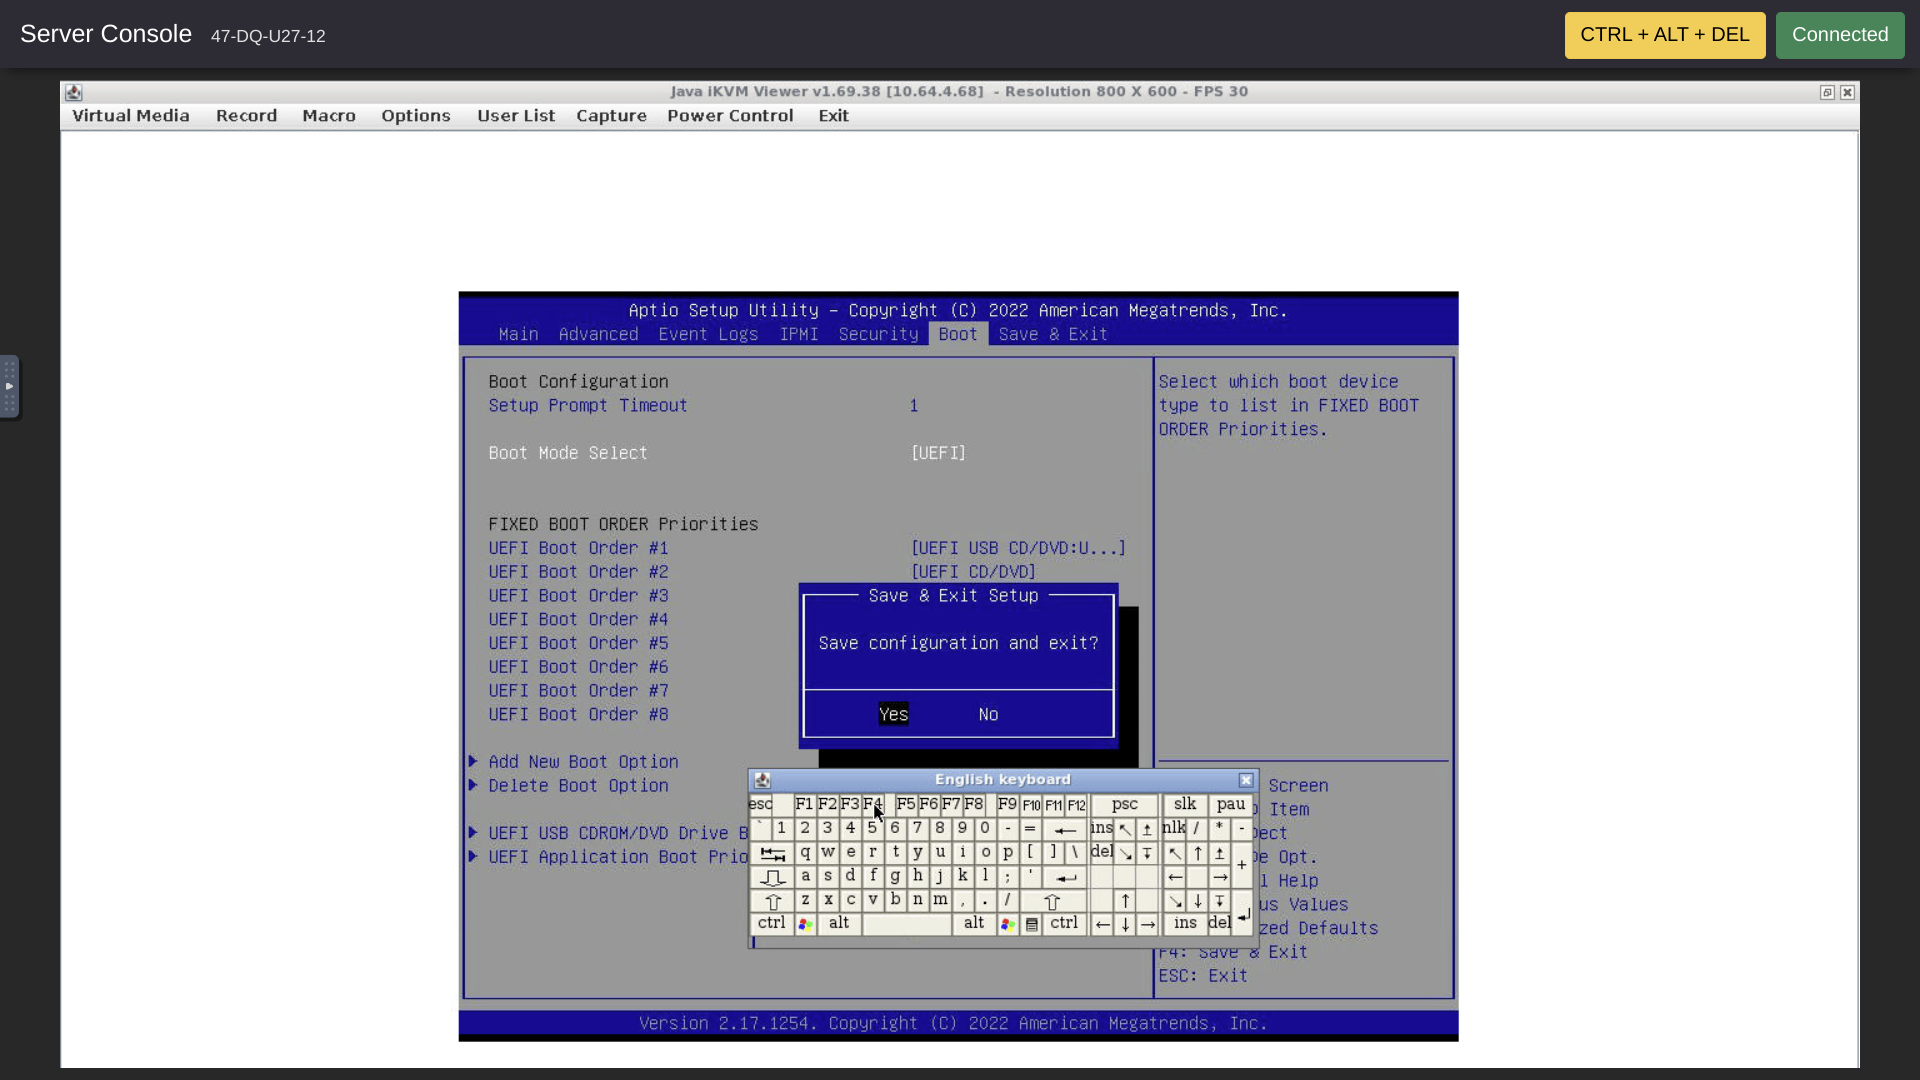
The boot sequence continues, and we see NetBSD beginning to boot.
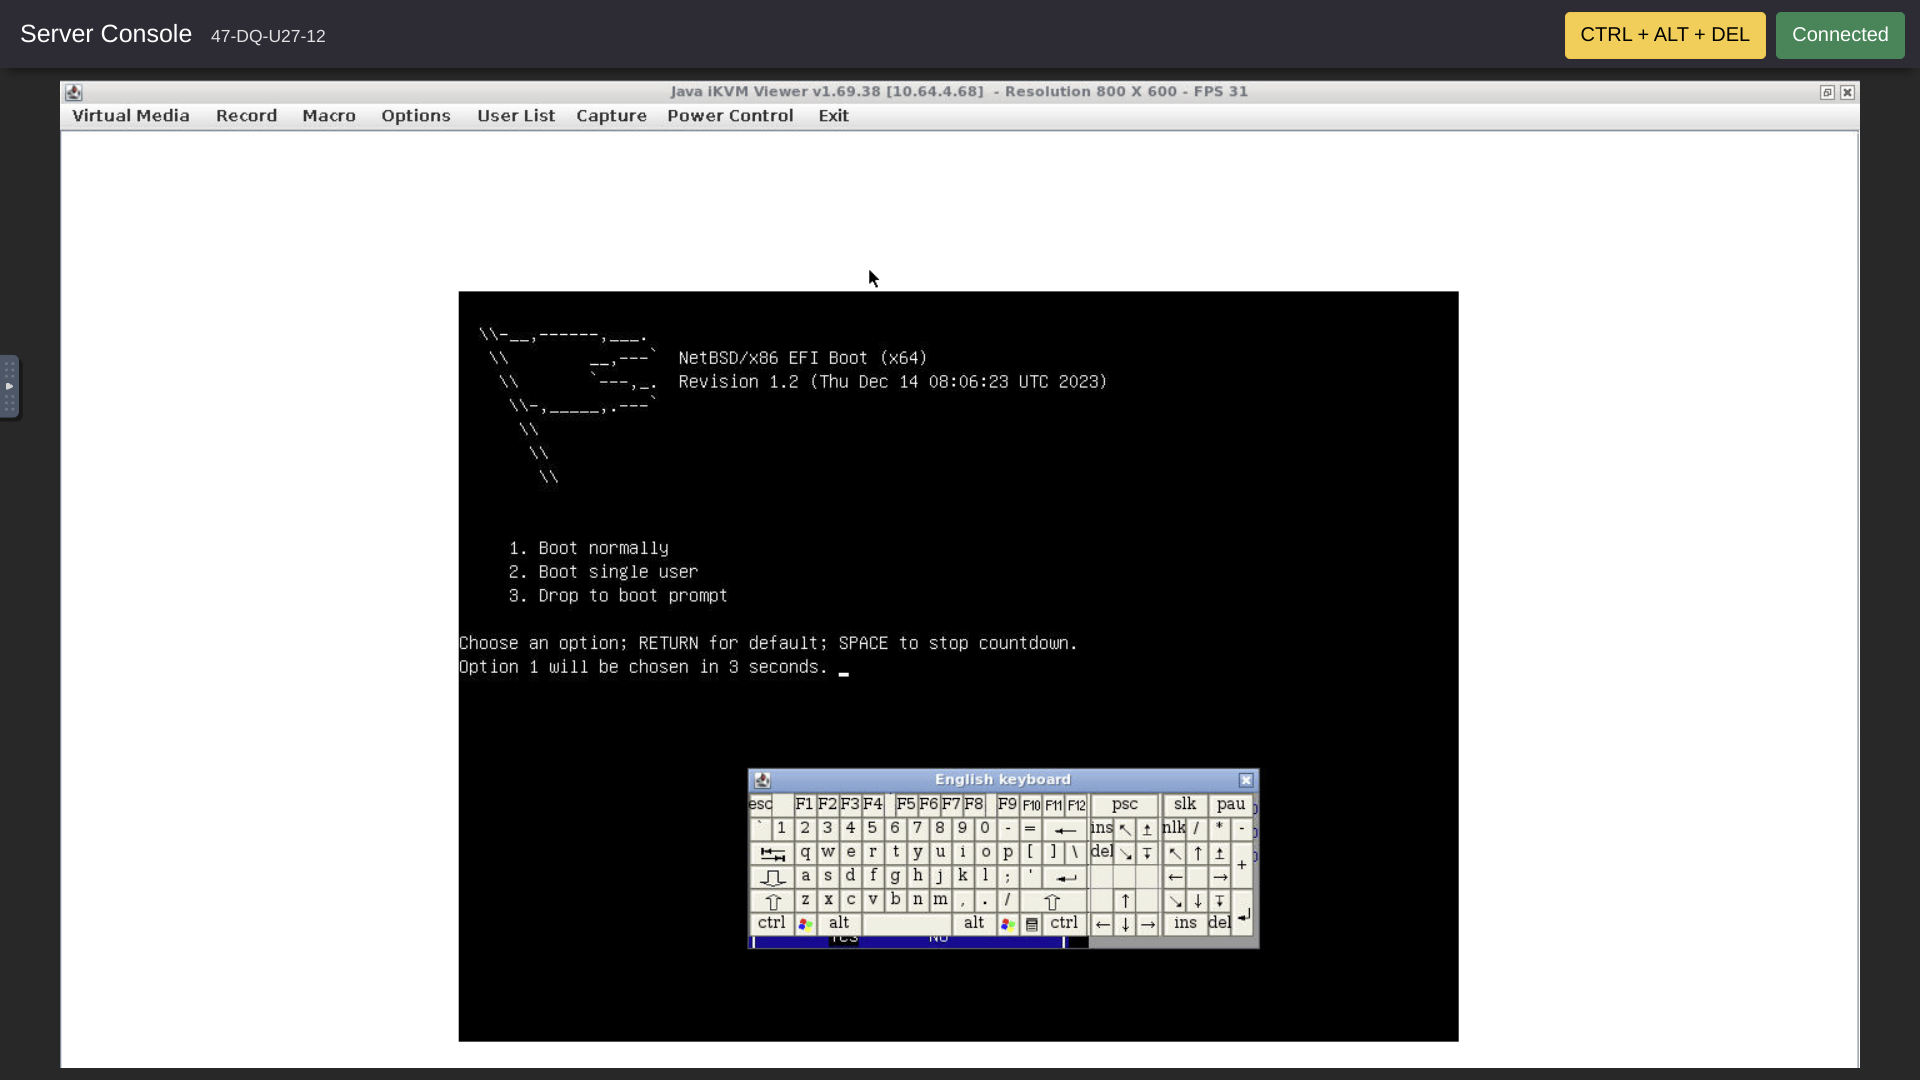
But . . . there seems to be an issue! I closed the Virtual Keyboard so it wouldn't block reading the error messages.
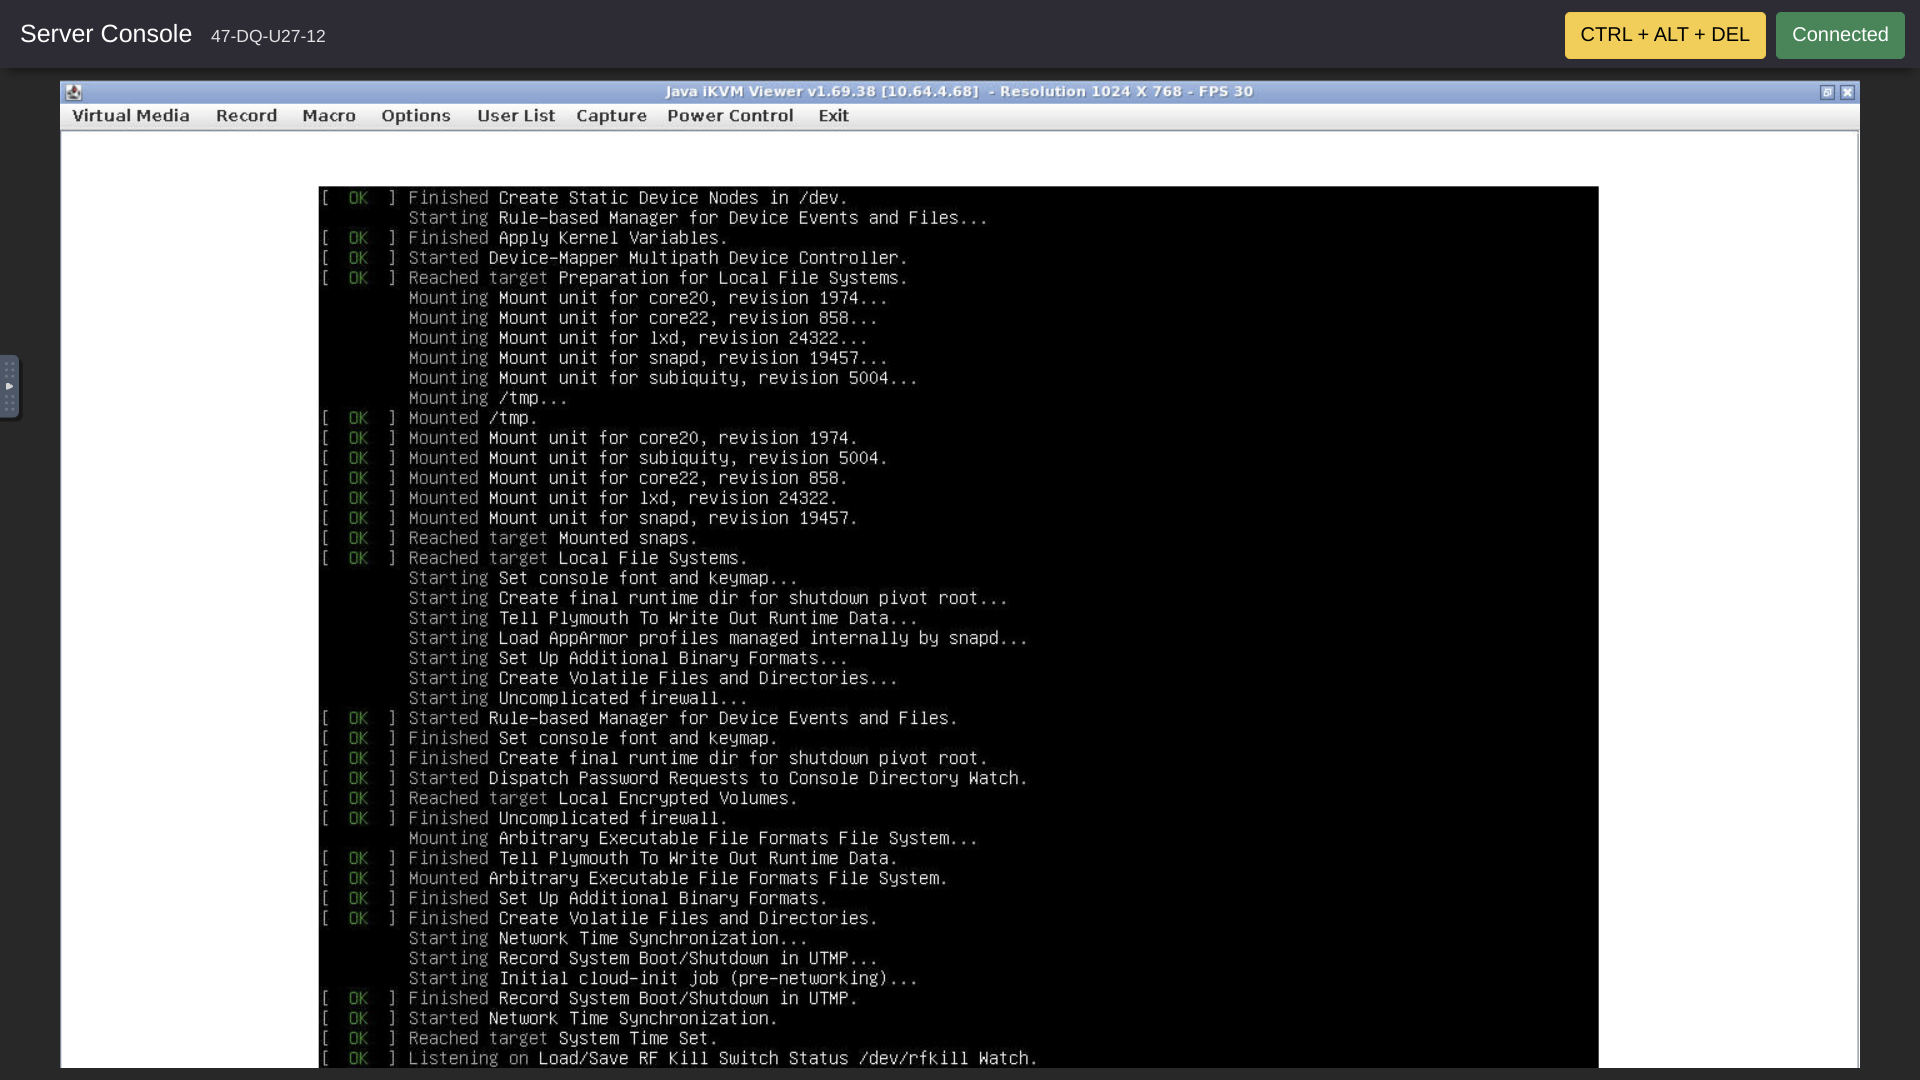
Step 7 -- Test With Known-Working Ubuntu ISO
I switched to the Ubuntu 22.04 ISO and tried that. Like NetBSD, the Ubuntu ISO began booting. It took awhile, but the Ubuntu ISO successfully got all the way through booting and beginning the install process.
Step 8 -- Re-try NetBSD
I re-tried NetBSD, but saw the same issue as before. ![]()
Step 9 -- Try Booting From NetBSD ISO With Legacy Mode
I tried the NetBSD ISO after changing the BIOS back to LEGACY and the boot sequence to Network + CD/DVD + Hard Disk.
The result was that crunchy booted back into her current Fedora Rawhide installation on the hard disks. In other words, apparently neither the network boot nor the hoped for CDROM boot worked with LEGACY.
I double checked to make sure the netbsd.iso was selected and plugged in.
Conclusion -- Help Request
Happily, all the IPMI shennanigans didn't hurt the existing install. Nevertheless, the hoped for NetBSD install failed.
Can some kind person please help me figure out what was going wrong with the NetBSD install?
Thanks so much! ![]()
I hope everyone gets the servers they want!
Comments
The best bet here is to summon crunchysupport @crunchbits
I asked a work colleague who knows NetBSD if he could help but halfway through reading the thread he died.
Interesting, I just checked that using the ISO from https://nycdn.netbsd.org/pub/NetBSD-daily/HEAD/202312141000Z/amd64/installation/cdrom/ I can successfully boot into the installer in a VM.
One thing you could try is to write the ISO to a spare hard disk partition and then try to boot from there. Once you are in the NetBSD boot manager, press "3" to get to the boot prompt. "dev" will list the devices it has detected, use "root" to set the root partition and then "boot hd1a:netbsd" (replace hd1a with the actual partition).
@cmeerw Double thanks for double checking the ISO!") Very kind of you!
Very kind of you! 
Of course the NetBSD daily ISO would be expected to change every day. There doesn't seem to be an easy way to download the ISO off the crunchbits staging server. Without that exact ISO, there doesn't seem to be an easy way to confirm that the ISO used in your VM test is the same as the ISO crunchbits had uploaded.
A feature request for the crunchbits platform might be to enable uploading and downloading of ISOs, checksums, and signature files by individual customers and freepers.") Especially freepers!
Especially freepers! ")
Next time through this, maybe I will copy the NetBSD ISO or whatever other ISO I want to one of my other servers and then ask crunchbits to load the ISO from there. At least I would retain access to a copy of the ISO used in the install.
We know that the Ubuntu ISO seems to work. Presumably all the other ISOs except our NetBSD ISO also worked. In a context where the existing ISO load process seems to work, at least for Ubuntu and for other ISOs, how would we expect the invalid file offset to be fixed just because we loaded the NetBSD ISO from a different medium? Isn't the file offset a property of the ISO itself and therefore should be independent of the media from which the ISO is loaded? So, does it make sense to ask what kinds of issues with the loading process itself might cause loading to work with most ISOs and fail with a single ISO?
Another puzzle in all this is how the NetBSD boot manager launches successfully in a situation where the boot manager itself then says the ISO file offset is invalid and that the boot manager can't find any files.
Both the puzzles seem to suggest an issue with the NetBSD ISO as it exists in the crunchbits ISO repo.
I think it would be great fun to try your suggestion about loading the NetBSD ISO from a hard drive partition!") It will be a different ISO since a few days have passed. It's good that I can grab the new ISO and put it on a hard drive myself without needing to ask crunchbits support for more freeper help!
It will be a different ISO since a few days have passed. It's good that I can grab the new ISO and put it on a hard drive myself without needing to ask crunchbits support for more freeper help! ") Let me see if I can get that to work. . . .
Let me see if I can get that to work. . . . ")
@cmeerw Thanks a lot for your wonderful help and kindness! @crunchbits Many thanks for crunchy!
  Much appreciated!
I hope everyone gets the servers they want!
The daily ISO actually hasn't changed. Your screenshot shows a timestamp of "Thu Dec 14 08:06:23 UTC 2023" and that's the one from https://nycdn.netbsd.org/pub/NetBSD-daily/HEAD/202312141000Z/ (and even still linked as latest).
I think it's at the stage where it is loading the kernel (or has finished loading the kernel) and then somehow sees an invalid offset just before handing off to that kernel. Why it would get into that state, I am not sure, but maybe the "virtual CDROM" for the ISO image behaves in a way that's incompatible with NetBSD?
Let me give the answer that any tech will give: Custom ISO, *BSD on top of it, enjoy your unmanaged learning")
Not possible. Within a week we'd have 9TB of junk ISOs scattered about. The different systems (i.e. IPMI network) are also fully firewalled and internal-only for security purposes. Would never open those up to allow public-at-large direct uploading.
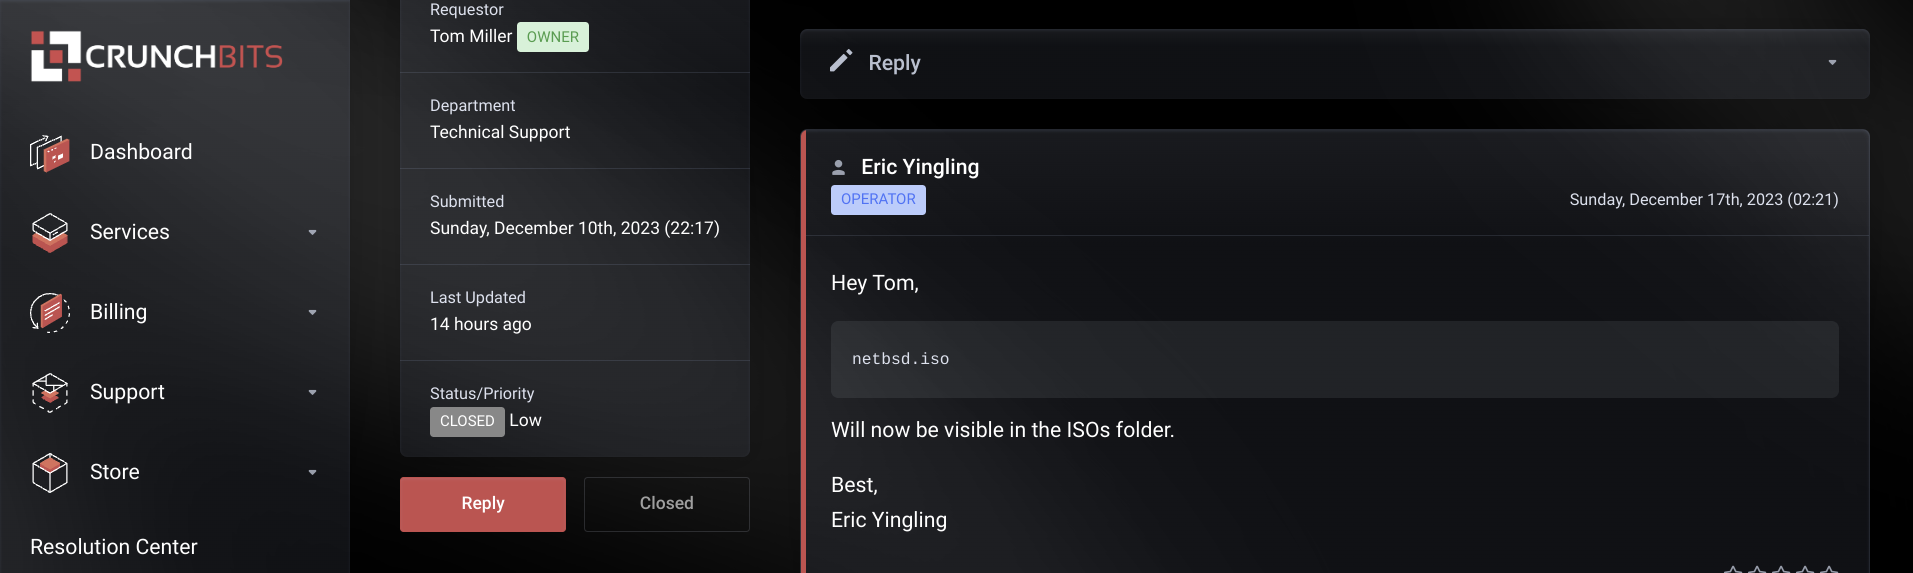
ISO was what was linked (boot.iso iirc, since I did it). Downloaded to our staging, checksummed, moved to live ISO folder, re-checksummed, good to go.
Crunchbits.com
See, my faith that crunchbits checked the checksum was justified and justified since they checked and checked. Thanks and thanks!

I hope everyone gets the servers they want!
@cmeerw "Spare hard disk partition" you say!? Hmm . . . radium has two spare "altroot" partitions! Maybe one for the installer and one for the install?
Significant difference: unlike crunchy, radium doesn't have the constantly available console.
Maybe Linux could reformat one or both the altroots in a file system readable by NetBSD??? Then place the NetBSD kernal and userland binaries in the altroot, make the altroot bootable, and ask grub to boot NetBSD from it? Or put the NetBSD ISO in one of the altroots and ask grub to boot from the ISO?
What I was going to do was wipe a server, maybe crunchy, then something like dd the NetBSD ISO to a drive, then install NetBSD to another drive. Then I remembered about radium's altroots.
How and on which server might it be best to proceed? Use radium's altroots or wipe crunchy or something else? Thanks!")
I hope everyone gets the servers they want!
You'll at least need a console for the installation itself.
I don't think you can write a NetBSD filesystem from Linux, but you can
ddthe NetBSD ISO into one of the partitions and then hopefully boot from that partition via grub.As you have two partition, you can, of course, just use those, but you could also just split one of the partitions, so you don't waste 100GB for a 300 MB ISO image.
Once you get into the NetBSD bootloader, it might not be able to figure out which partition it actually is in, so maybe you then need to tell it where to find the kernel and the root partition.