Installing Proxmox VE 6.2 at SoYouStart
Installing Proxmox VE 6.2 at SoYouStart
How to (almost) become a Hosting Provider for only US$29.95 and in only 20 minutes
Contributed by @Not_Oles -- June 21, 2020
Introduction
Every interaction with a website requires a client (often a web browser) and also a server. Servers are computers on the internet which transmit content in response to requests sent by clients. The server which supplies the specific content responsive to specific requests often is called the host for that content. Thus, a hosting provider is a person or a company which provides servers that can host content.
OVH, SoYouStart, and Kimsufi
OVH, an international company based in France, is an example of a hosting provider. As of 2017, OVH had over 2,000 employees, 27 data centers worldwide, and over 300,000 active servers.
In addition to selling under its own name, OVH also has two additional brands: SoYouStart, which provides less expensive servers, and Kimsufi, which provides very low cost servers.
As appropriate in the world of Low End Spirit, we will be working here today with one of the lowest cost SoYouStart servers. Our server was rented as a great Boxing Day deal for just US$29.95 per month.
Here are our server's specs: SYS-LE-1 Server - Intel Xeon D-1521 - 32GB DDR4 ECC 2133MHz - 2x 2To HDD SATA Soft RAID. SoYouStart servers are advertised as 250 Mbps bandwidth, which is symmetrical and unmetered. However ssssh! a few SoYouStart servers seem to be being delivered with 500 Mbps or even 1 Gbps.
Avoiding waste of server resources
Even our inexpensive SoYouStart server is bigger and more powerful than what is needed for the majority of websites or web services. And a latest generation web server might offer ten or twenty times the power of ours. Thus, to avoid the waste of server capacity which would result if each website or web service each had to use its own, individual dedicated, bare metal server, many methods have been developed for sharing or "virtualizing" server capacity.
Proxmox Virtual Environment
Proxmox Virtual Environment ("PVE") is a free, open source server virtualization administrative system from an Austrian company. Proxmox has seen wide adoption. Proxmox software is designed to divide and share bare metal host servers and their resources among multiple virtual private servers (VPS). Proxmox VE 6.2 was released on May 12, 2020.
Proxmox offers a Graphical User Interface ("GUI") through which one can administer, via a web browser, Proxmox itself as well as Proxmox host servers ("nodes") and VPSes installed by Proxmox. Proxmox has an extensive wiki and an active forum. Proxmox paid support subscriptions are available.
Proxmox is programmed in the PERL ("Practical Extraction and Report Language") programming language. Because Proxmox is programmed in PERL, Proxmox VE users have, in addition to the GUI, the option of controlling everything via the traditional command line interface ("CLI").
The SoYouStart Control Panel
OVH is a Proxmox Hosting Partner, and Proxmox is available on the SoYouStart Control Panel for install as one among the many OVH supported operating systems.
Besides installing supported operating systems, and somewhat similar to the OVH and the Kimsufi control panels, the SoYouStart Control Panel includes facilities for:
- Rescue Mode -- booting the server into an entirely memory resident operating system
- Netboot -- booting the server's resident operating system on a kernel obtained over the network
- IPMI -- Intelligent Platform Management Interface, Supermicro's method of managing the server remotely, sometimes referred to as Keyboard, Video monitor, Mouse (KVM)
- Failover IP assignment and transfer -- add or remove additional IP addresses or transfer IP addresses from one server to another
- Setting Reverse DNS
- Real time server monitoring
- Backup
- Quite a bit more
One possible advantage of using Proxmox on OVH is that the Proxmox OVH install seems to use kernels from Proxmox instead of the OVH-customized, real time monitoring-enabled kernels present in the OVH-Control-Panel-installed versions of some other operating systems. On Proxmox, one thus gets newer kernels faster, while paying the price of losing OVH's real time monitoring in the OVH Control Panel. As of this writing, the Proxmox kernel version is SMP PVE 5.4.44-1 (Fri, 12 Jun 2020 08:18:46 +0200) x86_64, while the latest OVH version is 4.19.128.
Proxmox OS Install process
We're now going to run through the Control Panel's Proxmox install process,. Note that installing Proxmox is quite similar to installing any of the other supported Operating Systems. So, for example, if you wanted to install Debian or Ubuntu or CentOS, the install process looks very much the same. Indeed, Proxmox runs on Debian, and so a Proxmox install basically is an extended Debian install.
What really does look quite different, however, and lies beyond today's scope, is installing an unsupported OS like OpenBSD by using the Rescue System or the IPMI. Suffice it to say that almost anything compatible with the hardware should be installable and should work just fine, though getting it installed and working sometimes can be quite tricky.
Starting the Install
On a newly rented server the first view of the Control Panel shows a pop-up flagging the Reinstall button along with a message saying something like, "Your server is ready to be installed." On a server which already has had an install, we begin by clicking the Reinstall button in the upper right:

Default or Custom Install
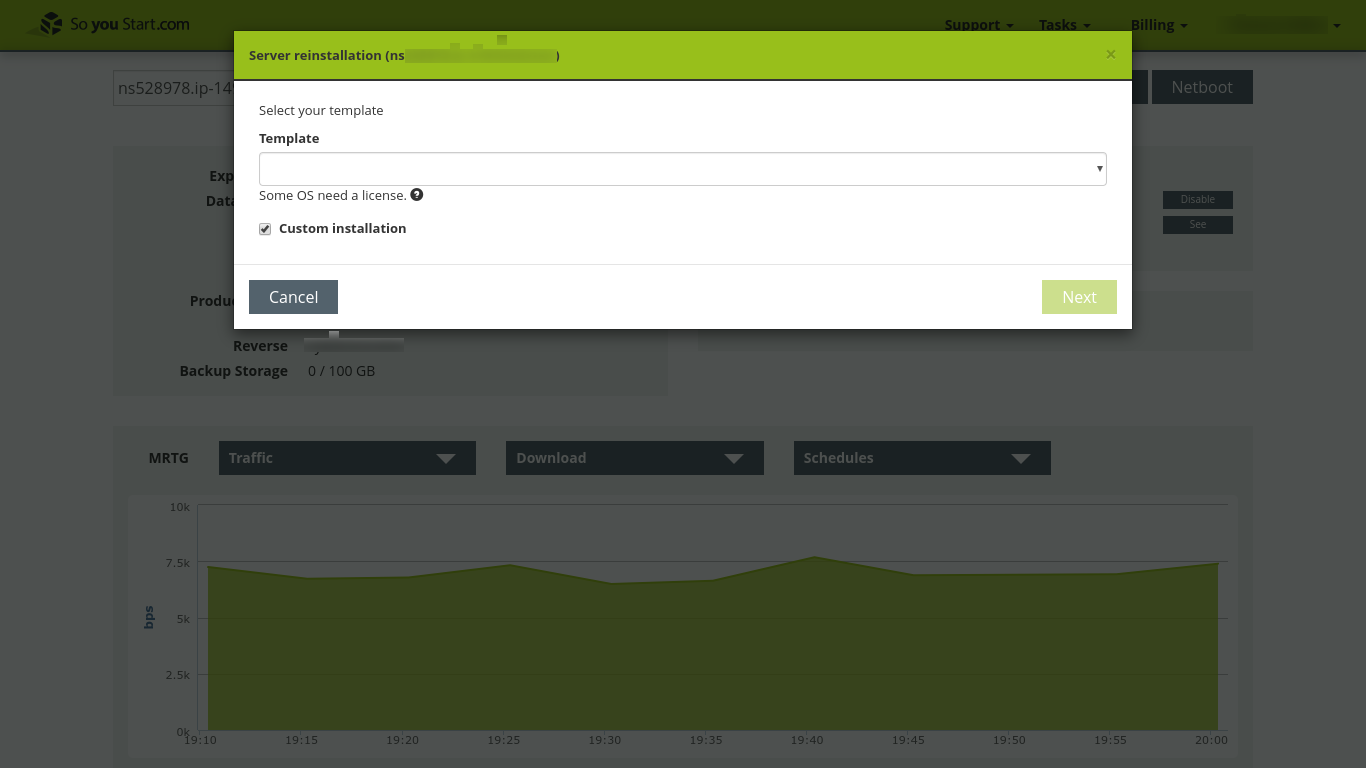
The Installer presents us with an opportunity to select the default install or a custom install. The default install simplifies the whole processes by bypassing the opportunity to change the disk partitioning. The defaults are fine for many people, but maybe we will want to make a change, so, let's check the box for "Custom Installation:"
OS Template selection
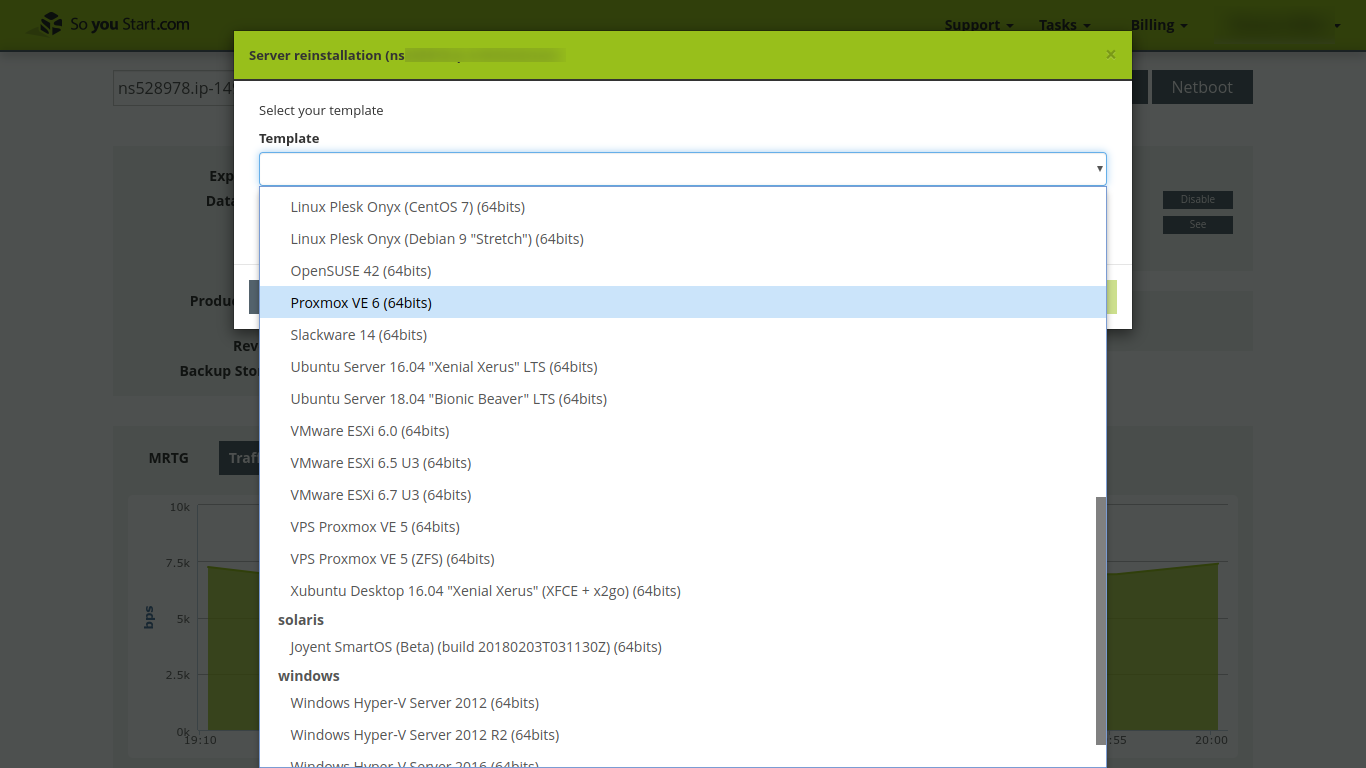
Next we select the Proxmox VE 6 operating system template. Note that previous versions of Proxmox also are available further down the list. If we were installing another supported operating system besides Proxmox, this is the place where we would select it.
Disk RAID, partitioning, and formatting
At the disk partitioning and formatting stage, we have the opportunity, on servers with more than one disk, to use the disks redundantly. When one disk constantly is mirroring another disk in a Redundant Array of Independent Disks (RAID), we always have two copies of all our data. When one disk fails, our data is safe on the mirror disk. The cost of RAID, with two disks total, is a 50% reduction in disk capacity.
For production, many people, including me, would enable RAID. Thus, the default of the OVH installer is to have RAID Level 1 mirroring enabled. RAID 1 mirroring requires two disks.
But, here, for our non-production, test server, not using RAID 1 will double our disk capacity and also might permit us to test, on the second disk, additional partition types, file systems, or operating systems not available through the OVH installer. So, here, let's disable RAID 1 by clicking the checkbox for "Install on the first disk only."
If you want to keep RAID 1 enabled, simply leave the "Install on the first disk only" checkbox unchecked.
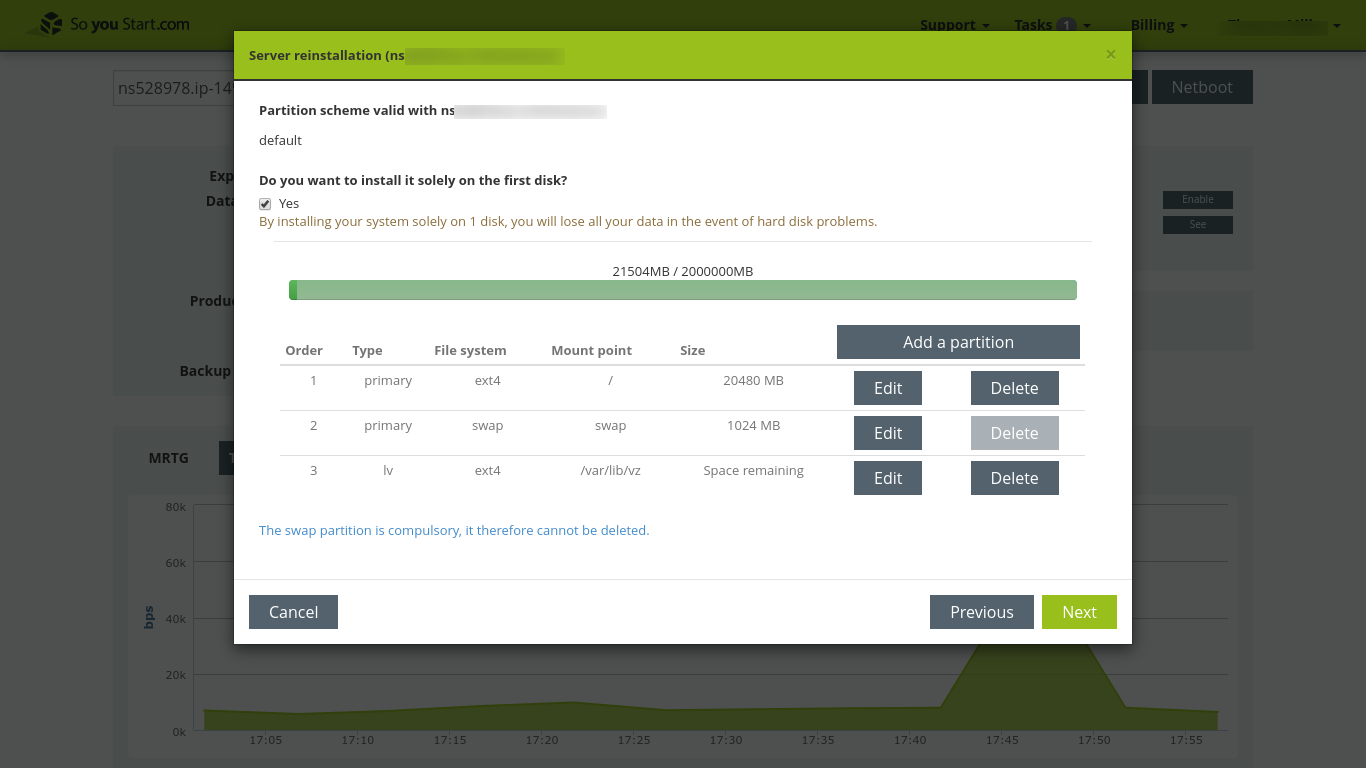
Next, we review the default partitioning scheme and make any desired changes. With First Disk Only selected the default partitioning scheme is as follows:
| Order | Type | File system | Mount point | Size |
|---|---|---|---|---|
| 1 | primary | ext4 | / | 20000 MB |
| 2 | primary | swap | swap | 1024 MB |
| 3 | lv | ext4 | /var/lib/vz | Space remaining |
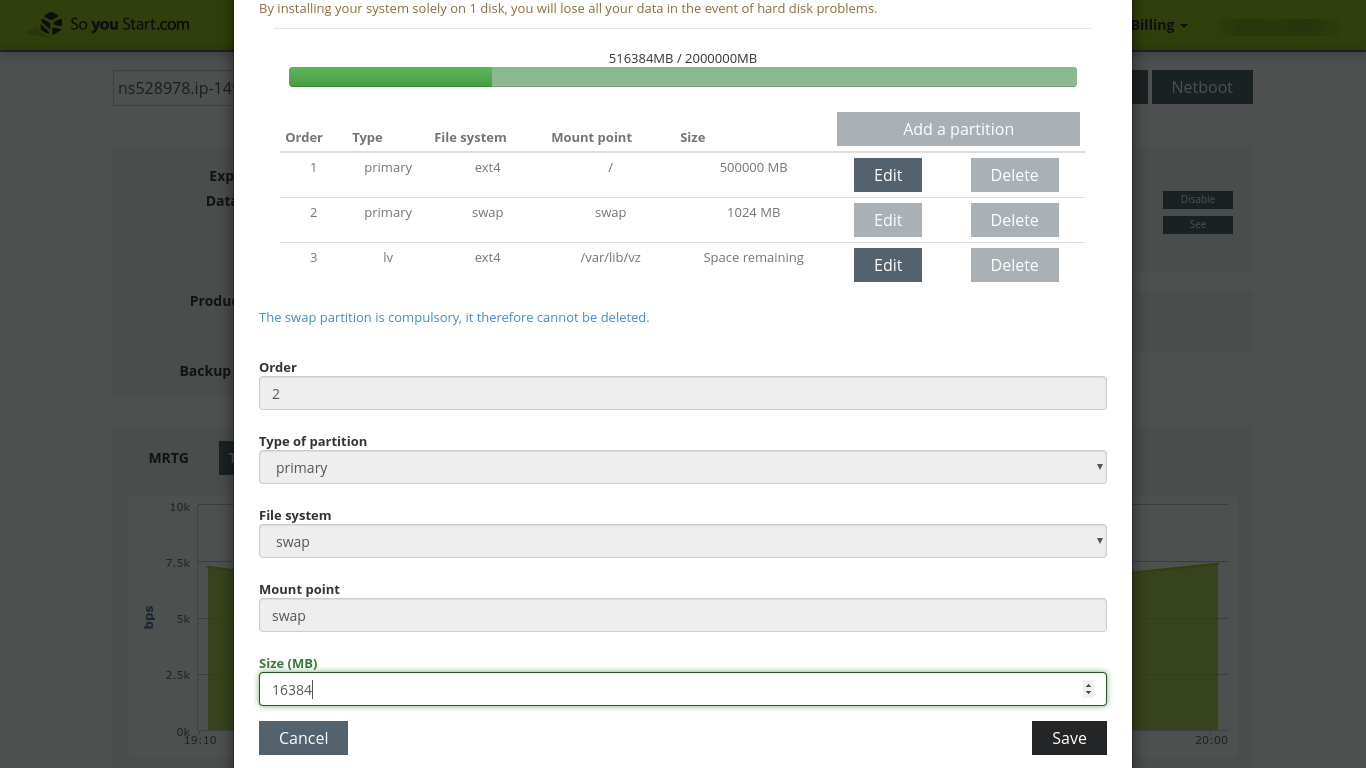
Here we consider two changes. First, changing the root partition ("/") to increase the size. The default 20,000 MB size is fine for the base system, and often, on production systems, one conservatively might want to avoid making any changes at all in the base system or its layout. But, for example, the base system does not include even the Proxmox manual pages. Since plenty of space is available, and since we might want to add a few things, let's increase the root partition size to 500,000 MB.
The 1024 MB swap space also might be fine, especially in a system, as here, with lots of RAM. Remember, we have 32 GB RAM in the host system. But probably we will not assign the VPSes that we will create with Proxmox access to the entire 32 GB memory. Therefore, a little more swap might help some of the smaller VPSes complete memory intensive projects without running out of memory. Let's set the swap to 16,384 MB, an amount about equal to half the total RAM.
| Order | Type | File system | Mount point | Size |
|---|---|---|---|---|
| 1 | primary | ext4 | / | 500000 MB |
| 2 | primary | swap | swap | 16384 MB |
| 3 | lv | ext4 | /var/lib/vz | Space remaining |
Here's an image of the installer at the moment before confirmation of the resized root and swap:
Hostname, SSH key, and Post-install script
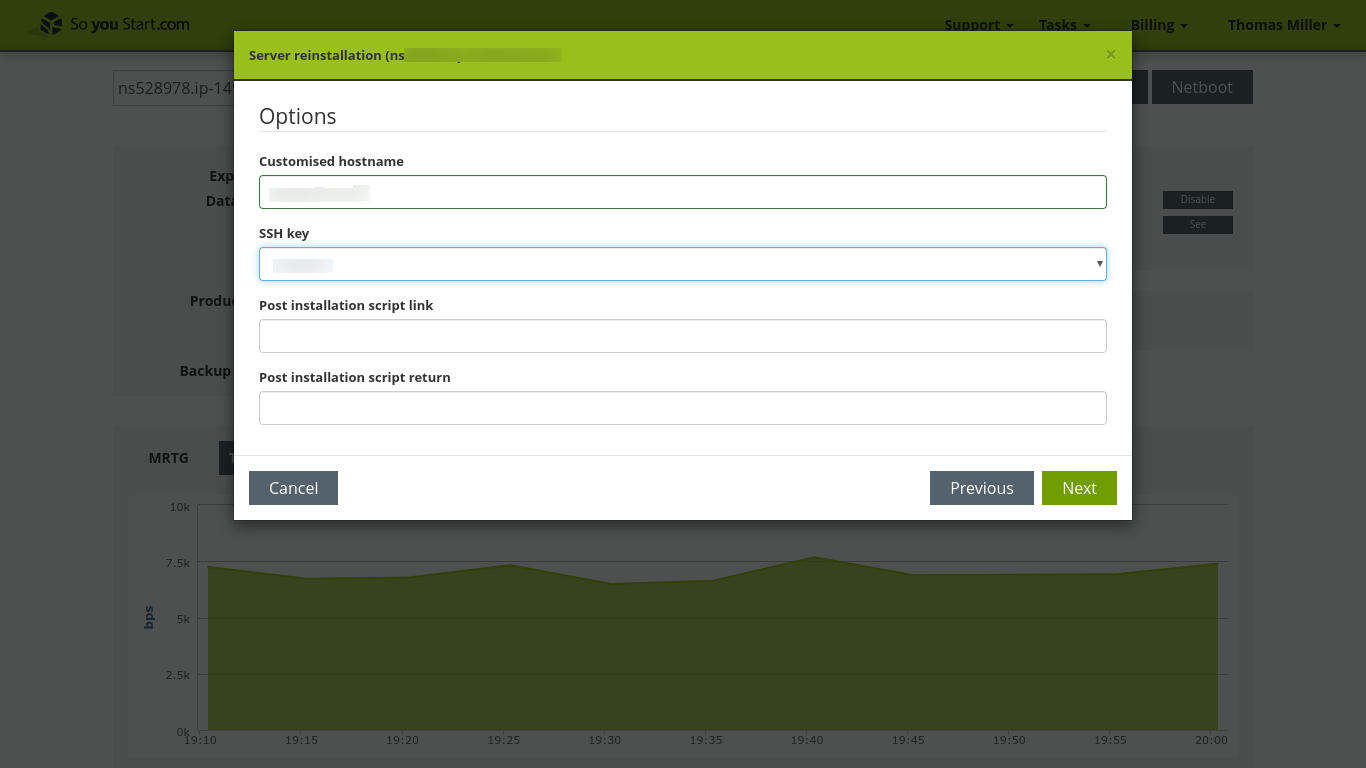
Next we tell the installer our fully qualified hostname. Also, we have an opportunity to select an ssh key from among the keys associated with our SoYouStart account. And, if we wish, we can link to a post-install script:
Confirmation
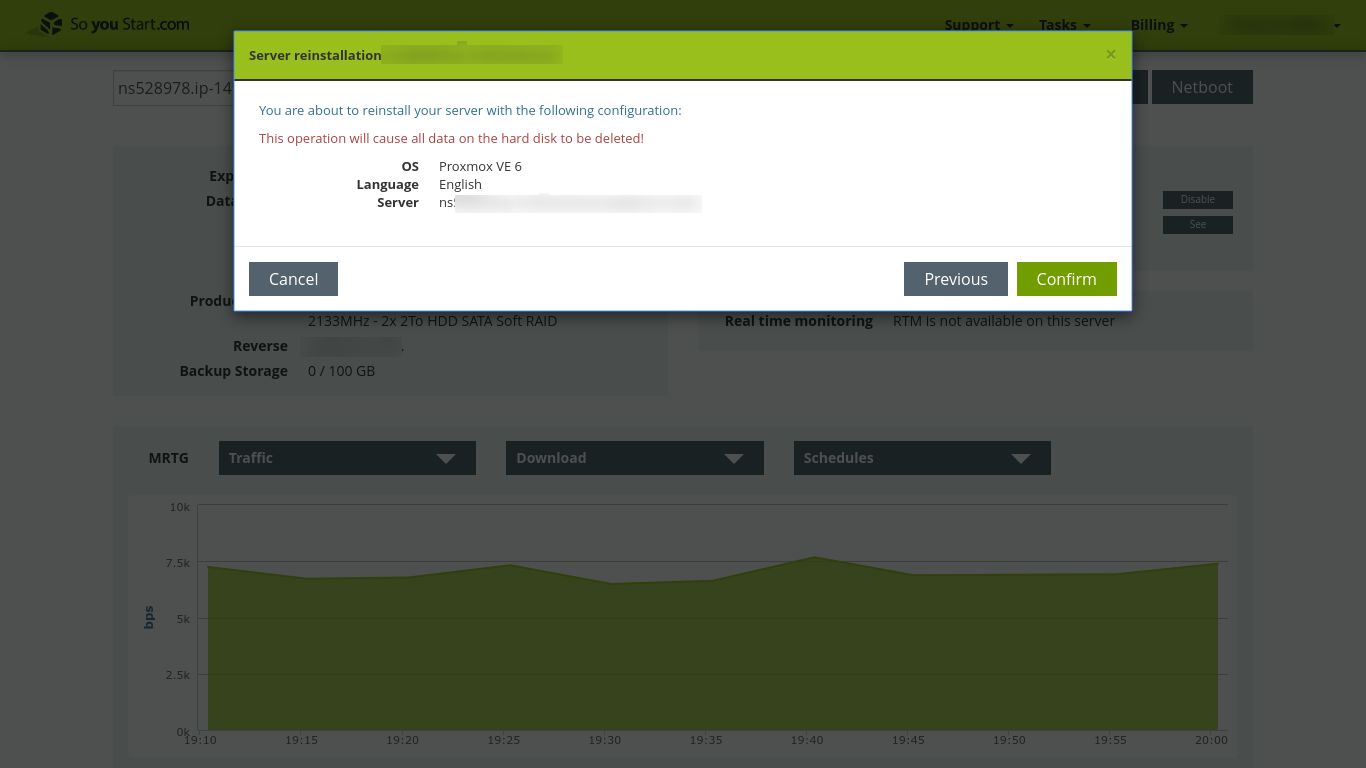
Finally we get our last chance to cancel or else to go ahead and launch the install:
Success
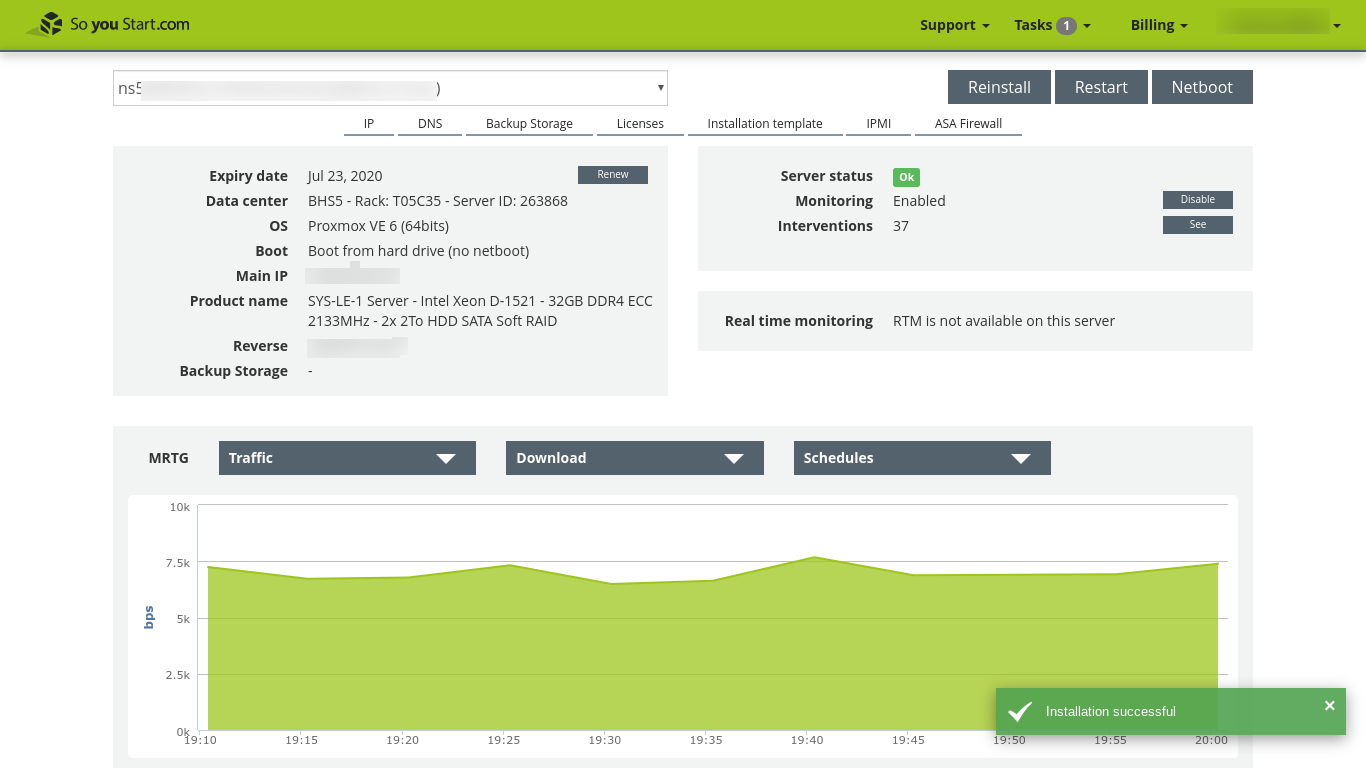
As soon as we confirm the install, all the magic begins to happen behind the scenes. On the Control Panel, the third entry in the left hand column, "OS," comes alive. It says something like "Initializing the install process," followed by "Hardware checks," followed by "Admin password." The install process continues, through "Partitioning and formatting," "Deploying OS," and "Rebooting." By this time, approximately ten minutes have passed.
The next and last stage takes about ten additional minutes for a total of twenty minutes all together. During the last stage, the Panel says, "Waiting for services to be up." Finally, we see a green "Success" pop-up, and also our phone beeps to announce the arrival of OVH's email confirming the install:
What's next after a successful install?
After our successful install we surely can congratulate ourselves, since now we're "(almost) ready" ![]() to begin serving profiting
to begin serving profiting ![]() as full fledged Hosting Providers.
as full fledged Hosting Providers. ![]() Let's now take a quick look at what else might be needed.
Let's now take a quick look at what else might be needed.
Regarding our newly installed test server there remain at least: updating, upgrading, setting up the firewall, setting up fail2ban, downloading VPS OS templates, and actually creating VPSes. The next post will cover how to do these remaining steps with both the Proxmox web GUI and the command line.
In addition to the test server, we need enough additional RAID enabled production servers to provide the capacity needed by our customer base.
On the business administration side, if not already done, we need to establish our hosting company as a formal business under the laws of the jurisdiction which will be our home base. We need to build a website for our hosting business, add a payment gateway, and go on a marketing campaign unless we're already drowning in customer requests. Finally, we need to ask for our Hosting Provider tag so we can advertise on LES if we have space for additional customers.
I hope everyone gets the servers they want!


Comments
Quality content @Not_Oles! Great post.
Michael from DragonWebHost & OnePoundEmail
Nice one.
Thanks @Not_Oles .
One of these days, I might try this.
I catch you when I screw things up. ?
Enjoy meditation without religion for one month.
Great guide! Thanks!
Hi!
Could you do the same guide to install PROXMOX 6 ZFS?
The template is not in OVH.
VMware ESXi 6.0
VMware ESXi 6.5
VMware ESXi 6.7
Citrix Xen Server 7
Citrix Xen Server 7.4
Windows Hyper-V Server 2016
Windows Hyper-V Server 2019
Proxmox VE 5
Proxmox VE 5 ZFS
Proxmox VE 6
CoreOS
SolusVM Master
SolusVM Slave
And I want to install Proxmox VE 6 ZFS ...
Could you send us a solution for that?
Thanks
Hi Raul!
I no longer have OVH machines.
One approach might be to boot the official Proxmox .iso installer on qemu inside tmux on the OVH rescue system. You'd probably need to set up VNC, since the Proxmox installer is graphical.
A bit tricky, but no harm in trying. Good luck!
Proxmox has a pretty good forum where you can ask questions and get replies from Proxmox engineers. Proxmox also sells support subscriptions.
Best wishes!
Tom
I hope everyone gets the servers they want!