

Migrate a KVM VPS from one host to another – Easy Mode.

Written by Anthony Smith, 27 May 2020
Article was migrated from WordPress to Vanilla in March 2022

This is the first in a series of posts in the "Easy Mode" series
I thought I would write this up as a super easy basic guide to an almost no-effort method of migrating a KVM VPS from one host to another without having to worry about any minor changes in software stacks that could cause your backup and restore to fail or not restore as expected.
As a host one of the unfortunate realities is that sometimes it is just necessary to have migrations either due to end of life of an OS major version or impending hardware failure etc and on the rare occasion you need people to migrate their own server, this usually results in a 10% panic rate and a desperate cry for help.
With all that in mind I thought I would illustrate possibly one of the most simple server migration methods possible, I have done this based on KVM to KVM as that is likely to be the most common method however this method should also work for Xen HVM to Xen HVM or KVM to Xen HVM or Xen HVM to KVM and finally VMware to VMware should also work fine.
I can't cover the huge amount of different control panels and access methods out there but all that I have used either have access to an ISO mount or a rescue mode so it should be easy for you to use this guide as long as your host's control panel provides at least an ISO mount option or a rescue mode.
In this example, I have used a KVM VPS on a host that uses SolusVM and migrated it to a host that uses Virtualizor.
Requirements and additional info before we get started.
- The destination VPS should have the same size hard disk (bigger is fine).
- This will only go as fast as the link between the 2 locations, latency is a huge factor, moving a 50GB Disk image from India to New York is no fun.
- Some attention to detail is required, it is possible to lose your data if you mess up the commands.
- If the destination control panel does not provide a 'reconfigure networking' button or a serial console/VNC option you can use to reconfigure networking yourself you may want to consider configuring but not activating the network settings for the destination VPS on the source prior to shutdown, SolusVM, however, will do this for you and in some cases depending on the Hosts configuration options in Virtualizor it will also.
- Source VPS, in this case, was at Inception Hosting - London, the destination VPS was with Nexus Bytes - New York
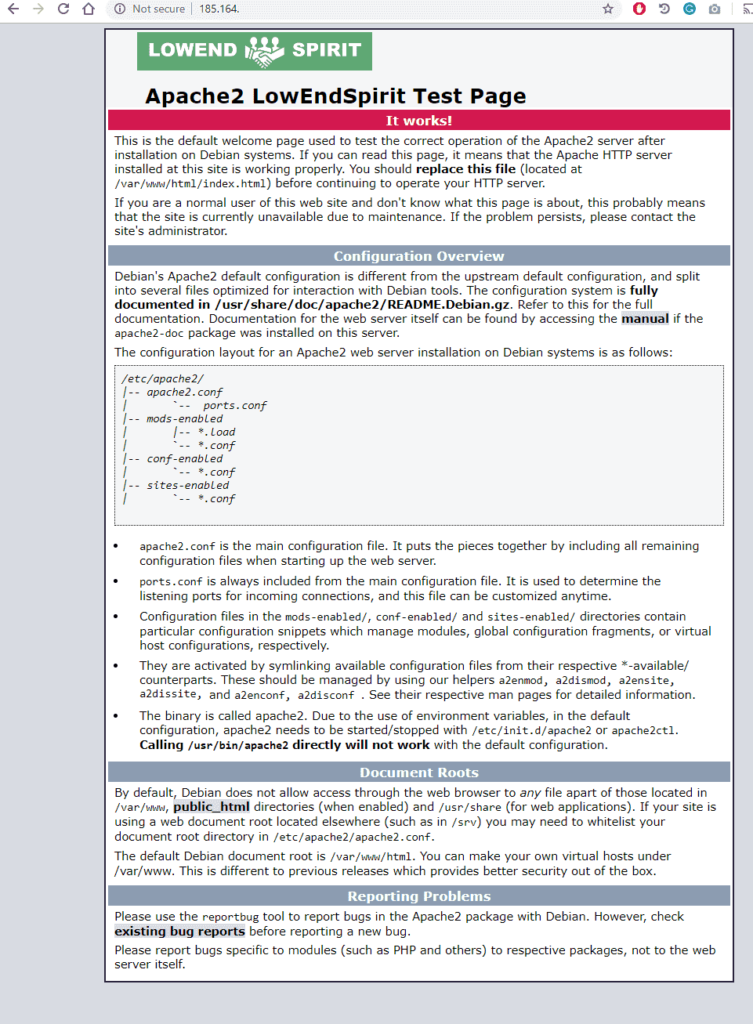
First of all, I created a quick KVM VPS as the source on the SolusVM based host, installed apache2 and slightly modified the test page which you can see loading on the source IP:
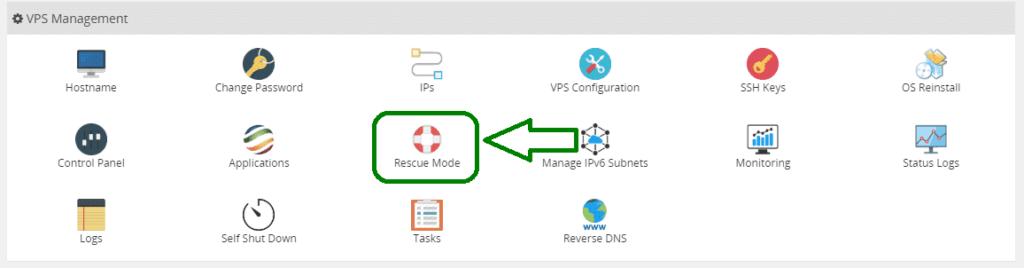
Then I shut down the Source VPS and put both the source and destination VPS into rescue mode.
For SolusVM (Source):
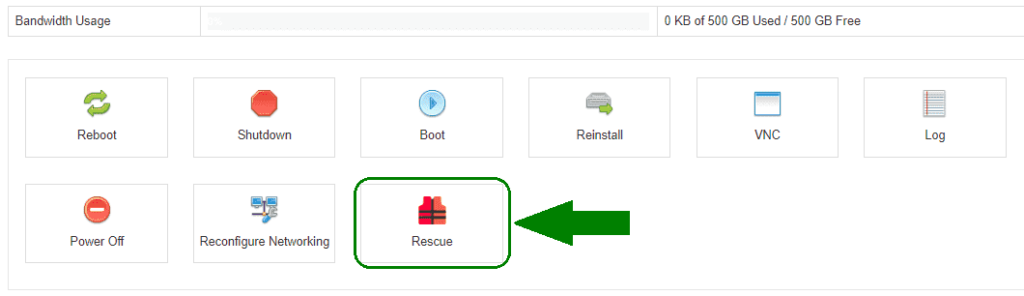
For Virtualizor (Destination):
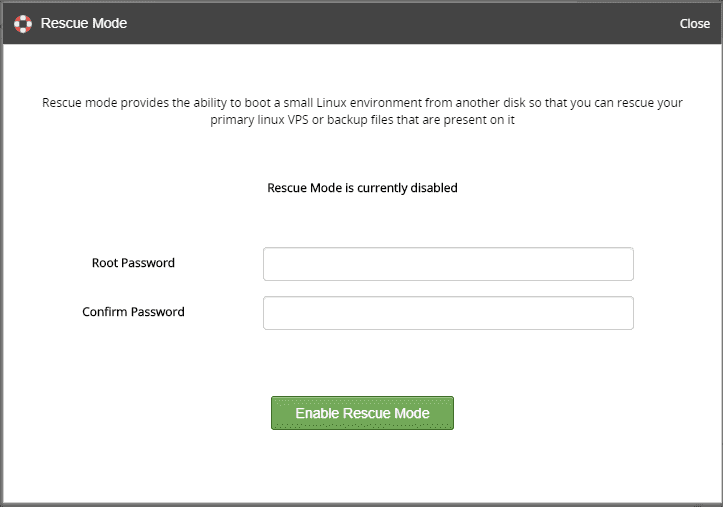
note: I noticed virtualizer has a tendency to just lock out all options even those for coming out of rescue mode when you do this which is resolved by simply refreshing the page, don't worry it does not resubmit the action
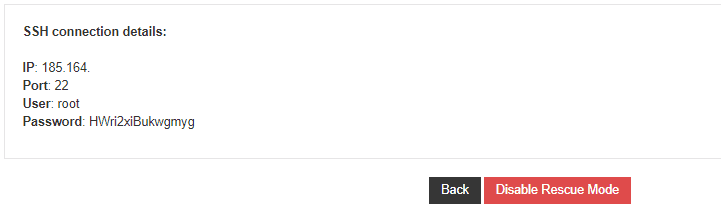
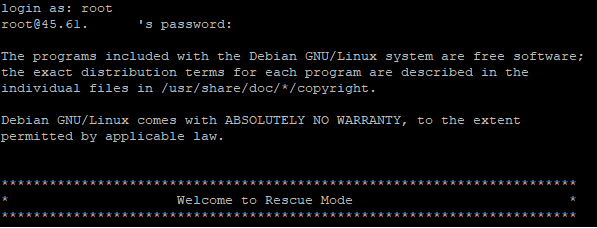
Now you should have both the source and destination in rescue mode and you should be able to login to both over ssh:
SolusVM VPS (Source)

Virtualizor VPS (Destination)
Next, you need to examine your disks to make sure you get the right one, the rescue modes will create a ramdisk so what was vda or sda on your VPS when it was running may not be now, this is the part you need to be sure you get correct, I have shown a side by side below using fdisk -l to check which disk I want to migrate to which disk on the other end.
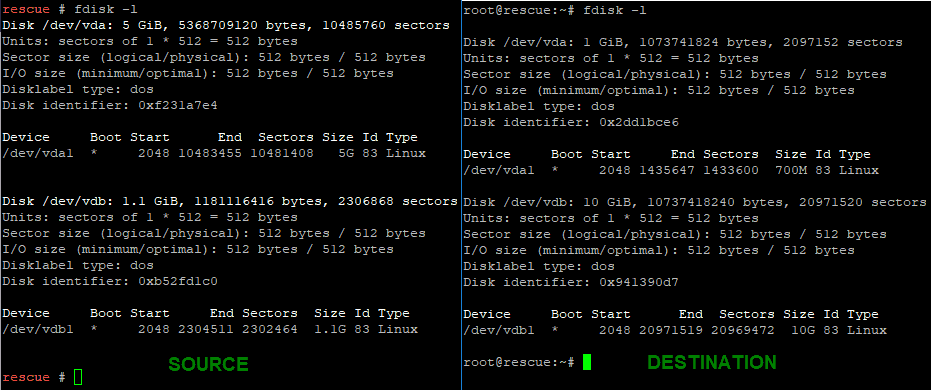
From the image above we can see that the 5GiB disk is the one I want /dev/vda because I know my source disk is 5GiB and on the destination side I can see that it is actually /dev/vdb I want to copy the disk to, the 10 GiB disk. It is very important that you check this before going any further as it could well be different.
Because we now know I want to copy vda on the source to vdb on the destination we can structure the command to do this.
dd if=/dev/vda bs=32M status=progress | ssh [email protected] "dd of=/dev/vdb"
let us break this down so it is better understood as there is nothing worse than knowing which buttons to press to achieve a goal, but having no idea why they work, or what they actually do:
- dd - Short for "data duplicator" a common commend used for copying or duplicating data.
- if=/dev/vda - The input or what we are reading, in this case, the entire virtual hard disk image
- bs=32M - BYTES, the number of BYTES to read per block when copying, you can set this yourself, I have found 32M is a good average.
- status=progress - This shows the progress of the copy, it has a very small overhead but without it you get nothing in terms of a progress indicator
- | - The pipe, in very simple terms, lets you pass the result of one command or set of commands to the next
- ssh [email protected] - Because this is after the pipe | it takes what was done before and sends it over an ssh session as root to the destination IP 45.61.123.123 (fake)
- "dd of=/dev/vdb" - Finally the instruction on what to do at the other side which is to use dd "data duplicator" to write the blocks it is receiving over ssh to
/dev/vdb
Once that command is issued you will see something like this:

And when it completes you will see:
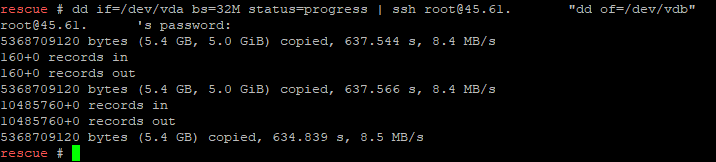
As we can see that took 634 seconds or a little over 10 minutes to complete and now the disk image on the destination should be identical to the source.
The next step is to cancel rescue mode on the destination via the control panel and then boot the destination VPS, going to the new IP address once it is finished booting shows that it was a success as the same page loads on the new IP:

If your destination VPS has a bigger disk size than the source you will not instantly gain the extra space by following the above process, you will need to either expand your partitions or extend your logical volume if using LVM, that however is beyond the scope of this particular tutorial but if you are also looking for easy mode for that then just boot the VPS with a GParted ISO or a rescue cd that contains GParted which will give you a simple UI to expand your partitions or look up vgextend and lvextend if using LVM.
If having read this you discover that your host does not have a built-in rescue mode then I would suggest requesting they supply a SystemRescueCd ISO (Also contains GParted) https://www.system-rescue-cd.org/ so you can mount it and boot into rescue mode.
Comments
Thanks great information !Thanks @AnthonySmith ! I think that rsync guide between KVM and KVM ( toó básic maybe) it could be useful for some people for next posts.
I believe in good luck. Harder that I work ,luckier i get.
probably worth mentioning that you can also slightly adapt this method to take a full disk image backup of a VPS by changing the destination to a running server and using an .img file for example:
dd if=/dev/vda bs=32M status=progress | ssh [email protected] "dd of=/home/backup/fullvpsbackup.img"https://inceptionhosting.com
Please do not use the PM system here for Inception Hosting support issues.
Fantastic post @AnthonySmith . This is sure will help many users, not only active members, but also lurkers!
Just wanted to add this
Virtualizors default setting actually resets network config files upon a complete powercycle from the control panel. The only time it may not do is if the provider disables that option by default. In our case, we leave the feature disabled as it will otherwise completely wipe any custom network configuration or changes you may have made on the default network settings.
If it is disabled for your VPS, please reach out to your respected providers")
Nexus Bytes Ryzen Powered NVMe VPS | NYC|Miami|LA|London|Netherlands| Singapore|Tokyo
Storage VPS | LiteSpeed Powered Web Hosting + SSH access | Switcher Special |
I see, I don't use virtualizor often these days, users can also use
chattr +i /path/to/network/configon any distro to prevent any control panel overwriting it.https://inceptionhosting.com
Please do not use the PM system here for Inception Hosting support issues.
Idk why it is showing thumbs down button and not a smiley face. Oh well.
And yes you are correct! That is actually a very unique steps, that user cane take") .
.
The decision was taken on our end, mostly to avoid general confusion where you reboot and all of a sudden nothing works") .
.
Nexus Bytes Ryzen Powered NVMe VPS | NYC|Miami|LA|London|Netherlands| Singapore|Tokyo
Storage VPS | LiteSpeed Powered Web Hosting + SSH access | Switcher Special |
Great post! Thanks")
Ympker's VPN LTD Comparison, Uptime.is, Ympker's GitHub.
Need to try this out over the weekend :-)
blog | exploring visually |
I would do a trim on the filesystem before copying it, and use a compression tool (gzip or whatever) to compress on the fly.
Additionally, if security isn't a concern a tarpipe (http://toast.djw.org.uk/tarpipe.html) will be much faster than ssh
Yep that’s the medium mode")
If security is no concern netcat is even faster, I have also found that compression on the fly (gzip) actually slows it down, the best speed boost for the method above is to use the cypher switch with arcfour256.
https://inceptionhosting.com
Please do not use the PM system here for Inception Hosting support issues.
This is awesome. I feel dumb now installing everything, securing and copying files every time I want to restore servers on other locations.
I hope to see a guide to resize disk soon.
Thank you.
@AnthonySmith
Very useful, thank you so much
Good day and Goodbye
One thing you can also do to save bandwidth (and your providers might appreciate this) is to throw in gzip on the sending side by piping dd to something like
gzip -1 -then decompressing withgzip -d(orzcat) on the receiving before piping to dd. You can also add in ssh compression withssh -C(which might be redundant. The full command from the article would then be:dd if=/dev/vda bs=32M status=progress | gzip -1 - | ssh -C [email protected] "gzip -d | dd of=/dev/vdb"Tested by migrating a 325GB disk with ~160GB used and only ~100GB was transferred over the network.
AMD EPYC powered Performance NVMe VPS - Los Angeles, Dallas, New York, Amsterdam, Singapore | Support | Status
Omg great and simple post thanks!
(comments from wordpress post prior to migration)
Kevin
Apr 24, 2021 / 06:16
Thank you. The images don’t work for me anymore.
mikho
Apr 26, 2021 / 11:46
Thank you for mentioning, the image links were a little messed up after the move from the old platform.
Should all be fixed now.
yabs daddy
Thanks you for sharing this way to image a vps
Ola Necro!!
45 more posts to go
blog | exploring visually |