

How to Create and Setup a Debian KVM VPS with Proxmox VE 6 -- Part III -- Network Configuration

Written by @Not_Oles, 23 Jul 2021
Article was migrated from WordPress to Vanilla in March 2022

I. Before We Start
We need to obtain our basic network configuration from our provider. Or, if we are running our own host node, we need to assign basic network configuration to ourselves. Our basic network configuration might look something like this:
| Item | Value |
|---|---|
| IPv4 address | 172.16.165.97/28 |
| Netmask | 255.255.255.240 |
| Broadcast | 172.16.165.111 |
| Gateway | 172.16.164.1 |
For IPv6, one might expect something like:
| Item | Value |
|---|---|
| IPv6 address | fe80::/64 |
But occasionally, IPv6 could be something like:
| Item | Value |
|---|---|
| IPv6 address | fe80:xxxx:xxxx:xxxx::97/128 |
| Gateway6 | fe80:xxxx:xxxx:xxxx::3 |
Notes:
- The /28 in the IPv4 address and the longer netmask are different ways of providing the same information about the size of the local, directly connected network. It suffices for us to have this information in one format or the other. We don't need both formats because the information is the same. Also, the broadcast IP might not be provided, since it isn't strictly necessary.
- For the second format of the IPv6 address, what happened to the /64? 😱 The /128 in the second form of the IPv6 address might seem clueless to IPv6 fans expecting a /64. Also, the second format of the IPv6 address includes a gateway6 address. The gateway6 address might seem strange to some IPv6 fans, but we need the gateway6 for our minimal, static configuration. More on all this below.
II. Introduction
In the previous post of this series we finished using the Proxmox web GUI to install our new Debian KVM VPS via the Debian netinst installer iso image. The final step in Part II was removing the netinst install iso image from the emulated cdrom and then reooting our new VM, which came up from its own internal filesystem:
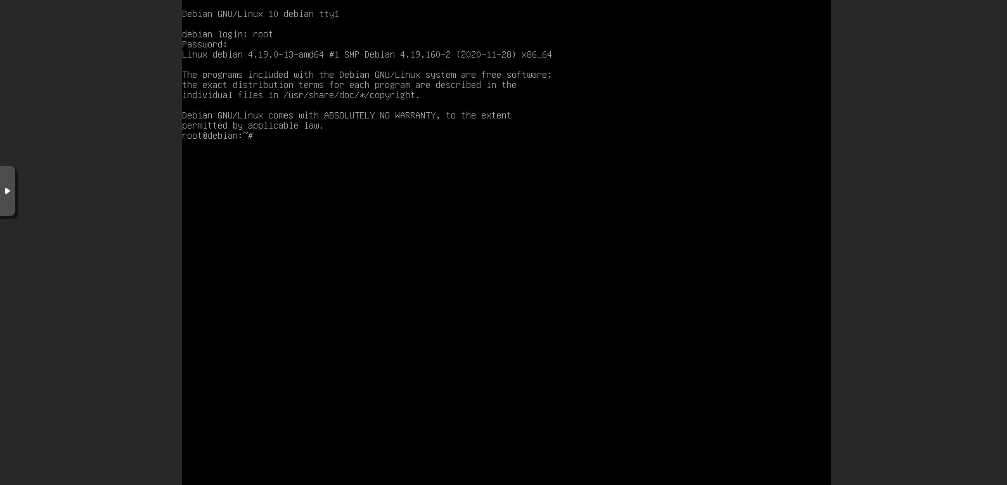
In today's post, we continue from this exact place where we left Part II -- connected to our newly installed and newly rebooted KVM via the Proxmox web GUI. In this post, we will accomplish the networking configuration which was skipped in Part II because the Debian netinst iso doesn't automatically configure out of band IP addresses.
There are three network configuration and related tasks we will accomplish today:
- First, we go "inside" our VM through the Proxmox web GUI's emulated "physical" console connection and set up networking. In Debian, networking setup requires that we adjust the file /etc/network/interfaces to tell our VM its network address and the address of its gateway to the internet.
- Second, we edit the file /etc/resolv.conf to tell our VM the numerical addresses of Domain Name System ("DNS") servers it can use to translate human readable Uniform Resource Identifiers (URI) into numerical Internet Protocaol ("IP") addresses.
- Third, we set up /etc/apt/sources.list to tell our system's Aptitude software package manager ("APT") where to get software updates and the additional software packages we will want to install.
Section III, Quick Setup, runs quickly through all three of today's tasks in "recipe style."
Section IV offers additional context on our setup environment.
Sections V, VI, and VII provide additional details on today's three setup tasks.
Section VIII discusses security.
Section IX discusses backup.
When we finish the Quick Setup, our new Debian KVM VPS should be connected to the internet, DNS should work, and we should be able to use the Debian package system to add whatever additional software we want.
When we finish all of today's post, we should have reasonable context within which to understand our Debian VM's networking setup.
III. Quick Setup
Logged into our VM through the Proxmox web GUI, we run the command ip link show. This command will give us the name of our network interface, probably something like "ens18."
As root or with sudo, we edit the text of the file /etc/network/interfaces so that it contains the minimum necessary information:
auto ens18
iface ens18 inet static
  address IPv4_ADDRESS/CIDR
  gateway GATEWAY_ADDRESS

iface ens18 inet6 static
  address IPv6_ADDRESS/CIDR
  gateway GATEWAY6_ADDRESS
Using our example network configuration, our minimal /etc/network/interfaces looks like this:
auto ens18
iface ens18 inet static
  address 172.16.165.97/28
  gateway 172.16.164.1

iface ens18 inet6 static
  address fe80:xxxx:xxxx:xxxx::97/128
  gateway fe80:xxxx:xxxx:xxxx::3
Second, we edit the /etc/resolv.conf file so that it looks like this:
nameserver 1.1.1.1
nameserver 8.8.8.8
nameserver 2606:4700:4700::1111
nameserver 2001:4860:4860::8888
Third, we edit /etc/apt/sources.list so that it looks like this:
deb http://deb.debian.org/debian buster main contrib non-free

deb http://deb.debian.org/debian-security/ buster/updates main contrib non-free

deb http://deb.debian.org/debian buster-updates main contrib non-free
Finally, we restart networking so that our new configuration takes effect:
systemctl restart networking
At this point, we should have both IPv4 and IPv6 connectivity, and DNS and APT both should work.
IV. More Context
- Virtualized Console Connection
The Proxmox web GUI virtualizes a wired console connection. In other words, our web browser does connect over the internet to our Proxmox server, but, the view from inside our new KVM is the same as though a wired connection was attached. Our new KVM thinks it's talking over a wired connection to a physical console. From inside our new KVM, there is, as yet, no network connection.
By default, the Proxmox web GUI works via VNC. In the Proxmox wiki on serial terminal Proxmox warns that VNC might
not have the features you need (i.e. easy copy/paste between other terminals)
or it might be
impossible to capture all [kernel messages, standard output, or error] messages on [the] VNC screen.
Yep, copy / paste commands do not seem to work in the Proxmox KVM virtual console.
Also, if you enjoy using the vi editor, you might find what looks like a "Send-Esc" button among the set of choices within the set exposed by the top button on the console VNC control bar. Use of the real keyboard Escape key results in exiting full screen. However, a second real Esc seems to produce the expected mode change, despite that maybe we no longer can see too well without returning to full screen.
- No DHCP, No SLAAC
These days most network setups use Dynamic Host Configuration Protocol (DHCP) to autoconfigure IPv4 networking. The machine on which networking is to be configured asks for and receives from a DHCP server all the needed information for the networking setup.
It is possible to configure DHCP so that it always returns the same IP address to each VM, but, since our entire Proxmox network is static, it may be simpler to set up networking manually--the traditional way for servers.
Stateless Address Autoconfiguration ("SLAAC") provides automatic configuration of IPv6 addresses. SLAAC requires a /64, which is why people say, for IPv6, that a /64 is expected and that less than a /64 is clueless. However, it remains possible to hand configure a single static IPv6 address, as we are doing here.
What if, for whatever reason, we simply do not want to use SLAAC? What if our provider doesn't receive enough IPv6 addresses from his provider to allow passing on to each VPS its own /64? What if our provider's provider charges an extra fee for extra IPv6 addresses, but we do not want to pay our provider's pass through of his provider's extra fee? What if we simply choose to use single, static IPs as is traditional for servers?
- No Cloud-Init
As mentioned in the previous post of this series, most VM network setups these days are done with Cloud-Init. Proxmox supports Cloud-Init, which enables both networking and ssh access to virtual machines to be set up on the Proxmox hypervisor and outside of the VM. Cloud-init can use DHCP. Here, however, we have chosen the simplest possible manual configuration with static IPs.
- Our Static, Routed Configuration And Out of Band Gateway From Our Provider's Provider
Here, our single, static IPv4 and single, static IPv6 are each derived from a routed subnet assigned to our server node. However, our internet gateway IPv4 address is not included among our server's routed group of IPv4s. This is called an "out of band" gateway.
Besides routed subnets, it also is possible for a datacenter to assign to servers non-routed, individual IP addresses. Data for these non-routed IPs moves between the datacenter switch and server nodes via the "link layer." Hetzner has a tutorial on Debian network configuration which includes discussion of "bridged configuration" for non-routed IPs.
- Systemd in Debian Networking
Since about 2014, networking is setup on Debian with systemd. The choice of systemd initially was and has continued to be divisive. Nevertheless systemd has remained as the Debian default.
There are at least two basic variations of Debian's systemd network arrangement. The first--which seems to be the default variation for Debian systemd network configuration--at least with the netinst iso--is using systemd's networking.service. For example, by using systemctl, we can confirm that networking.service is what is being used on our Node:
root@Proxmox-VE ~ # systemctl status networking.service
● networking.service - Raise network interfaces
   Loaded: loaded (/lib/systemd/system/networking.service; enabled; vendor preset:
   Active: active (exited) since Wed 2021-06-02 19:13:13 UTC; 1 weeks 2 days ago
     Docs: man:interfaces(5)
 Main PID: 791 (code=exited, status=0/SUCCESS)
    Tasks: 0 (limit: 4915)
   Memory: 0B
   CGroup: /system.slice/networking.service

 [ . . . ]
root@Proxmox-VE ~ #
Our test KVM also seems to think its networking is controlled by systemd:
root@debian-kvm:~# systemctl status networking
● networking.service - Raise network interfaces
   Loaded: loaded (/lib/systemd/system/networking.service; enabled; vendor preset: enabled)
   Active: active (exited) since Wed 2021-06-16 01:20:45 UTC; 4min 51s ago
     Docs: man:interfaces(5)
  Process: 448 ExecStart=/sbin/ifup -a --read-environment (code=exited, status=0/SUCCESS)
 Main PID: 448 (code=exited, status=0/SUCCESS)

Jun 16 01:20:45 debian-kvm systemd[1]: Starting Raise network interfaces...
Jun 16 01:20:45 debian-kvm systemd[1]: Started Raise network interfaces.
root@debian-kvm:~#
As we can see, systemd networking.service calls the traditional debian ifup and ifdown.
root@debian-kvm:~# cat /lib/systemd/system/networking.service
[Unit]
Description=Raise network interfaces
Documentation=man:interfaces(5)
DefaultDependencies=no
Requires=ifupdown-pre.service
Wants=network.target
After=local-fs.target network-pre.target apparmor.service systemd-sysctl.service systemd-modules-load.service ifupdown-pre.service
Before=network.target shutdown.target network-online.target
Conflicts=shutdown.target

[Install]
WantedBy=multi-user.target
WantedBy=network-online.target

[Service]
Type=oneshot
EnvironmentFile=-/etc/default/networking
ExecStart=/sbin/ifup -a --read-environment
ExecStop=/sbin/ifdown -a --read-environment --exclude=lo
RemainAfterExit=true
TimeoutStartSec=5min
root@debian-kvm:~#
The second Debian systemd possibility--not the default on Debian netinst.iso and not used here--is systemd-networkd. Sahitya Maruvada has a simple, clear, Debian systemd-networkd introduction, Working with systemd-networkd. The systemd-networkd wiki page and the systemd.network manpage also are available.
- Official Debian Network Setup Instructions
Official Debian network setup instructions include the Wiki, the Handbook, manual pages such as man interfaces, /etc/network/interfaces examples online, and sometimes locally:
# less /usr/share/doc/ifupdown/examples/network-interfaces
- The
ipCommand Usually Is Available Even Though Networking Setup Varies Among Linux Distributions
Setting up networking, DNS name resolution, and software package management is very different in different Linux distributions. Therefore, we should not assume that the steps taken below would be exactly the same with a different Linux distribution than Debian.
Nevertheless, despite the different distributions' differing network setup systems, the ip command, supplied by the iproute2 collection, usually is available these days. Please see also Red Hat's IP Command Cheat Sheet
Because the ip command often is available, networking can be configured in many distributions, including Debian, by running a sequence of ip commands. The net effect ![]() of the sequence of
of the sequence of ip commands can be to get the network functioning on most distributions without touching that individual distribution's network setup scheme.
Here's an example of the ip command used in the context of an iPXE boot. Note that the first command in the linked example requires knowledge of the name of the interface. We can list the names of the interfaces on our system by running the ip link show command.
One issue with using a sequence of ip commands is that the network setup fails to persist across reboots. However, we can place the ip command sequence inside a script which will be run automagically every time the server reboots. The sequence of ip commands in a script reminds us of the days before systemd, when scripts controlled all parts of the boot process including network setup.
Our KVM VPS's internal network configuration that we will be using below is similar to how LXC containers are configured in Proxmox. As will be seen below, Proxmox's LXC containers' network configuration adopts a variant of the "scripted ip command" approach, which also works inside Proxmox's KVM VPSes.
V. Our VM's Network Setup
- Interfaces
Our original /etc/network/interfaces file, the one installed by the netinst.iso, might look like this:
debian@debian-kvm:~$ cd /etc/network
debian@debian-kvm:/etc/network$ cat interfaces.original
# This file describes the network interfaces available on your system
# and how to activate them. For more information, see interfaces(5).

source /etc/network/interfaces.d/*

# The loopback network interface
auto lo
iface lo inet loopback
debian@debian-kvm:/etc/network$
Note that, in the default from the netinst.iso, /etc/network/interfaces.d is empty, so sourcing its files does nothing to the configuration.
debian@debian-kvm:/etc/network$ ls interfaces.d
debian@debian-kvm:/etc/network$
Now, let's edit /etc/network/interfaces to match our example network information from the above Before We Start section.
debian@debian-kvm:/etc/network$ cat interfaces
# This file describes the network interfaces available on your system
# and how to activate them. For more information, see interfaces(5).

source /etc/network/interfaces.d/*

# The loopback network interface
auto lo
iface lo inet loopback

auto ens18
iface ens18 inet static
  address 172.16.165.97/28
  gateway 172.16.164.1

iface ens18 inet6 static
  address fe80:xxxx:xxxx:xxxx::97/128
  gateway fe80:xxxx:xxxx:xxxx::3

debian@debian-kvm:/etc/network$
The minimum required information does not include comments (lines beginning with #). Maybe we can make the rash and short-sighted assumption that we are not going to install anything which will want a file included from interfaces.d. The loopback interface might no longer be required (please see lines 17 and 18 in this file from Debian sources). Thus, for our example setup, the minimum /etc/network/interfaces might be:
debian@debian-kvm:/etc/network$ cat interfaces

auto ens18
iface ens18 inet static
  address 172.16.165.97/28
  gateway 172.16.164.1

iface ens18 inet6 static
  address fe80:xxxx:xxxx:xxxx::97/128
  gateway fe80:xxxx:xxxx:xxxx::3

debian@debian-kvm:/etc/network$
When configuring Debian LXC containers, Proxmox configures their /etc/network/interfaces files using added post-up and pre-down routes. Similarly, just for fun, instead of giving the gateway addresses in our /etc/network/interfaces,, we can manually add routes. Except for the initial post-up and pre-down these added lines mirror ip route commands that we could run manually to set up or take down networking without touching the /etc/network/interfaces file.
debian@debian-kvm:/etc/network$ cat interfaces
# This file describes the network interfaces available on your system
# and how to activate them. For more information, see interfaces(5).

source /etc/network/interfaces.d/*

# The loopback network interface
auto lo
iface lo inet loopback

auto ens18
iface ens18 inet static
  address 172.16.165.97/28
     post-up ip route add 172.16.164.1 dev ens18
     post-up ip route add default via 172.16.164.1 dev ens18
     pre-down ip route del default via 172.16.164.1 dev ens18
     pre-down ip route del 172.16.164.1 dev ens18

iface ens18 inet6 static
  address fe80:xxxx:xxxx:xxxx::97/128
     post-up ip route add fe80:xxxx:xxxx:xxxx::3  dev ens18
     post-up ip route add default via fe80:xxxx:xxxx:xxxx::3  dev ens18
     pre-down ip route del default via fe80:xxxx:xxxx:xxxx::3  dev ens18
     pre-down ip route del fe80:xxxx:xxxx:xxxx::3  dev ens18

debian@debian-kvm:/etc/network$
VI. Our VM's DNS
We might want to add more or different nameservers to /etc/resolv.conf. Our Quick Setup configuration, above, includes IPs from Cloudflare and from Google.
VII. Our VM's Apt Setup
The Debian wiki instructions for configuring apt are at https://wiki.debian.org/SourcesList. There also is a man page. The configuration shown above, in Section III Quick Setup, is from the SourcesList Debian wiki page.
The Debian Security Information page says:
You can use apt to easily get the latest security updates. This requires a line such as
deb http://security.debian.org/debian-security buster/updates main contrib non-free
Many of the larger providers offer Debian mirrors. For example, Debian packages and security updates are available from the Hetzner Debian Mirror
After /etc/sources.list is edited, we update our system's package repositories as follows:
apt-get upgrade && apt-get dist-upgrade -y
We can see exactly which packages are installed by looking at the logs in /var/log/apt.
We may wish to install openssh-server so that we can connect to our VM via ssh in addition to our Proxmox VNC connection. With ssh we regain cut and paste functionality while enjoying lower apparent latency!
apt-get install openssh-server
The Kennedy article, mentioned below in Section VII, has some good tips for ssh server configuration.
VIII. Security
Google suggests its first choice among essential server security articles. This article from 2013, by Bryan Kennedy, seems to provide still-good advice, except that, nowadays, many people prefer to use ed25519 keys
IX. Backup
After all this work, we certainly want to make an offline backup of our new VM. We can use Proxmox to make the backup and then download a a copy from the host node's /var/lib/vz/dump directory.