

How To Install KVM VPSes From The Command Line Using `libvirt` and `virsh`

Notes From Following The Footsteps Of The 大唐 (Great Tang)
Introduction
Back on May 19, 2023, the 大 (big, great) @tang_cn wrote an awesome LES tutorial called How to Become an One-Man NAT VPS Provider?
@tang_cn's tutorial covers setting up NAT VPSes using the virt-install command line utility from libvirt.
Trying On A Debian 12.2 Node
I decided to try following @tang_cn's tutorial. The Node which @tang_cn's tutorial had used was running Debian 11. I tried with a Debian 12.2 Node. On Debian 12.2, I ran into two issues:
@tang_cn's example code did not include a possibly newly required line
--osinfo detect=on,name=OSNAME. Adding theosinfo detect=on,name=debian12line resulted in a fatal error. So, yes, Debian is great, but Debian 12.2'svirt-installdid not include "debian12" among the list of supported releases shown byvirt-install --osinfo list! I bypassed the error with--osinfo detect=on,require=off, but I am unclear on what, if any problems turning offosinfo requiremight have caused.After completing @tang_cn's install steps, my Debian guest VM worked fine over remote VNC via ssh tunnel into the VM's console. The VM could ping and could be pinged from the WAN over IPv6, but not over IPv4. I didn't solve the NAT IPv4 networking issue, whatever it was.
Trying On A Fedora Rawhide Node
I tried again on a Node runniing Fedora Rawhide. I did find that the more current but much less tested code in Rawhide enabled virt-install to support Debian 12 VMs.
- The Rawhide Node
The Rawhide Node is an Intel E-2276G rented from the Hetzner server auction for €33.70 monthly. This price is at least a couple of Euros above the minimum auction price for this server. Nevertheless, this server is worth keeping long term since it has two new NVMe disks. Not all auction servers have new disks.

- References
Fedora has an introductory Virtualization – Getting Started tutorial. The Fedora tutorial links to libvirt's wiki article on common libvirt networking configurations.
Let's start by following the command line versions of the steps in the Fedora tutorial.
- Step 1: System Requirements
Virtualization requires certain minimum RAM amounts and also CPU virtualization extensions, either Intel VT or AMD-V. The minimum RAM amounts are satisfied here since the Node has 64 GB DDR4 ECC RAM. The CPU passes the wiki article's egrep '^flags.*(vmx|svm)' /proc/cpuinfo check.
- Step 2: Install Virtualization Software
The Fedora dnf package manager's virtualization group on our Rawhide server still seems the same as that shown in the Fedora wiki.
[root@polonium ~]# dnf groupinfo virtualization
Last metadata expiration check: 3:24:19 ago on Sun 19 Nov 2023 03:19:10 PM UTC.
Group: Virtualization
 Description: These packages provide a graphical virtualization environment.
 Mandatory Packages:
   virt-install
 Default Packages:
   libvirt-daemon-config-network
   libvirt-daemon-kvm
   qemu-kvm
   virt-manager
   virt-viewer
 Optional Packages:
   guestfs-tools
   python3-libguestfs
   virt-top
[root@polonium ~]#
Let's try installing with the optional packages.
dnf group install --with-optional virtualization
Whew! That was 481 packages, but the install took only about one minute. The entire 2,130 lines of terminal output was saved, so, if you want to see it, please ask.
Let's use systemctl to start and then to enable the libvirt daemon. Enabling the daemon makes it restart automatically when the Node reboots.
[root@polonium ~]# date -u; systemctl start libvirtd
Sun Nov 19 10:49:12 PM UTC 2023
[root@polonium ~]# date -u; systemctl enable libvirtd
Sun Nov 19 10:49:30 PM UTC 2023
Created symlink /etc/systemd/system/multi-user.target.wants/libvirtd.service → /usr/lib/systemd/system/libvirtd.service.
Created symlink /etc/systemd/system/sockets.target.wants/libvirtd.socket → /usr/lib/systemd/system/libvirtd.socket.
Created symlink /etc/systemd/system/sockets.target.wants/libvirtd-ro.socket → /usr/lib/systemd/system/libvirtd-ro.socket.
Created symlink /etc/systemd/system/sockets.target.wants/libvirtd-admin.socket → /usr/lib/systemd/system/libvirtd-admin.socket.
[root@polonium ~]#
Verify that KVM is properly loaded.
[root@polonium ~]# lsmod | grep kvm
kvm_intel             425984  0
kvm                  1376256  1 kvm_intel
irqbypass              12288  1 kvm
[root@polonium ~]#
- Step 3: Default Networking Support
The Fedora tutorial tells us to expect a 192.168.x.x subnet to be set up by default on the Node. The VM guests should be able to connect out to the WAN by using the Node's main IPv4 as a gateway. Connections from the WAN into the guests require firewall DNAT rules on the Node or a bridged environment.
Let's use the iproute2 suite to see what happened to the default network when we installed the dnf virtualization group.
[root@polonium ~]# ip link show
  [ . . . ]
3: virbr0: <NO-CARRIER,BROADCAST,MULTICAST,UP> mtu 1500 qdisc noqueue state DOWN mode DEFAULT group default qlen 1000
    link/ether xx:xx:xx:xx:xx:xx brd ff:ff:ff:ff:ff:ff
[root@polonium ~]#
It's apparent that installing the virtualization group added a bridge called virbr0. The bridge is down now, but will be put up when we install and start a VM.
- Step 4: Create A Guest With
virt-install
Let's install a Debian guest VM. Even though we are following a Fedora tutorial. 🙈🙉🙊
First we get the guest's iso image, SHA512 sum, and signature. The Fedora tutorial put the iso images in /var/lib/libvirt/images/. I began by creating the images directory and then a separate iso directory inside /var/lib/libvirt/images. Libvirt seems flexible about the iso location. Because I use the iso images for additional purposes beyond libvirt, if I were doing this again, I might create the iso directory in /var/lib, independent of and on the same level as the libvirt directory.
Reference: https://cdimage.debian.org/debian-cd/current/amd64/iso-cd/
cd /var/lib/libvirt/images/iso
wget https://cdimage.debian.org/debian-cd/current/amd64/iso-cd/debian-12.2.0-amd64-netinst.iso
wget https://cdimage.debian.org/debian-cd/current/amd64/iso-cd/SHA512SUMS
wget https://cdimage.debian.org/debian-cd/current/amd64/iso-cd/SHA512SUMS.sign
Next, let's check the SHA512 sum and the signature.
Reference: https://www.debian.org/CD/verify
sha512sum -c SHA512SUMS --ignore-missing
gpg --keyserver keyring.debian.org --recv DF9B9C49EAA9298432589D76DA87E80D6294BE9B
gpg --verify SHA512SUMS.sign SHA512SUMS
Now we get to use virt-install to create our Debian 12 guest. Here is the install command directly from the Fedora tutorial.
virt-install --name Fedora39 \
--description 'Fedora 39 Workstation' \
--ram 4096 \
--vcpus 2 \
--disk path=/var/lib/libvirt/images/Fedora-Workstation-39/Fedora-Workstation-39-20180518.0.x86_64.qcow2,size=20 \
--os-type linux \
--os-variant fedora39 \
--network bridge=virbr0 \
--graphics vnc,listen=127.0.0.1,port=5901 \
--cdrom /var/lib/libvirt/images/Fedora-Workstation-39/Fedora-Workstation-Live-x86-64-39-1.1.iso \
--noautoconsole
Here is the virt-install command which was used for this test. Note that --os-type has been deprecated, and that the version of virt-install, still numbered 4.1.0 in Rawhide, supports Debian 12.
[root@polonium ~]# cat -n /root/Install-Debian-KVM-Guest.sh
     1  virt-install --name Debian-12-Guest-1 \
     2  --description 'Debian 12 from netinst.iso' \
     3  --ram 4096 \
     4  --vcpus 2 \
     5  --disk path=/var/lib/libvirt/images/Debian-12-20231119.1.x86_64.qcow2,size=20 \
     6  --os-variant debian12 \
     7  --network bridge=virbr0 \
     8  --graphics vnc,listen=127.0.0.1,port=5901 \
     9  --cdrom /var/lib/libvirt/images/iso/debian-12.2.0-amd64-netinst.iso \
    10  --noautoconsole
[root@polonium ~]# /root/Install-Debian-KVM-Guest.sh

Starting install...
Allocating 'Debian-12-20231119.1.x86_64.qcow2'                    |    0 B  00:00:00 ...
Creating domain...                                                |    0 B  00:00:00

Domain is still running. Installation may be in progress.
You can reconnect to the console to complete the installation process.
[root@polonium ~]#
virt-install leaves us with a guest which is running. The guest has a disk image qcow2 file and also is connected to the net-install iso. virt-install boots the guest from the iso. Thus, at this point, we have installed the guest on the Node, but we still need to install the guest OS inside the guest's disk image.
- Step 5: Install The Guest OS Inside The Guest
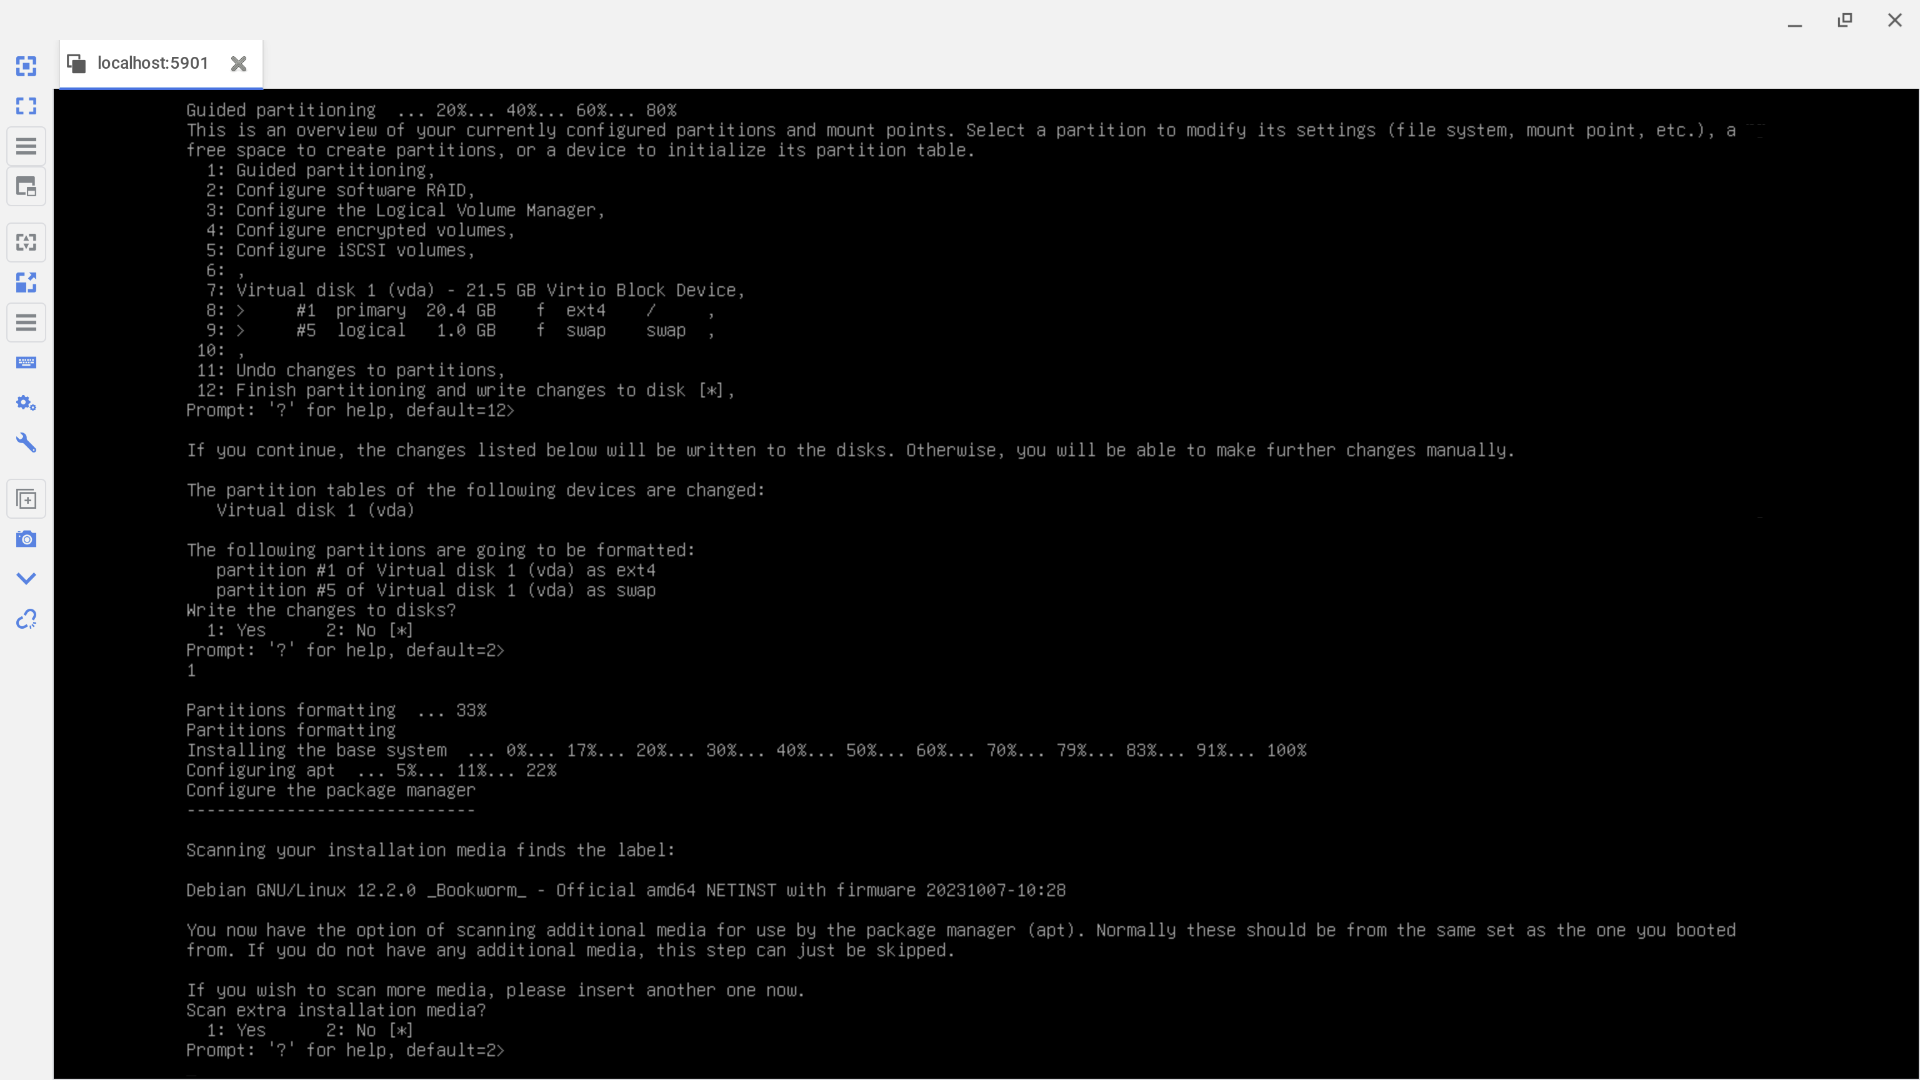
We connect to and install the guest in the usual way appropriate to the distribution that the guest is using. Inside the guest, the guest's IPv4 network is automatically configured by DHCP using the subnet IP assigned to the guest and using the IP of the Node as the gateway.
To connect to the guest from our local address, we set up an ssh tunnel from our local machine to the Node.
ssh root@$NODE_IP -L 5901:localhost:5901
Then we connect via VNC. In our local VNC client, we enter the localhost IP address followed by the port number which was used in the virt-install --graphics vnc,listen=127.0.0.1,port=5901 \ flag. So, here, we would connect to 127.0.0.1:5901.
When we are finished installing the guest OS on the guest qcow2 image, we normally remove the iso and click reboot in the installer so that the guest reboots from the qcow2 image rather than from the netinst iso. However, here, with libvirt, the guest shuts down and does not reboot. Instead, we now need to start the guest with virsh.
- Step 6: Manage The Guest With
virsh
virt-install leaves an XML file for each guest in /etc/libvirt/qemu.
To start a virtual machine, use virsh create with the full filename of the guest's XML file.
[root@polonium ~]# cd /etc/libvirt/qemu
[root@polonium qemu]# ls -l
total 16
drwx------. 2 root root 4096 Nov  6 00:00 autostart
-rw-------. 1 root root 7235 Nov 20 03:58 Debian-12-Guest-1.xml
drwx------. 3 root root 4096 Nov 19 22:49 networks
[root@polonium qemu]# virsh create Debian-12-Guest-1.xml
Domain 'Debian-12-Guest-1' created from Debian-12-Guest-1.xml

[root@polonium qemu]# virsh list
 Id   Name                State
-----------------------------------
 1    Debian-12-Guest-1   running

[root@polonium qemu]#
To gracefully stop a guest:
# virsh shutdown <virtual machine (name | id | uuid)>
To destroy a guest which already has been stopped. The guest's qcow2 image needs to be removed manually.
# virsh undefine <virtual machine (name | id | uuid)>
Success!
Logging into the fully installed and rebooted guest via VNC showed IPv4 WAN connectivity from inside the guest.

Also, we can use ssh to log in to the guest from the Node.
[root@polonium ~]# ssh [email protected]
The authenticity of host '192.168.xxx.xxx (192.168.xxx.xxx)' can't be established.
ED25519 key fingerprint is SHA256:0NfbDJkPk5Lt+dsFOlt/tWOq2+Edf/UPn136Yis9Kvo.
This key is not known by any other names.
Are you sure you want to continue connecting (yes/no/[fingerprint])? yes
Warning: Permanently added '192.168.xxx.xxx' (ED25519) to the list of known hosts.
[email protected]'s password:
Linux debian 6.1.0-13-amd64 #1 SMP PREEMPT_DYNAMIC Debian 6.1.55-1 (2023-09-29) x86_64

The programs included with the Debian GNU/Linux system are free software;
the exact distribution terms for each program are described in the
individual files in /usr/share/doc/*/copyright.

Debian GNU/Linux comes with ABSOLUTELY NO WARRANTY, to the extent
permitted by applicable law.
Last login: Sun Nov 19 22:44:07 2023
tom@debian:~$
Note: QEMU/KVM Without libvirt
We could have used qemu without libvirt. But that might not be so easy. ![]() Let's see the
Let's see the qemu command that libvirt used.
[root@polonium ~]# ps aux | grep libvirt | grep -v grep
  [ . . . ]
qemu       25641  0.9  0.9 5580140 646992 ?      Sl   04:45   0:27 /usr/bin/qemu-system-x86_64 -name guest=Debian-12-Guest-1,debug-threads=on -S -object {"qom-type":"secret","id":"masterKey0","format":"raw","file":"/var/lib/libvirt/qemu/domain-1-Debian-12-Guest-1/master-key.aes"} -machine pc-q35-8.1,usb=off,dump-guest-core=off,memory-backend=pc.ram,hpet=off,acpi=on -accel kvm -cpu host,migratable=on -m size=4194304k -object {"qom-type":"memory-backend-ram","id":"pc.ram","size":4294967296} -overcommit mem-lock=off -smp 2,sockets=2,cores=1,threads=1 -uuid 2d88e4ec-782f-4da6-961e-0266d08f845a -no-user-config -nodefaults -chardev socket,id=charmonitor,fd=32,server=on,wait=off -mon chardev=charmonitor,id=monitor,mode=control -rtc base=utc,driftfix=slew -global kvm-pit.lost_tick_policy=delay -no-shutdown -global ICH9-LPC.disable_s3=1 -global ICH9-LPC.disable_s4=1 -boot strict=on -device {"driver":"pcie-root-port","port":16,"chassis":1,"id":"pci.1","bus":"pcie.0","multifunction":true,"addr":"0x2"} -device {"driver":"pcie-root-port","port":17,"chassis":2,"id":"pci.2","bus":"pcie.0","addr":"0x2.0x1"} -device {"driver":"pcie-root-port","port":18,"chassis":3,"id":"pci.3","bus":"pcie.0","addr":"0x2.0x2"} -device {"driver":"pcie-root-port","port":19,"chassis":4,"id":"pci.4","bus":"pcie.0","addr":"0x2.0x3"} -device {"driver":"pcie-root-port","port":20,"chassis":5,"id":"pci.5","bus":"pcie.0","addr":"0x2.0x4"} -device {"driver":"pcie-root-port","port":21,"chassis":6,"id":"pci.6","bus":"pcie.0","addr":"0x2.0x5"} -device {"driver":"pcie-root-port","port":22,"chassis":7,"id":"pci.7","bus":"pcie.0","addr":"0x2.0x6"} -device {"driver":"pcie-root-port","port":23,"chassis":8,"id":"pci.8","bus":"pcie.0","addr":"0x2.0x7"} -device {"driver":"pcie-root-port","port":24,"chassis":9,"id":"pci.9","bus":"pcie.0","multifunction":true,"addr":"0x3"} -device {"driver":"pcie-root-port","port":25,"chassis":10,"id":"pci.10","bus":"pcie.0","addr":"0x3.0x1"} -device {"driver":"pcie-root-port","port":26,"chassis":11,"id":"pci.11","bus":"pcie.0","addr":"0x3.0x2"} -device {"driver":"pcie-root-port","port":27,"chassis":12,"id":"pci.12","bus":"pcie.0","addr":"0x3.0x3"} -device {"driver":"pcie-root-port","port":28,"chassis":13,"id":"pci.13","bus":"pcie.0","addr":"0x3.0x4"} -device {"driver":"pcie-root-port","port":29,"chassis":14,"id":"pci.14","bus":"pcie.0","addr":"0x3.0x5"} -device {"driver":"qemu-xhci","p2":15,"p3":15,"id":"usb","bus":"pci.2","addr":"0x0"} -device {"driver":"virtio-serial-pci","id":"virtio-serial0","bus":"pci.3","addr":"0x0"} -blockdev {"driver":"file","filename":"/var/lib/libvirt/images/Debian-12-20231119.1.x86_64.qcow2","node-name":"libvirt-2-storage","auto-read-only":true,"discard":"unmap"} -blockdev {"node-name":"libvirt-2-format","read-only":false,"discard":"unmap","driver":"qcow2","file":"libvirt-2-storage","backing":null} -device {"driver":"virtio-blk-pci","bus":"pci.4","addr":"0x0","drive":"libvirt-2-format","id":"virtio-disk0","bootindex":1} -device {"driver":"ide-cd","bus":"ide.0","id":"sata0-0-0"} -netdev {"type":"tap","fd":"34","vhost":true,"vhostfd":"36","id":"hostnet0"} -device {"driver":"virtio-net-pci","netdev":"hostnet0","id":"net0","mac":"52:54:00:ec:db:35","bus":"pci.1","addr":"0x0"} -chardev pty,id=charserial0 -device {"driver":"isa-serial","chardev":"charserial0","id":"serial0","index":0} -chardev socket,id=charchannel0,fd=31,server=on,wait=off -device {"driver":"virtserialport","bus":"virtio-serial0.0","nr":1,"chardev":"charchannel0","id":"channel0","name":"org.qemu.guest_agent.0"} -device {"driver":"usb-tablet","id":"input0","bus":"usb.0","port":"1"} -audiodev {"id":"audio1","driver":"none"} -vnc 127.0.0.1:1,audiodev=audio1 -device {"driver":"virtio-vga","id":"video0","max_outputs":1,"bus":"pcie.0","addr":"0x1"} -global ICH9-LPC.noreboot=off -watchdog-action reset -device {"driver":"virtio-balloon-pci","id":"balloon0","bus":"pci.5","addr":"0x0"} -object {"qom-type":"rng-random","id":"objrng0","filename":"/dev/urandom"} -device {"driver":"virtio-rng-pci","rng":"objrng0","id":"rng0","bus":"pci.6","addr":"0x0"} -sandbox on,obsolete=deny,elevateprivileges=deny,spawn=deny,resourcecontrol=deny -msg timestamp=on
[root@polonium ~]#
Note: Command Summary
For cut and paste fiends, here's a list of all the commands run in this post.
# egrep '^flags.*(vmx|svm)' /proc/cpuinfo
dnf group install --with-optional virtualization
systemctl start libvirtd
systemctl enable libvirtd
# lsmod | grep kvm
# ip link show
wget https://cdimage.debian.org/debian-cd/current/amd64/iso-cd/debian-12.2.0-amd64-netinst.iso
wget https://cdimage.debian.org/debian-cd/current/amd64/iso-cd/SHA512SUMS
wget https://cdimage.debian.org/debian-cd/current/amd64/iso-cd/SHA512SUMS.sign
sha512sum -c SHA512SUMS --ignore-missing
gpg --keyserver keyring.debian.org --recv DF9B9C49EAA9298432589D76DA87E80D6294BE9B
gpg --verify SHA512SUMS.sign SHA512SUMS

virt-install --name Debian-12-Guest-1 \
--description 'Debian 12 from netinst.iso' \
--ram 4096 \
--vcpus 2 \
--disk path=/var/lib/libvirt/images/Debian-12-20231119.1.x86_64.qcow2,size=20 \
--os-variant debian12 \
--network bridge=virbr0 \
--graphics vnc,listen=127.0.0.1,port=5901 \
--cdrom /var/lib/libvirt/images/iso/debian-12.2.0-amd64-netinst.iso \
--noautoconsole

virsh create Debian-12-Guest-1.xml
# virsh shutdown <virtual machine (name | id | uuid)>
#ps aux | grep qemu | grep -v grep
Future Steps
- Set up IPv4 NAT and IPv6/48 on the Node.
- Add IPv6/64 inside the guest.
- Set up Spice.
- Try other Linux and BSD guests.
I hope everyone gets the servers they want!
Comments
osinfounless you need performance critical featuresAny chance you could please give us a hint about what performance features are being disabled and the effect of disabling those features? Thanks!
FWIW, the machine I set up does seem to have DHCP, which "just worked" out of the box.
I hope everyone gets the servers they want!
I would personally put proxmox on it, have opnsense on a vm, and configure nat from that.
youtube.com/watch?v=k1BneeJTDcU
Check this
I mean libvert's DHCP")
I agree with @Otus9051 that proxmox is an easy solution.
first blood
Nonce?
Maybe some of the following Proxmox tutorials might be helpful to people who are not already using Proxmox:
Faster, Easier Proxmox Install On A Hetzner Dedicated Server!
Installing Proxmox VE 6.2 at SoYouStart
Postinstall Configuration of Proxmox VE 6.2
Creating our first LXC VPS with Proxmox VE 6.2 at SoYouStart
How to Create and Setup a Debian KVM VPS with Proxmox VE 6 — Part I — Creation
How to Create and Setup a Debian KVM VPS with Proxmox VE 6 — Part II — Debian Install
How to Create and Setup a Debian KVM VPS with Proxmox VE 6 — Part III — Network Configuration
From @Maounique on LET:
Basic setup of Proxmox in an OVH environment with NAT and IPv6 enabled containers
From @Half on LET:
Proxmox @Hetzner Setup
I hope everyone gets the servers they want!
A few more links for folks who might be interested in starting with Proxmox. Some people do not like Proxmox's web interface, so here is an alternate interface called ProxCP.
https://lowendtalk.com/discussion/161587/proxcp-6-month-review
https://proxcp.com/
I hope everyone gets the servers they want!
From looking at the above qemu command which
libvirtused, and from looking at qemu commands generated by Proxmox, we see that qemu commands can be complex. However, there are easy ways to make VPSes directly using qemu. Here are links to a couple of articles which might be helpful to people just starting to make VPSes directly with qemu.Three Quick And Easy Home Made Qemu KVM VPS Recipes! -- Bake Them Yourself On Almost Any Linux Distribution!
More Quick And Easy Home Made Qemu KVM Recipes! — Give Each VM Its Own IP Address!
It's fun to try making VPSes in different ways on different servers from different Providers and with different operating systems!")
I hope everyone gets the servers they want!
ProxCP looks dead to me, I know one Provider that was/is using it.
No idea if @DataIdeas ditched it or is still using it.
edit: I think @Mason is/was also using it, maybe he can say something.
Free NAT KVM | Free NAT LXC
Irrigation,you know that,new membership


