

Resize your KVM VPS disk partition, 2 methods and bonus tip to reclaim disk space - Easy mode.

Written by Anthony Smith, 1 July 2020
Article was migrated from WordPress to Vanilla in March 2022
Did you upgrade your VPS and it looks like the disk is still the same size? Did you migrate your VPS to another host using the method in part 1 of this easy mode series and the target disk was bigger so you want to make use of that extra space?
I will show you in a few simple methods below with examples of resize2fs and growpart and also the super simple point and click GParted.
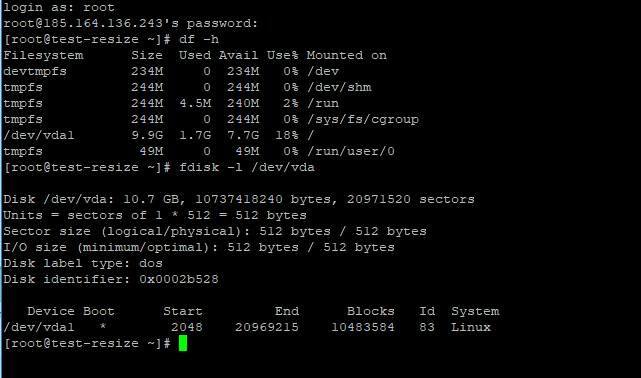
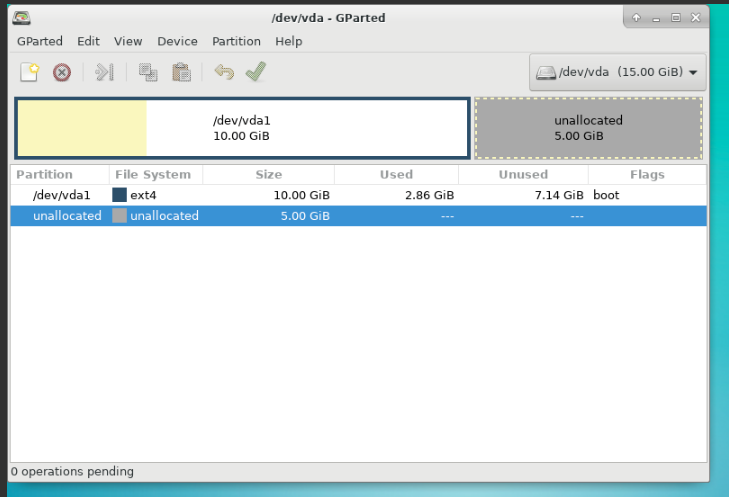
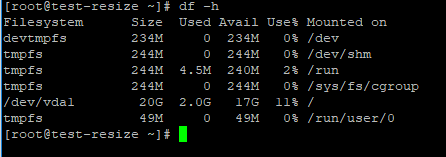
In the following image we get a look at the disk and partition size before any changes have been made so we have a good starting point to work from, we can see it is a 10GB disk with a single partition /dev/vda1 being pretty much the full 10GB.
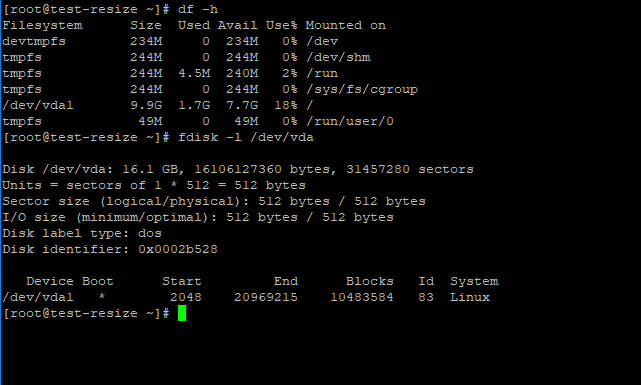
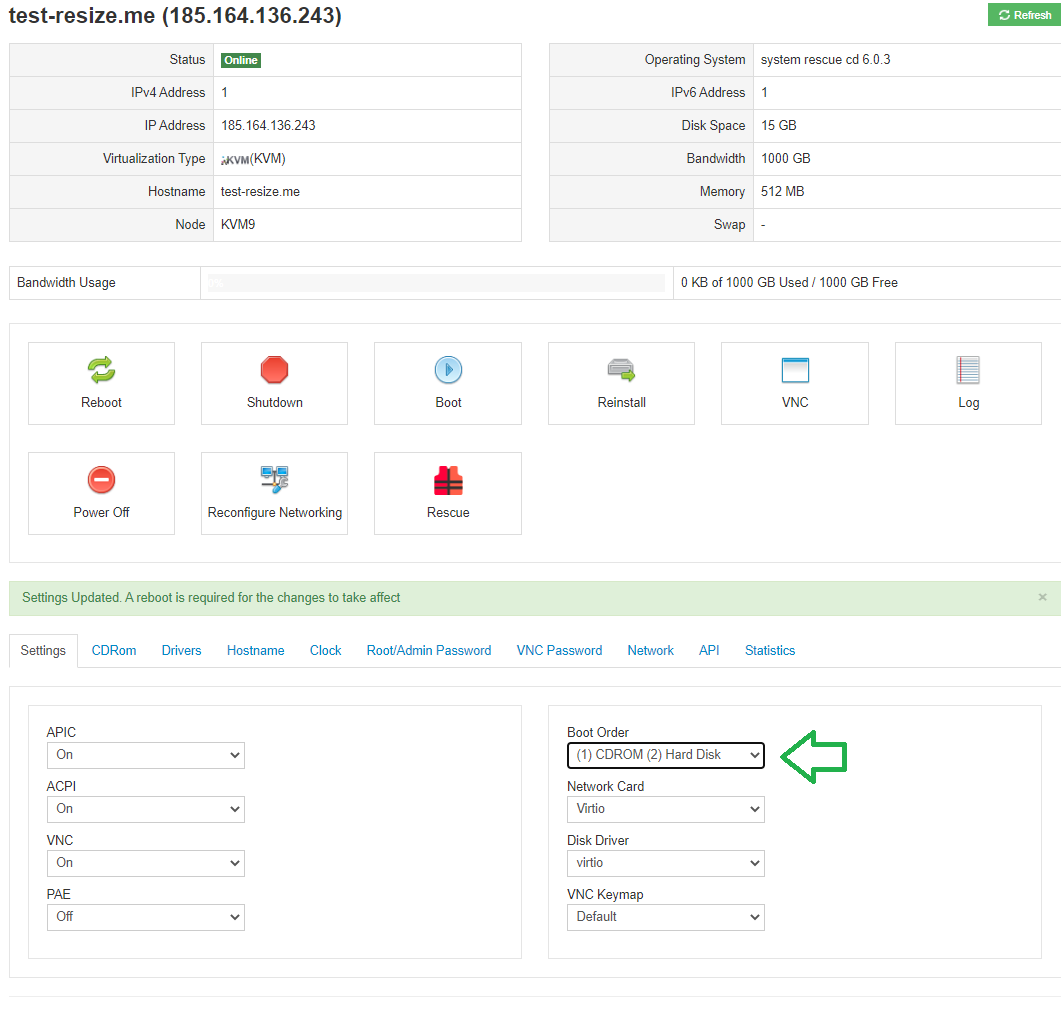
I then resized the disk up to 15GB in the backend as you can see in the next image, the physical disk is now 15GB however the partition /dev/vda1 is still only 10GB.
Starting with the GParted method we need to boot the VPS into a rescue mode that includes GParted, most hosts will offer some ISO with GParted included or just a plain GParted disk, I tend to use sysrescuecd as it usually has the relevant tool-set to complete most tasks.
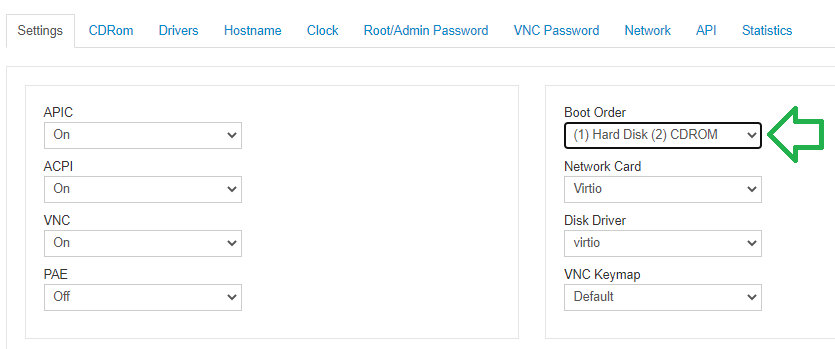
Now you need to change the boot order and mount the ISO of choice (that includes GParted).
Boot order:
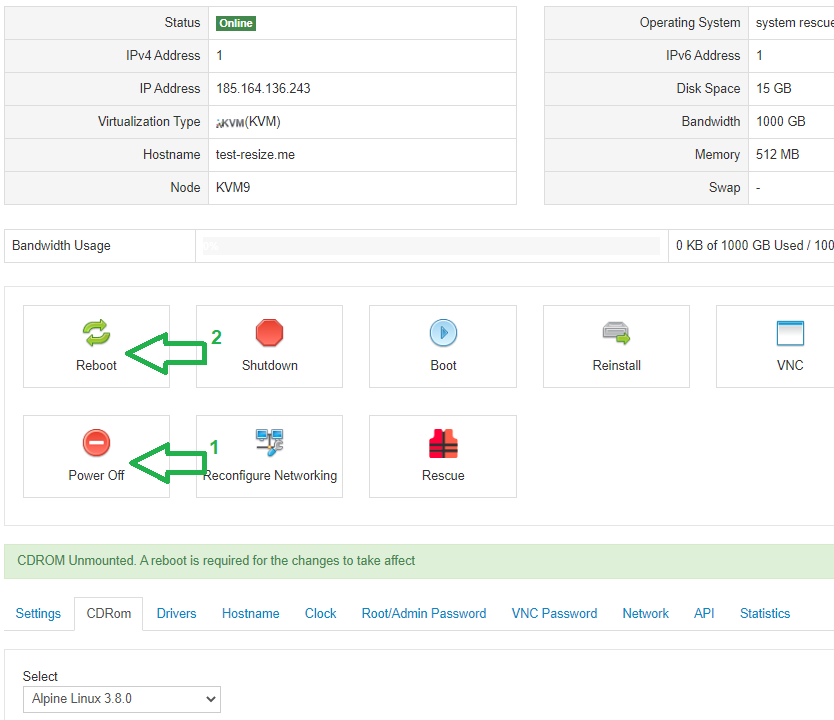
Mount ISO and reboot:
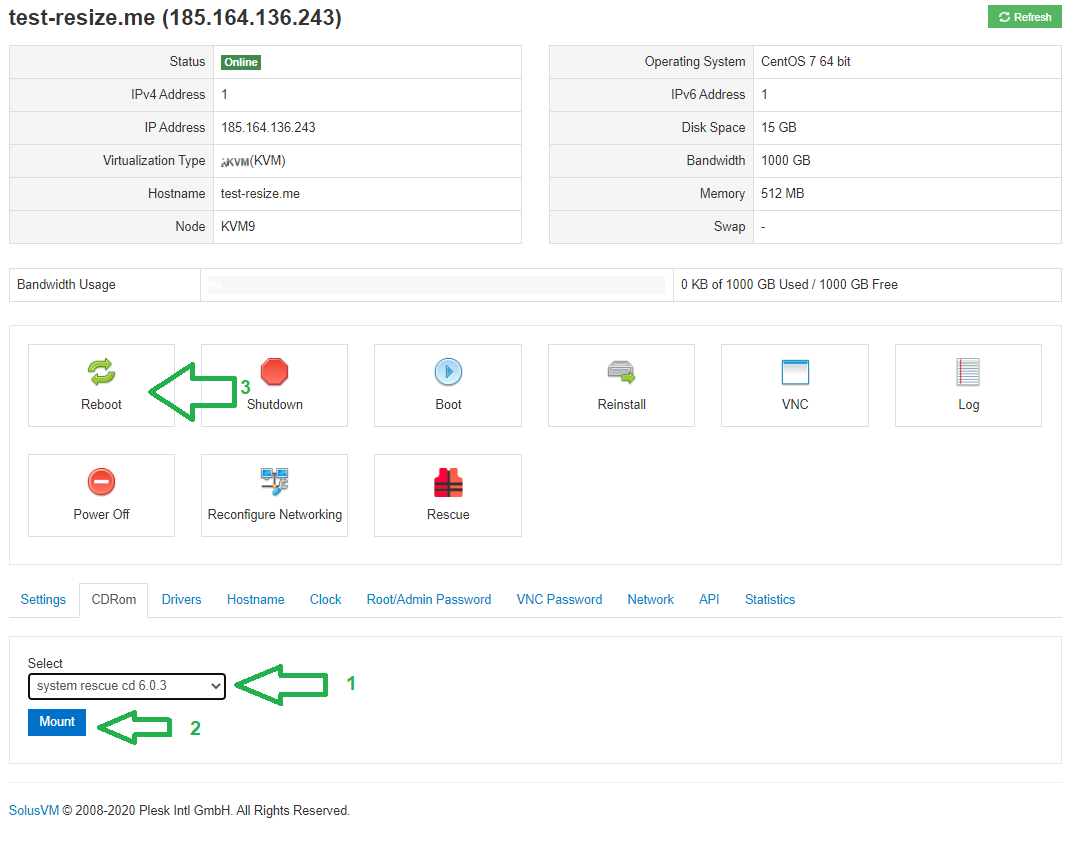
Clicking the reboot button in SolusVM is what re-writes your config file on the backend so that the ISO mounts and the boot order changes, in Virtualizor you need to 'Stop' then 'Start', reboot, for some reason does not update the config file so the ISO will not mount.
You will then be able to open a VNC session using the built-in HTML5 VNC viewer or a direct VNC connection using a desktop client.
If you used sysrescuecd you should see something similar to this:
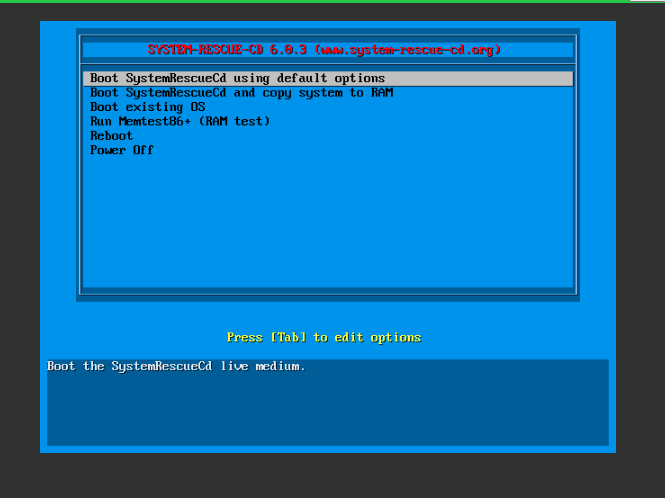
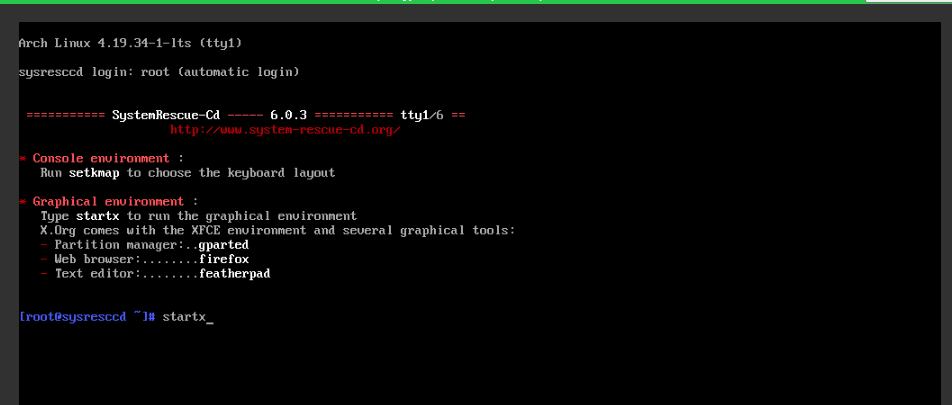
Pick the default option and when the rescue mode drops you at a prompt, run: startx as shown in the next image:
Give it a minute or so and the graphical session should start and look like this:
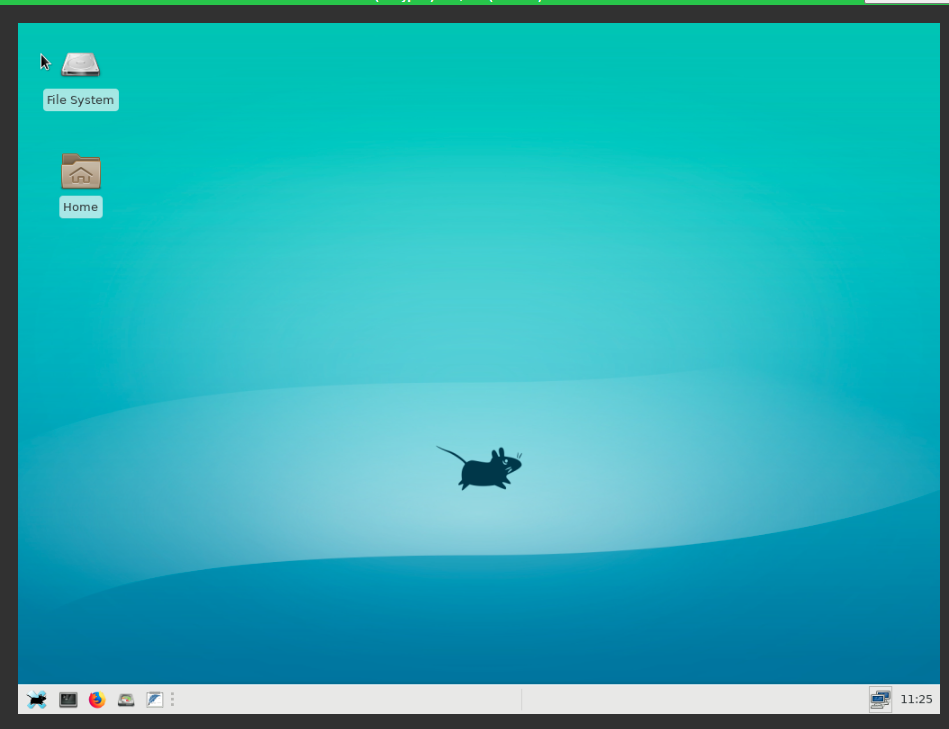
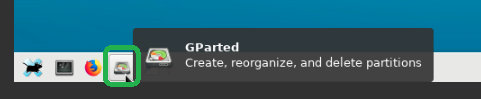
You will see a shortcut to GParted on the bottom left, in other distros you may find it via the menu system.
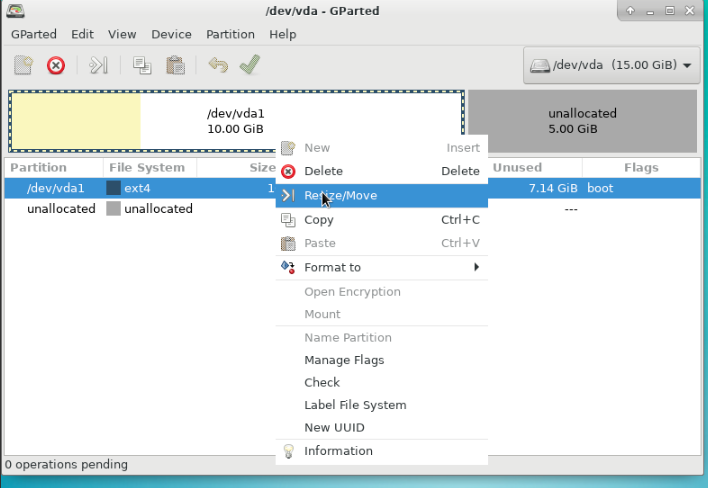
After you launch GParted you will see a disk overview and you will see that extra 5GB of unused space:
Right-click on the first partition on the left labelled /dev/vda1 and select resize/move:
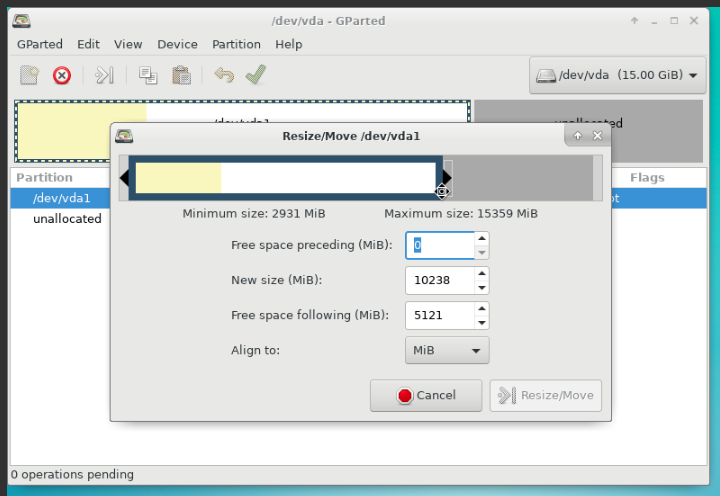
Then grab the furthest extent of the partition and drag it to the right and click the 'resize/move' button.
Before:
After:

Then click the tick to confirm the operation:
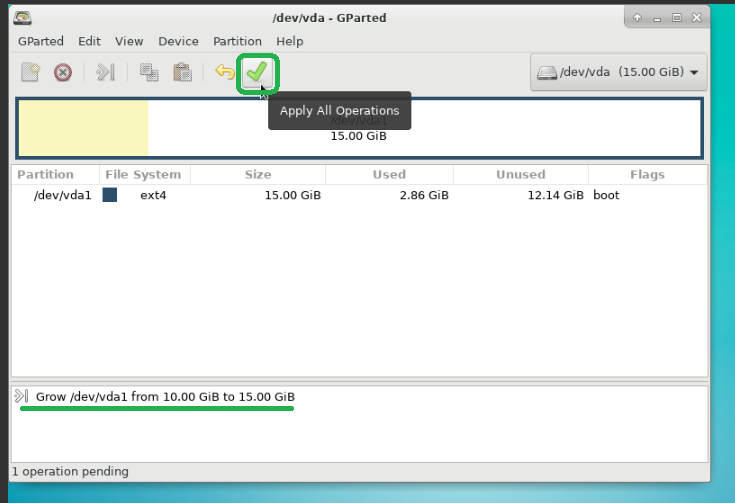
Confirm:

That should be it, the partition should now occupy all of the free space on the hard disk.
You can now shut down the rescue mode by unmounting the ISO and changing the boot order back:
Tip: Hit power off first then reboot, you will not risk any data while in rescue mode without mounted partitions so no need to wait for the full shutdown, this saves you 30 seconds or so.
Now when you log in to your VPS again you will see that the partition size has grown:

Congratulations you are all done!
But what if you feel like using GParted was cheating, more like 'Super-easy' mode and you want to feel like you learned what is actually happening rather than just knowing where to click?
I hear you!, let's do it again then in a slightly different way, once again in the backend, I have increased the disk size on the same VPS to 20GB (an extra 5GB) as seen in the image below.
Once again, get in to rescue mode or boot with the sysrescuecd iso, I won't repeat the same images as above, the process is identical however just get to the point whereby you get a prompt do not run startx.

Now running fdisk -l /dev/vda we can see that the disk vda is 20GB and the first partition vda1 is 15GB, to extend this run:
growpart /dev/vda 1 note the space between vda and 1
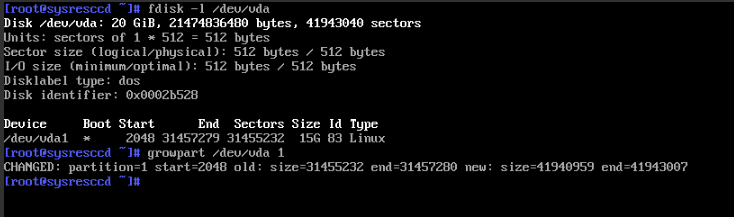
This (growpart) will not always automatically grow the filesystem but what it is useful for is forcing the kernel to register the new disk size as some older kernels and tools may fail with you run resize2fs with an error along the lines of "Nothing to do"
So next we will manually run resize2fs /dev/vda1

As you can see in the above image the increased partition size is verified with lsblk /dev/vda which will show the disk and the partition sizes.
Power off the VPS, change the boot order back to Hard disk first again and reboot.
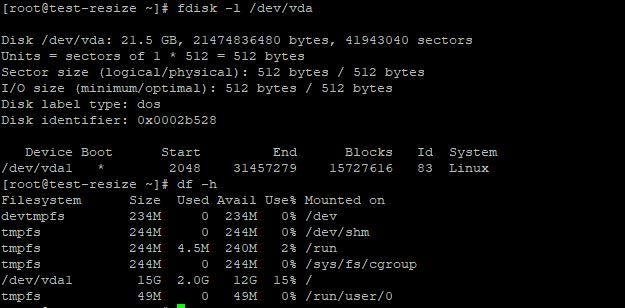
Now when you log in to your actual OS you can verify that the partition has in fact expanded:
BONUS TIP
The ext4 filesystem most commonly used, certainly for Linux VPS templates anyway will as standard reserve 5% of your disk space in case you run out, it is like a buffer zone to prevent catastrophe.
It is a relic from ext3 which was released in 2001, at that time the average physical hard disk in use was between 10GB and 20GB.
These days disks even virtual ones are significantly bigger and you take very regular backups... right? so 5% is often really over the top.
You can reduce this to 0 however I seriously do not recommend that, but you can sometimes gain a good little chunk of disk space back by pushing the reserve down to 1%.
This can be done live, no need to reboot or go in to rescue mode, just run: tune2fs -m 1 /dev/vda1
The 1 is the % of space to reserve for the partition you select, in this case /dev/vda1
Comments
Very handy, thanks!
Michael from DragonWebHost & OnePoundEmail
Good one Ant, Useful for sharing this link to my friends who would need idiot proof hand holding.
It was helpful, Thanks")
https://webhorizon.net
I used it today and it worked great. Thank you.
The graphical method using GParted didn't work on my storage VPS with gpt partitions, but the 2nd method worked fine.
When I was following the steps I just noticed a small typo : the screenshot shows
growpart /dev/vda 1but the description above the screenshot omits the/dev/.Thanks, that has been fixed.
https://inceptionhosting.com
Please do not use the PM system here for Inception Hosting support issues.